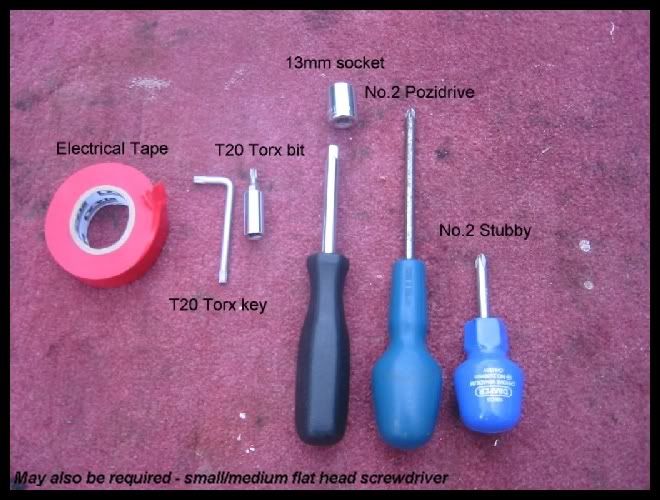
Firstly, insert the key in the ignition and turn the steering wheel to full lock, enabling better access to the wheel arch you will be working on (i.e full lock left to work on drivers side arch, full lock right to work on passenger arch).
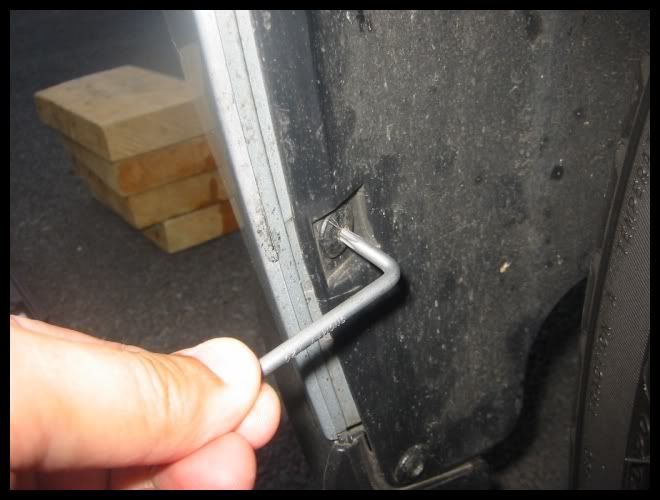
Then use T20 torx key (as access is still limited) to undo the 4 torx screws holding the wheel arch liner in place against the front bumper.
Next use T20 torx to undo the screw holding the bumper to the front wing. Once you have done this, turn the steering wheel to the opposite lock and repeat the process removing the 5 T20 screws from the other arch.
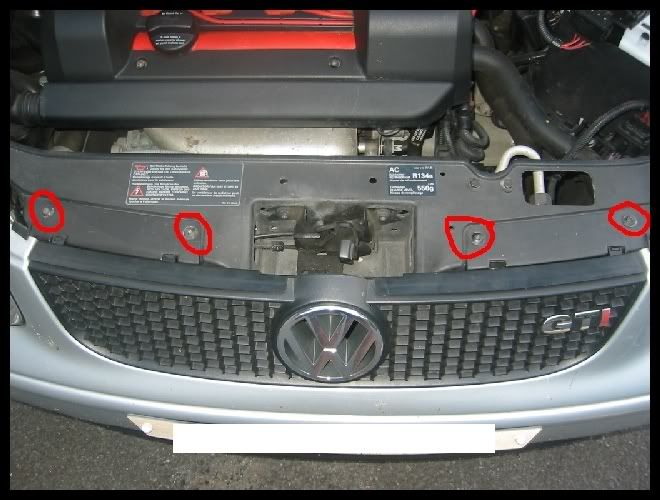
Next undo the 4 T20 torx screws (indicated by the red circles)holding the front grille onto the bumper.
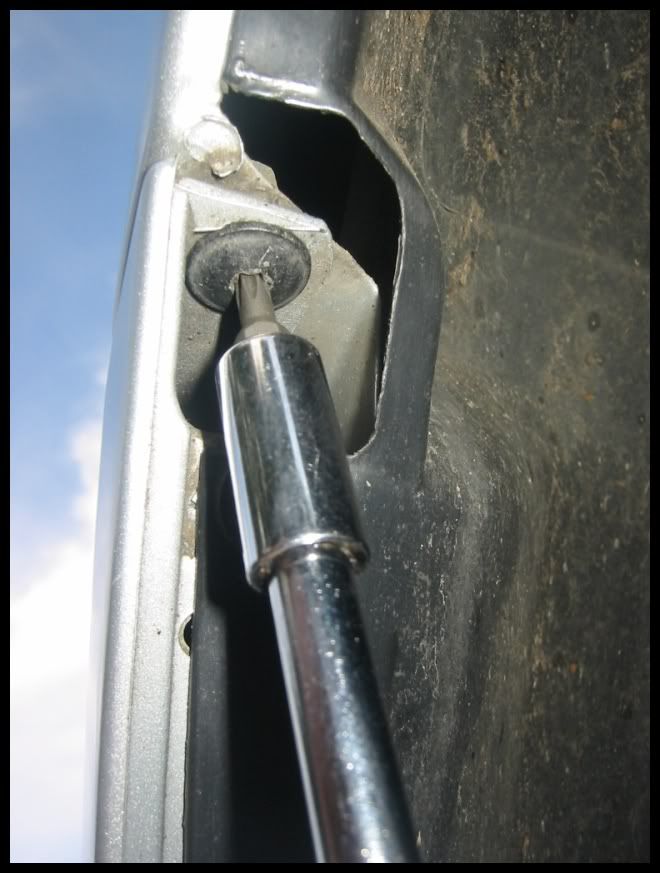
Next, remove each of the foglight mesh housings using a No.2 Pozidrive screwdriver. See the picture for the location of the single screw holding the mesh on.
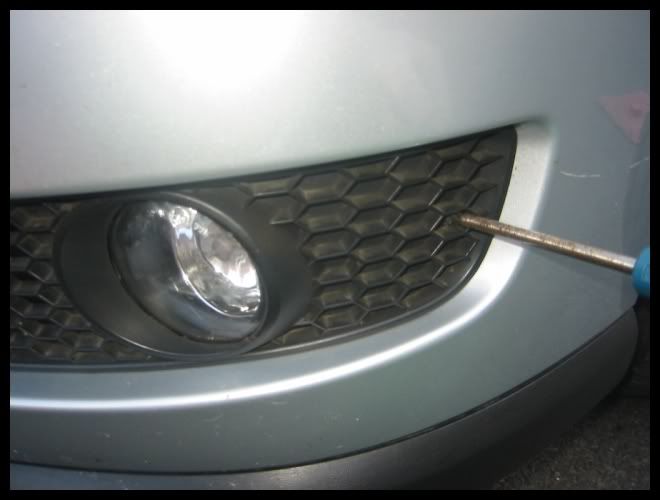
Then use T20 torx to undo the single screw located in each of the foglight housings, that is holding the front bumper on. Please note there is no need to undo or remove the actual foglight bulb holder.

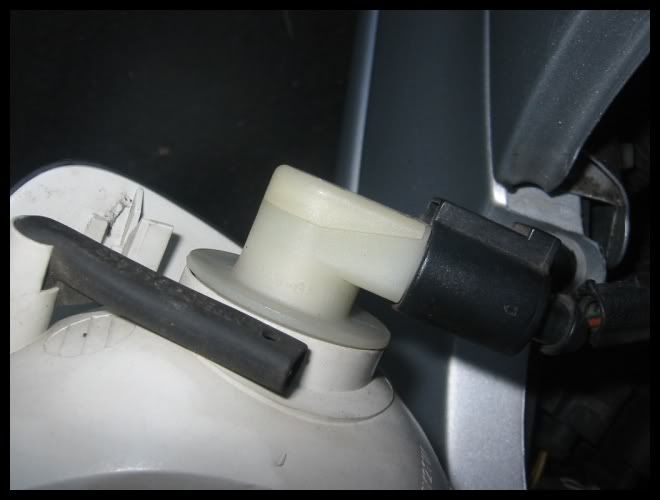
Next, in order to remove the indicator unit, twist the small black plastic headed lock that is indicated in the picture, so that the "pins" are parallel with the car i.e one facing the front bumper, one facing the windscreen (as indicated in the picture).
Then pull the lock gently upwards, which will then enable the indicator unit to be removed. The lock pin does not actually come out, just pull it up gently until it stops and it should happily sit there. For reference, when re-installing these pins, I just pushed mine down, rather than twisting them as well, as there is no chance of them coming out and twisting them just complicates matters next time you need to remove them.
Gently ease the indicator unit out (you may need to wobble it gently to initially release it), taking care to keep it parallel to the headlight unit when doing so, as the indicator unit is held in place by two flimsy plastic guides (see picture). Whilst removing, or once removed, take a look at the side of the headlight unit, as you will see what/where the plastic guides slide into.
Next remove the indicator bulb housing from the indicator unit, by grasping the housing and twisting it about 45 degrees (I can't remember whether it is clockwise or anti clockwise). Place the indicator unit somewhere safe, and leave the indicator bulb and housing safely next to the headlight unit. You can remove the indicator bulb if you are worried about it being scratched, but you don't need to.
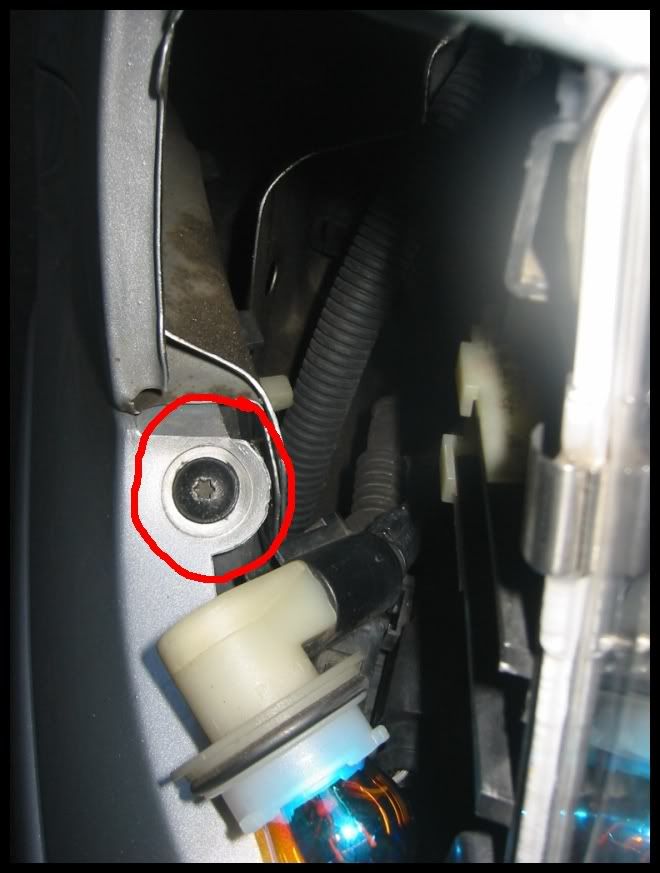
Next, undo the T20 Torx screw that has appeared since the removal of the indicator unit. These (one either side) are the final two screws holding the front bumper on.
Next, you need to remove the headlight washer jet cover. There should be some slight movement in the washer jet cover on the bumper, if you can pull it up just using your fingers then do so. If not, use a small/medium size flat head screwdriver wrapped in a suitable cloth to prevent damage to the bumper, and lever the washer jet up enough to enable you to hold it with your fingers. Note that as the washer jets are spring loaded, there will be a resonable amount of force working against you as you extend them up out of the bumper.
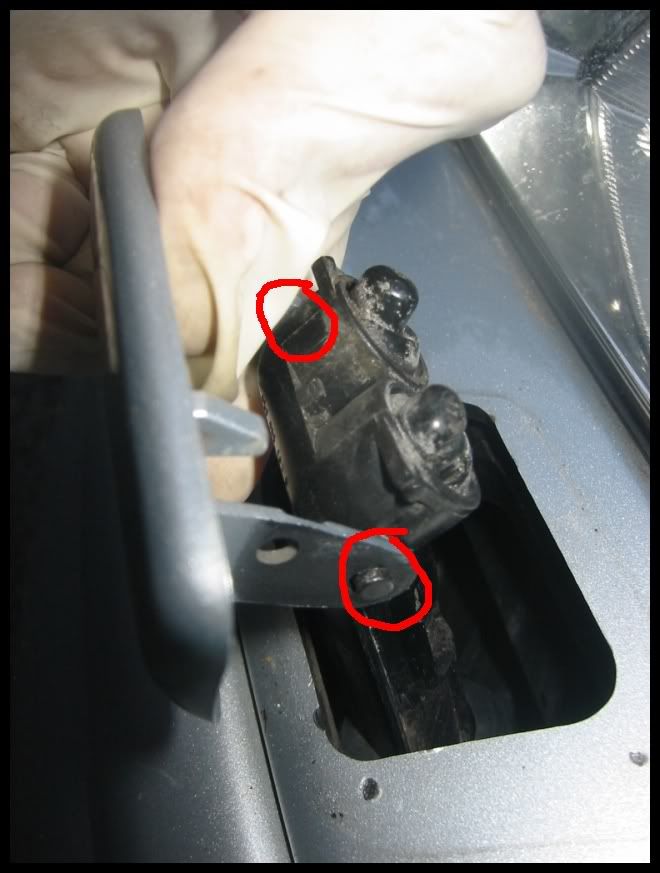
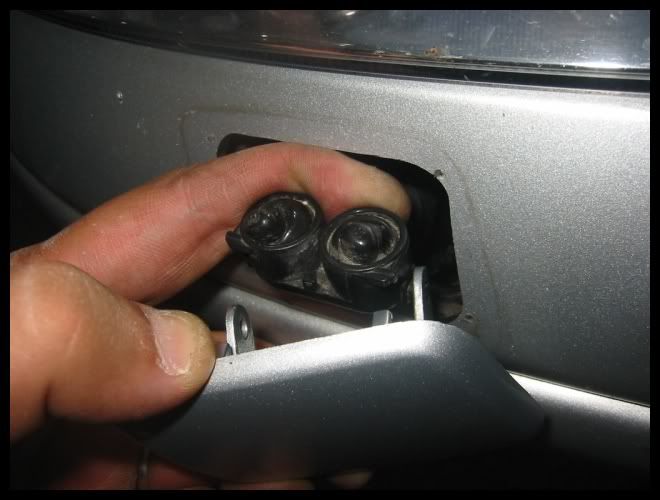
The washer jet covers are held to the washer jets by a tab either side of the unit (indicated by a red circle in the picture). Gently prise either side off using your fingers, and then let the washer jet unit sink back down, it will reside below the bumper. Although they only fit back on one way, for ease, try to remember (or mark) which side is which, and also which way round they fit on.
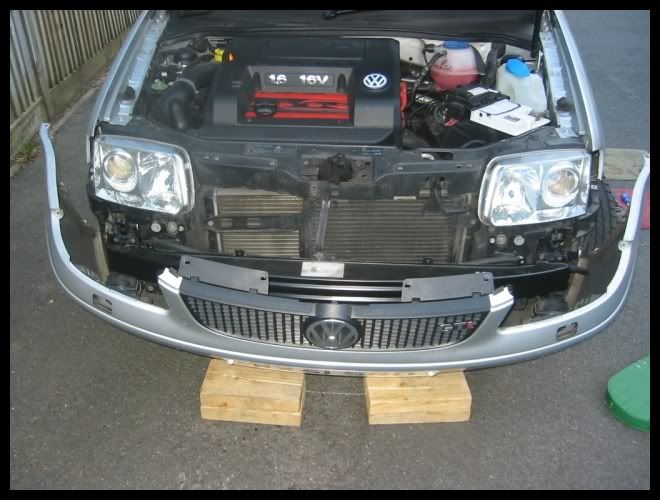
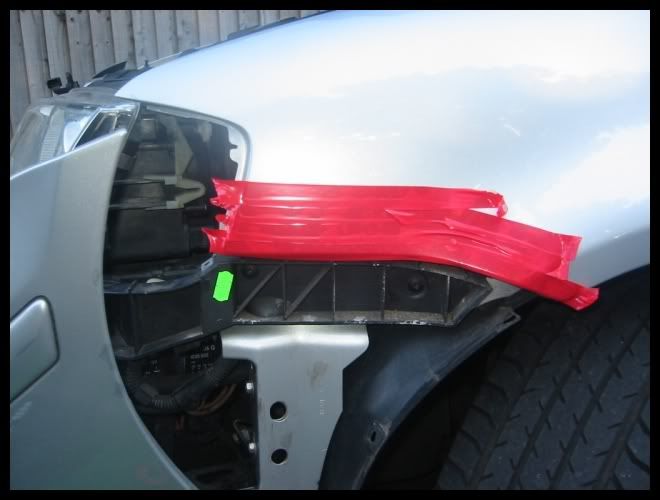
You are now ready to remove the front bumper from the car. It is still secured to the engine undertray by some plastic rivets, so there is no reason why it should fall off once released. However, to protect your splitter, and to support the weight of the front bumper, I used a couple of blocks of wood under the splitter, so that when the bumper is released, it is supported by them. I suggest using something similar, it needs to be just below the height that the splitter currently sits at, and located directly beneath the edge of it.
To remove the bumper, gently pull out either side of the bumper near each front wing, then gently pull the bumper forwards from the front and it should start to come forward. You may wish to put some tape on your front wings before doing this procedure, but as you see from the picture the bumper tends to be quite clear of them once released.
Once you have the bumper sitting happily forward, place some electrical tape or similar (masking tape is also fine) on both front wings above where the bumper sits flush with them. This is to protect the wings from scratches when you re-fit the front bumper.
You now need to undo/remove the headlight unit from the car.
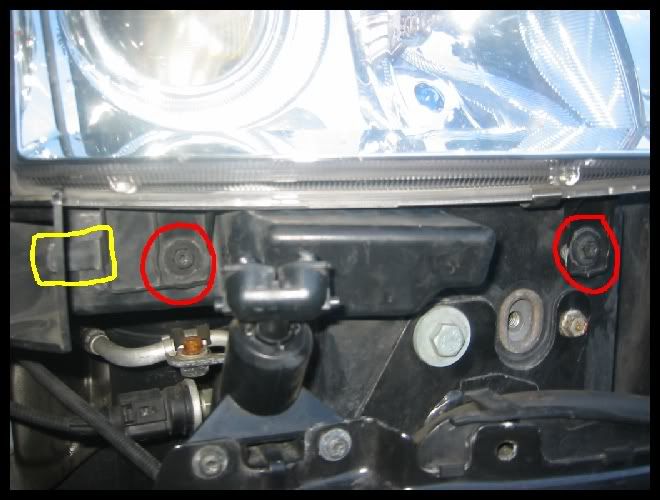
Working on the drivers side initially. Remove the 2 T20 Torx screws located just under the front of the headlight unit (indicated by the two red circles). Please note the "tab" highlighted by the yellow square, although no action is neccessary yet.
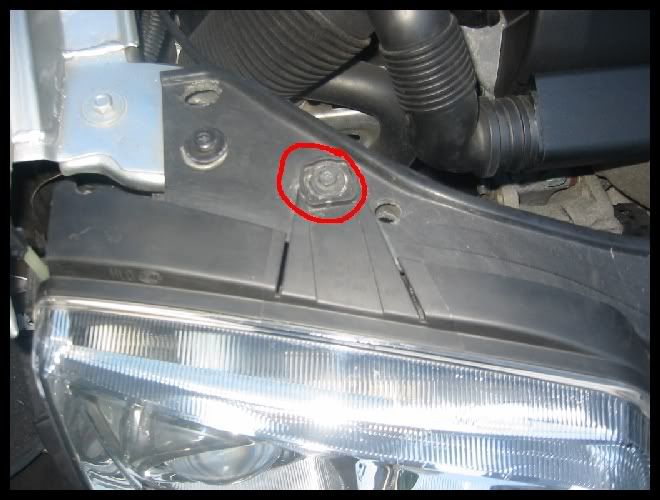
Next, undo the T20 Torx screw located on top of the headlight unit.
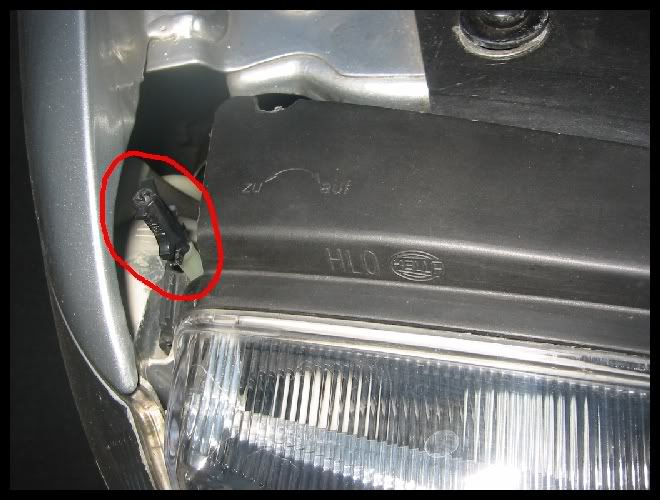
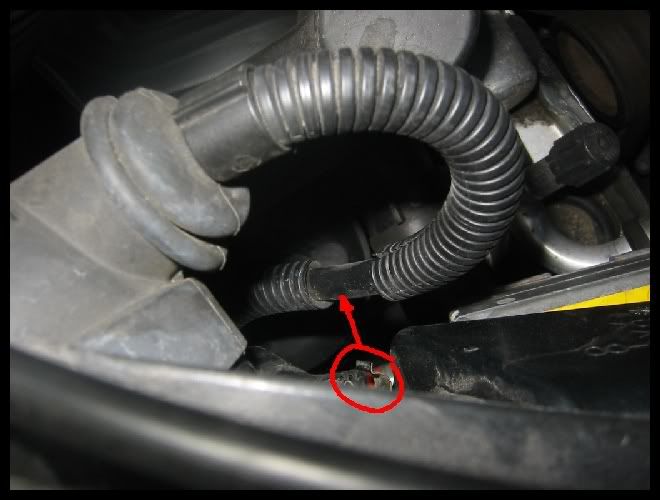
Now look at the back of the headlight unit, you will see the wiring loom held in place by a small clip (circled red in the picture). Release the wiring loom from the clip by just gently pulling it out.
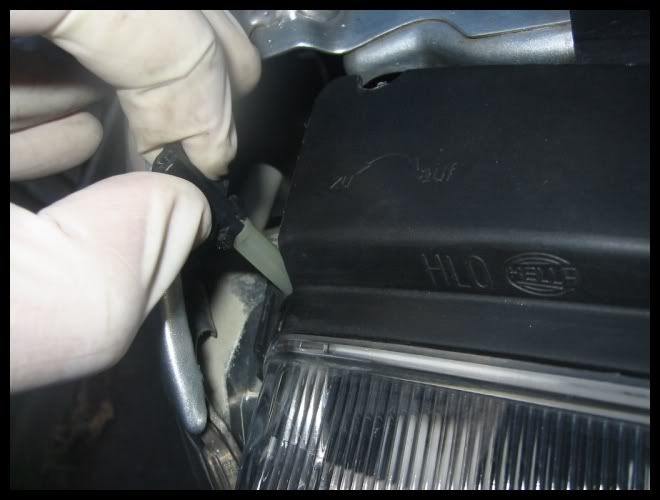
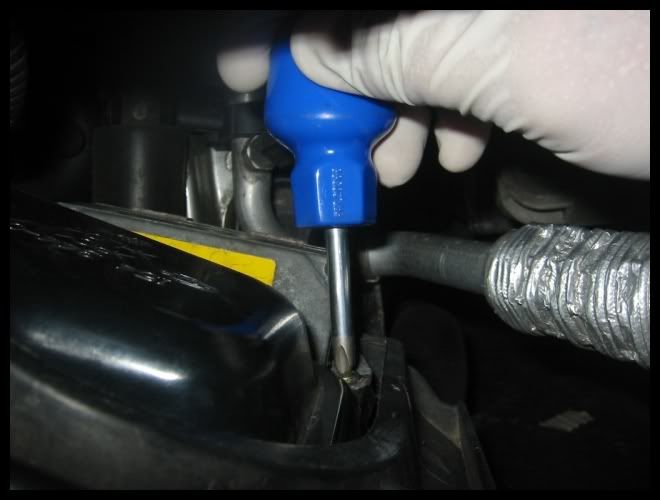
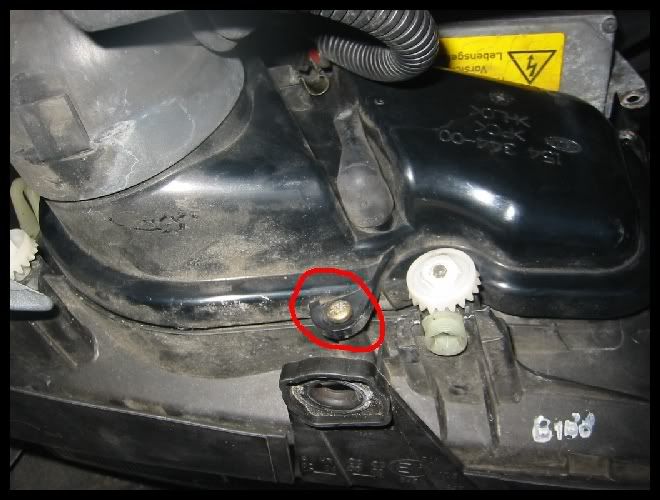
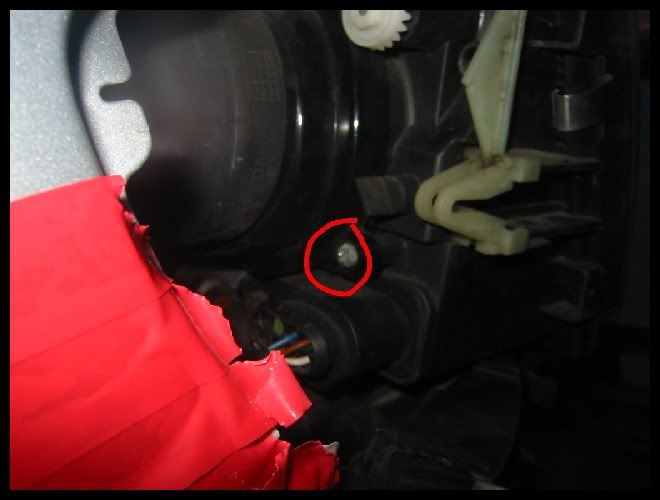
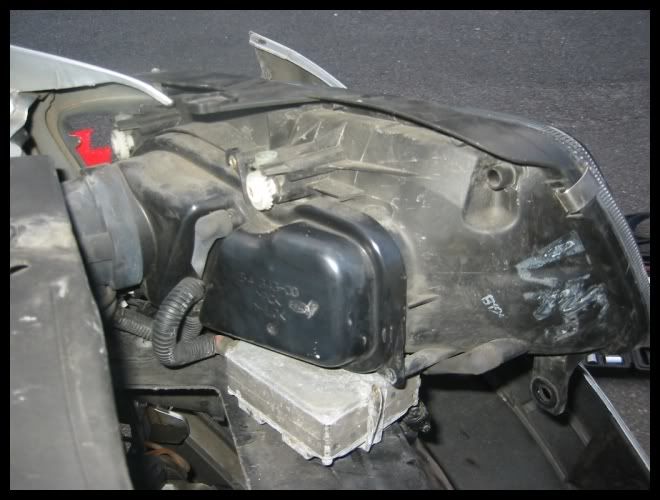
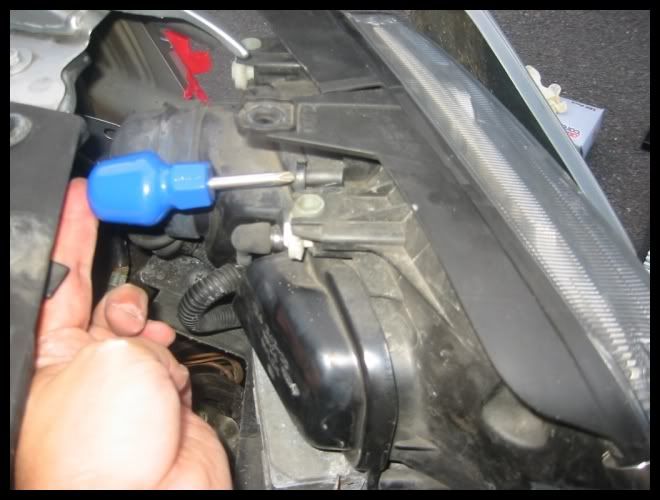
Looking into the engine bay behind the headlight unit, you will see a grey box with a yellow sticker on it just below the headlight unit. This (I assume) is the ballast unit for the xenon bulbs. It is held to the headlight unit with a single small screw. Looking down behind the headlight unit, the screw is located on the far right hand side. Carefully remove this screw using the stubby No.2 Pozidrive. Access is very limited, you will not be able to remove this using a nomal size screwdriver. Be very careful not to let the screw drop into the engine bay. It is best to undo the screw by doing the first few turns using the screwdriver, then do the rest using your fingers.
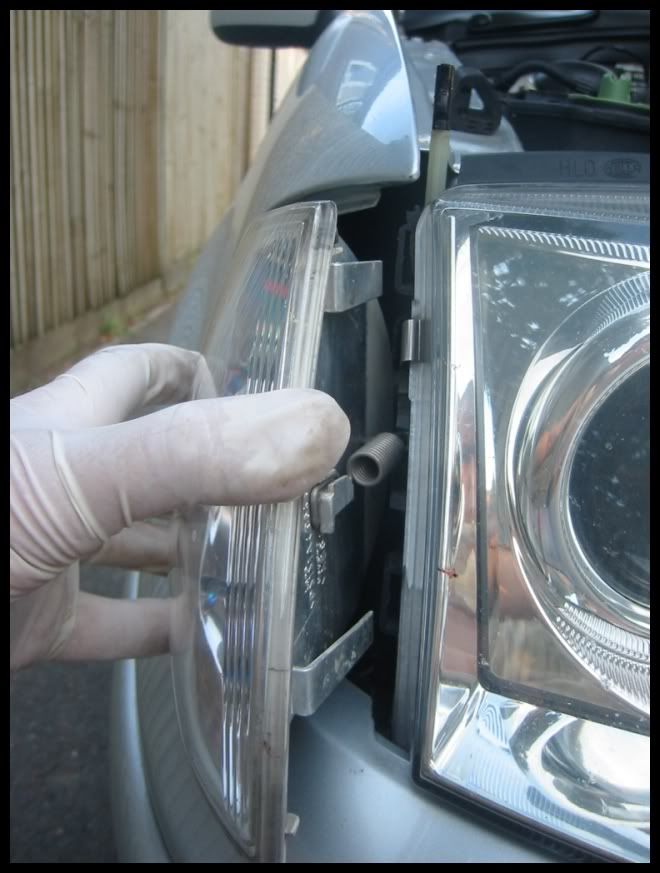
Now that all the screws and cables holding the headlight unit in placed have been removed/moved, you should be able to move the headlight unit from side to side. It is now time to remove the headlight unit from the recess where it sits.
Firstly, go back 4 pictures to see the tab that is highlighted with a yellow square. You need to release this tab, if possible using your finger, or if not using a flat blade screwdriver. Move the headlight unit as far accross as possible to avoid bending the plastic tab too much.
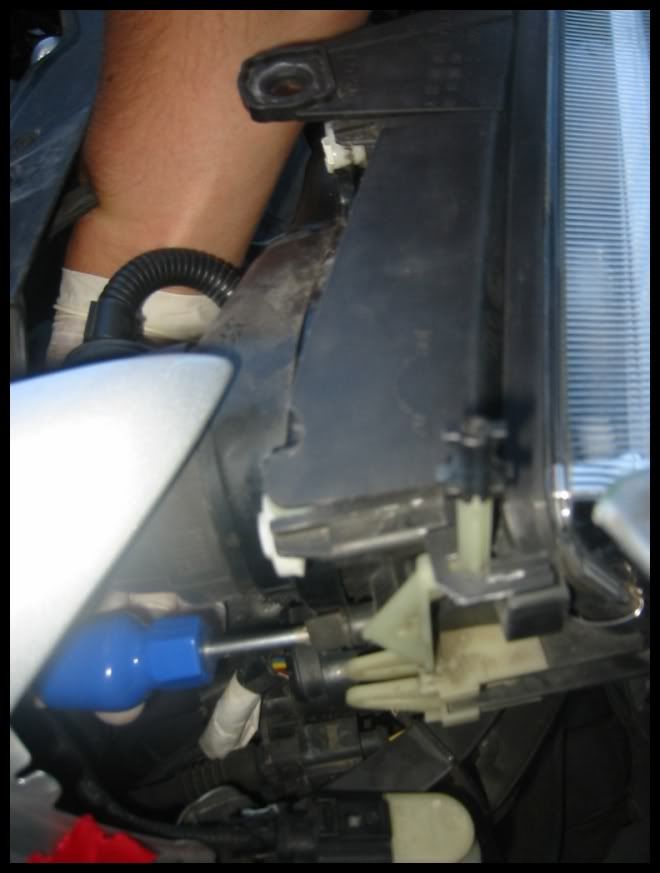
Once the tab is out gently lift the headlight unit up and look underneath it. You see a black "runner" that the ballast box sits on, which holds it close to the headlight unit. Sliding the headlight unit back should see the unit release from this.
Now gently try removing the headlight unit itself, take care and do it gently. It is best to try and bring the right hand side (looking at the drivers side unit from the front) up and out first, but be careful of the indicator lock stalk when doing this, it will probably be very close to the edge of the wing. I found there was less play on the drivers side headlight unit, compared to the passenger side. But you only need it out slightly in order to undo the headlight casing.
Once have you the unit out enough, you can now undo the next headlight case screw, indicated by the red circle in the following picture.
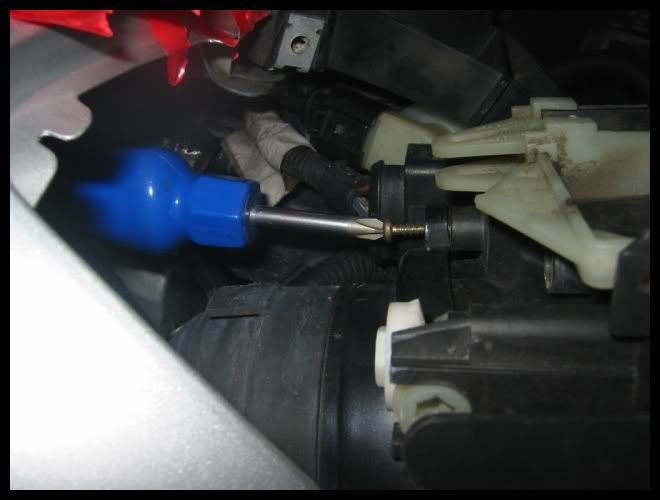
There is just one screw left to remove in order to be able to remove the headlight casing now, yet it is the hardest one to get to ! The screw is located at the bottom left hand side of the headlight unit, near to where the indicator stalk lock is located (see pic).
I found the only way to undo the screw was to slip my hand in round the back of the headlight unit from the right hand side. There just wasn't the room to get in from the left hand (wing) side. You will definately need the stubby screwdriver for this and be very careful that the screw does not drop - again it is best to do the last few turns by hand.
Once the screw is removed, gently prise the black headlight casing off the back of the headlight unit. Again be gentle and take your time, the whole casing does not need to come off. Gently twist the right hand side case up to about 45% degrees (as in the pic) in order to access the sidelight and main beam bulbs.
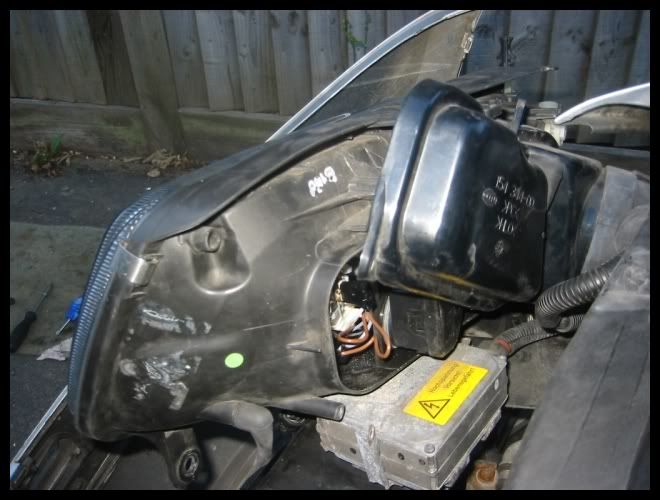
Visually locate the sidelight bulb holder and the two wires which lead to it (indicated in the red circle).

Try pulling on the sidelight housing with your fingers to release it, but if this does not work, use the wires to pull the sidelight housing and sidelight out. It is held in quite firmly, so a reasonable amount of pressure on the wires is needed. It will just suddenly release.
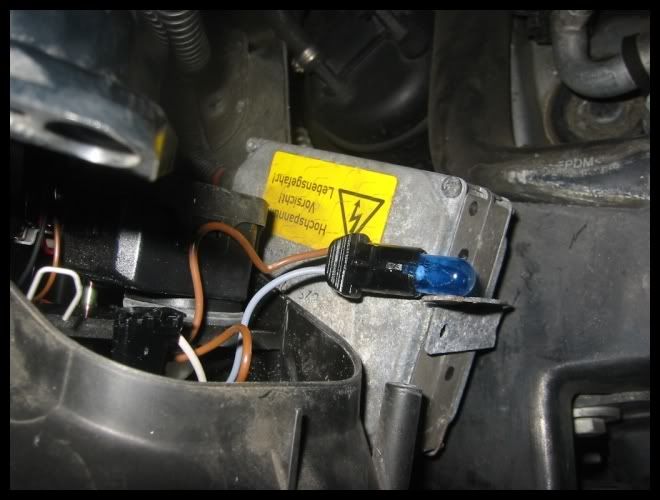
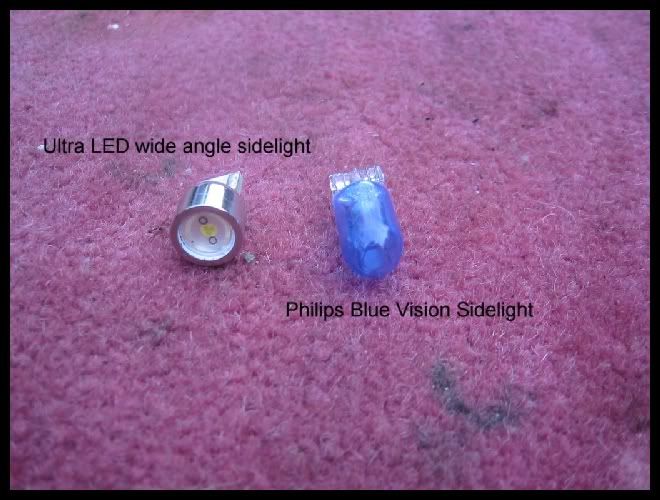
Remove the bulb from its housing and replace with the bulb of your choice. Once fitted, check that the bulb works in the holder before replacing it (some LED sidelights have polarity). The last thing you want is to refit everything and then find the bulb doesn't work.
Breath a sigh of relief to have got this far and then reverse the procedure to refit the headlight unit i.e. replace casing, casing screws, then headlight housing back in place etc, etc.........
To do the drivers side sidelight, it is pretty much the same procedure. The only difference is that you have the battery in the way !
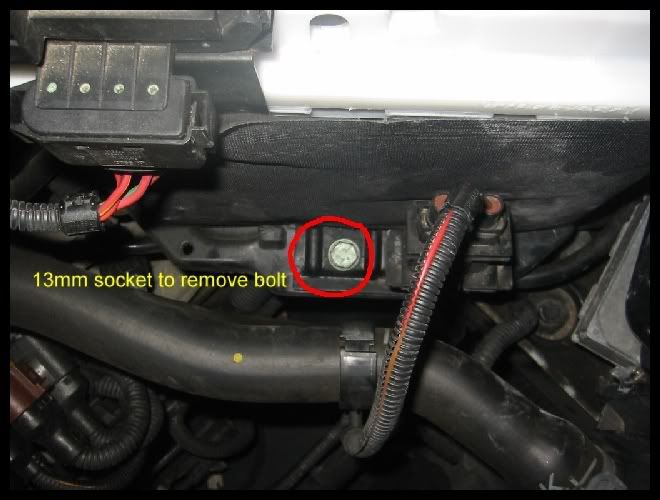
Once you have undone the front and top screws holding the headlight in place, you need to remove the bolt shown. I found the wire and casing in the picture (to the right of the bolt) to be exactly in the place where you need to place the stubby screwdriver to remove the ballast screw. Undoing and removing this bolt alllows you to move this wire casing further along the battery i.e to roughly where the bolt was, which gives you enough access.
Then follow the same procedure to remove the headlight housing as before, removing the ballast screw before attempting to move the unit out It should end up in a position similar to this:
Remove the top casing screw as indicated:
Remove the bottom case screw as indicated. Again this is not easy to get to, but I found it easier to access than the drivers side. Then twist the case off as before and change the bulb in the same way. Again, reverse the procedure to refit the headlight in position.
Once you have re-fitted the headlight and bumper, you need to refit the washer jet covers. These at the moment will be sited below the bumper. Grab the jet with your fingers through the hole. It is a tight squeeze and you will be working against a spring, so it is hard work, but pull them up through the bumper and hold them very securely whilst adding the covers back on by slipping the holes over the lugs. Once fitted gently let them lower against the bumper.
Once you have replaced these check you havent got any screws left over and you have finished !
Rejoice, as your sidelight used to look like this:
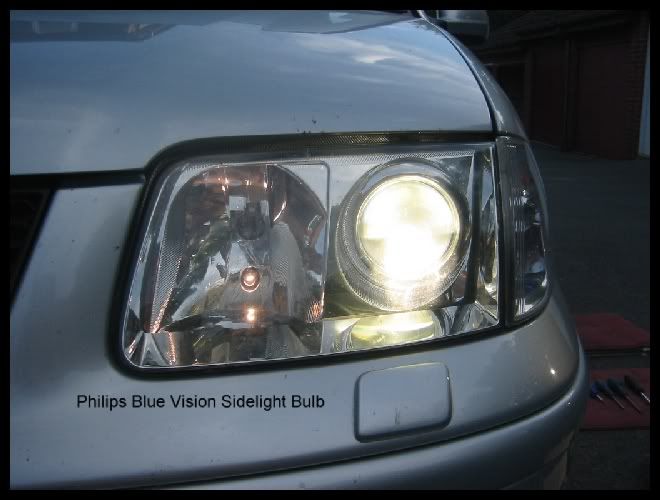
But now should look similar to this (depending upon bulb chosen):
If you used this guide I hope you found it very thorough and helpful. If you attempted the job and got stuck, please feel free to PM me to see if I can help with further advice.
