Polo 6C 1.2 TSI Oil sump drain plug strip

Chat about your 6R/6C model Polos here!
User avatar
Le_Combattant
Gold Member
Posts: 511
Joined: Sun Mar 07, 2021 4:04 pm
Drives: Polo 6C 1.2 TSI 90 Cup
Location: France

Re: Polo 6C 1.2 TSI Oil sump drain plug strip

Post by Le_Combattant »

Hello all !

So good news, I just received my brand new oil pan !
PXL_20250829_125956607.jpg
PXL_20250829_125956607.jpg (3.16 MiB) Viewed 1523 times
PXL_20250829_125903888.jpg
PXL_20250829_125903888.jpg (3.3 MiB) Viewed 1523 times
PXL_20250829_130545409.jpg
PXL_20250829_130545409.jpg (2.98 MiB) Viewed 1523 times
I also ordered from my local dealer some parts/bolts:

Oil pan bolts: N90500605 x19 (+2: two will be converted into studs for guidance during installation).
Gearbox bolts: N10706901 x3
Air conditioning compressor bolt: N191204501 x3
Sealant: D176501A1

Adn documentation for the torquing sequence:
2.jpg
2.jpg (65.22 KiB) Viewed 1523 times
User avatar
Le_Combattant
Gold Member
Posts: 511
Joined: Sun Mar 07, 2021 4:04 pm
Drives: Polo 6C 1.2 TSI 90 Cup
Location: France

Re: Polo 6C 1.2 TSI Oil sump drain plug strip

Post by Le_Combattant »

Hello hello !

Quick update :D

I finally received everything, all the parts are here and I'm quite happy !
PXL_20250928_070934321.jpg
PXL_20250928_070934321.jpg (4.04 MiB) Viewed 1247 times
On Monday, my oil pan will be replaced !

The things is about oil pans bolts (N90500605) I noticed some imperfection on the threads (even brand new) and because my engine block is made out of aluminium, I don't want to mess with it.
s93671yjiiqf1.jpeg
s93671yjiiqf1.jpeg (1.73 MiB) Viewed 1247 times
For, on some of them I used a tape and die set. I had some hard point on them (hand use only with WD40).

Then I received the lang tool 2584 kit, perfect for my situation. I used it on the last remaining bolts.

The thing is, those bolt will be torqued to 8NM + 90°. And tape and die set are much more aggressive than a thread chaser as it's primary function is to cut new threads.

Is there a possibility I messed up some threads by removing some materials ?

The only thing I fear is threads stripping.

Thank you for your help, and have a great day.
RUM4MO
Bling Bling Diamond Member
Posts: 6077
Joined: Sat Dec 30, 2006 9:12 pm
Drives: B8 S4 & 6R/6C1 1.2TSI 110
Location: Mid Lothian

Re: Polo 6C 1.2 TSI Oil sump drain plug strip

Post by RUM4MO »

It is very annoying that new bolts from at least VW Group always seem to have slight damage on their threads when you receive them, even worse as you have said when it is a softer material that they are getting screwed into.

I have just replaced the front suspension on my old 2011 Audi S4, and when carrying out that job I needed to remove the drive shaft bolt, when I fitted the new bolt into the driveshaft it jammed, so I removed it and discovered there was slight damage on the thread - not good! So, I ordered in a split die to correct that, I wanted a split die so that I could open it up as much as my die holder would allow and that would stop me cutting any material from the "okay/good" sections of that bolt's thread - and that worked - I could run that die down the thread easily, I just used oil to lubricate it and not cutting fluid as I could not reach it at the time, a very small amount of thread was removed at 3 points on that bolt, after that I was able to screw it fully into the driveshaft by hand.

You are absolutely correct that thread chaser and thread files will take off less material.

What really really really annoyed me was, because I had needed to order in new uprights and the pinch bolts had seized in the original ones, my Audi parts person said "we will not honour any warranty claims against these new (very expensive) uprights if you do not buy new genuine fixings" - that driveshaft bolt was in fact bought from that Audi dealership parts department!! I just could not be bothered with the time and expense of going back in there to get that bolt swopped possibly for another one that was also damaged, so I sucked up that by buying in a split die.

Also, I was more than slightly concerned when I changed the oil on my wife's 2015 Polo 1.2TSI this year, I did not detect any roughness/stiffness when refitting the old drain plug after fitting a new washer, I set a torque wrench to 30Nm, but felt that maybe that fixing was "beyond" 30Nm and the torque wrench had not "clicked", so I played safe and grabbed another torque wrench set it to 30Nm and finished torquing up that drain plug - though I was still very worried!

Edit:- just a comment aimed at anyone that does not know this, there are at least 3 grades of fixings threads sizes and tolerance, aircraft and car threads are always the top grade but when buying taps and dies for general use, DIYers etc usually only get access to the next grade down which will always mean cutting off more metal than you should, now just how much of an effect that this will/can have on the ultimate strength of a "joining" I can't say in terms of "is this joining now too weak" - but it is something to consider when using "general purpose" grade taps and dies when working on your cars.
amer6R
Platinum Member
Posts: 1301
Joined: Thu Feb 06, 2020 7:57 am
Drives: Polo 6R 2010 1.6 TDI
Location: budget build

Re: Polo 6C 1.2 TSI Oil sump drain plug strip

Post by amer6R »

thread a nut, if it goes on it will be fine. if not, id give them a clean
RUM4MO
Bling Bling Diamond Member
Posts: 6077
Joined: Sat Dec 30, 2006 9:12 pm
Drives: B8 S4 & 6R/6C1 1.2TSI 110
Location: Mid Lothian

Re: Polo 6C 1.2 TSI Oil sump drain plug strip

Post by RUM4MO »

amer6R wrote: Tue Sep 30, 2025 7:59 am thread a nut, if it goes on it will be fine. if not, id give them a clean
That only works if you use a nut of the same grade, using a "domestic" grade of nut on a "automobile" grade bolt that is already got slightly damaged threads will prove nothing as being over size it will still fit over the damaged area unless it is extreme.

Cleaning up using a split die that is used "opened" will work though, maybe even better if you allow it to close down only over the areas of damaged thread.
User avatar
Le_Combattant
Gold Member
Posts: 511
Joined: Sun Mar 07, 2021 4:04 pm
Drives: Polo 6C 1.2 TSI 90 Cup
Location: France

Re: Polo 6C 1.2 TSI Oil sump drain plug strip

Post by Le_Combattant »

So yesterday was the day ! :D

After three months of spreading its precious 0W30 oil on the roads of France, it was high time to replace that damn oil pan.

I would like to thank my father for offering his help. With two of us, the work went much faster and the extra pair of hands was very welcome.

First step: removal

All the screws came out without any problems, except for one (of course...) which immediately stripped :oops:
Luckily, I had bought the special VW tool (hex key with rounded tip).
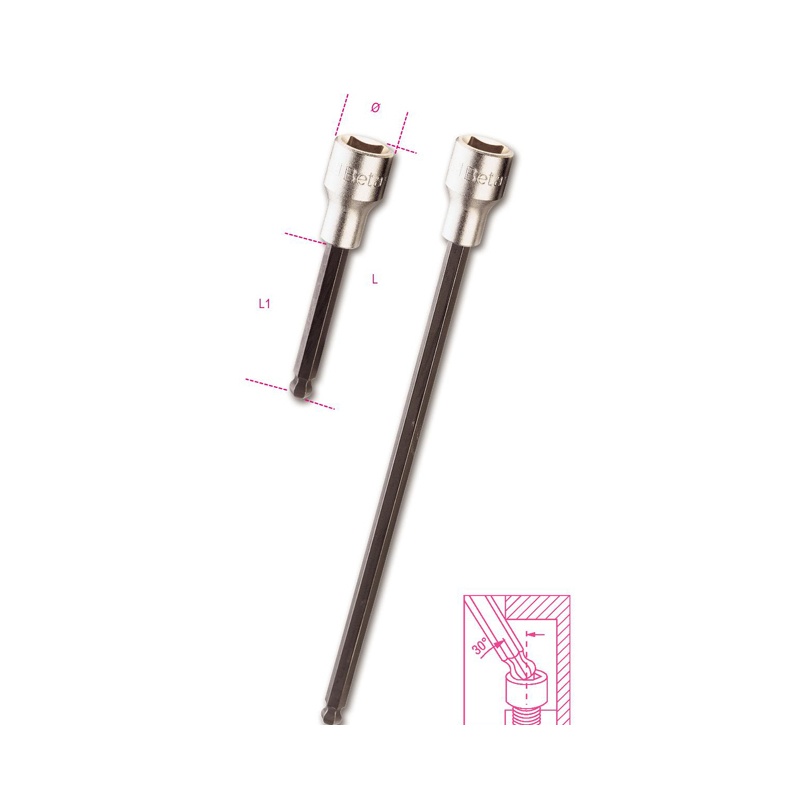
bk_jAVsB3KPVQS5Ia5J5kgG-1-max.jpg
bk_jAVsB3KPVQS5Ia5J5kgG-1-max.jpg (44.35 KiB) Viewed 1180 times
With that, it came out without any problems.

The screws on the gearbox and air conditioning compressor also came out without any problems.
No matter if there were in good condition, I alway buy new screw.

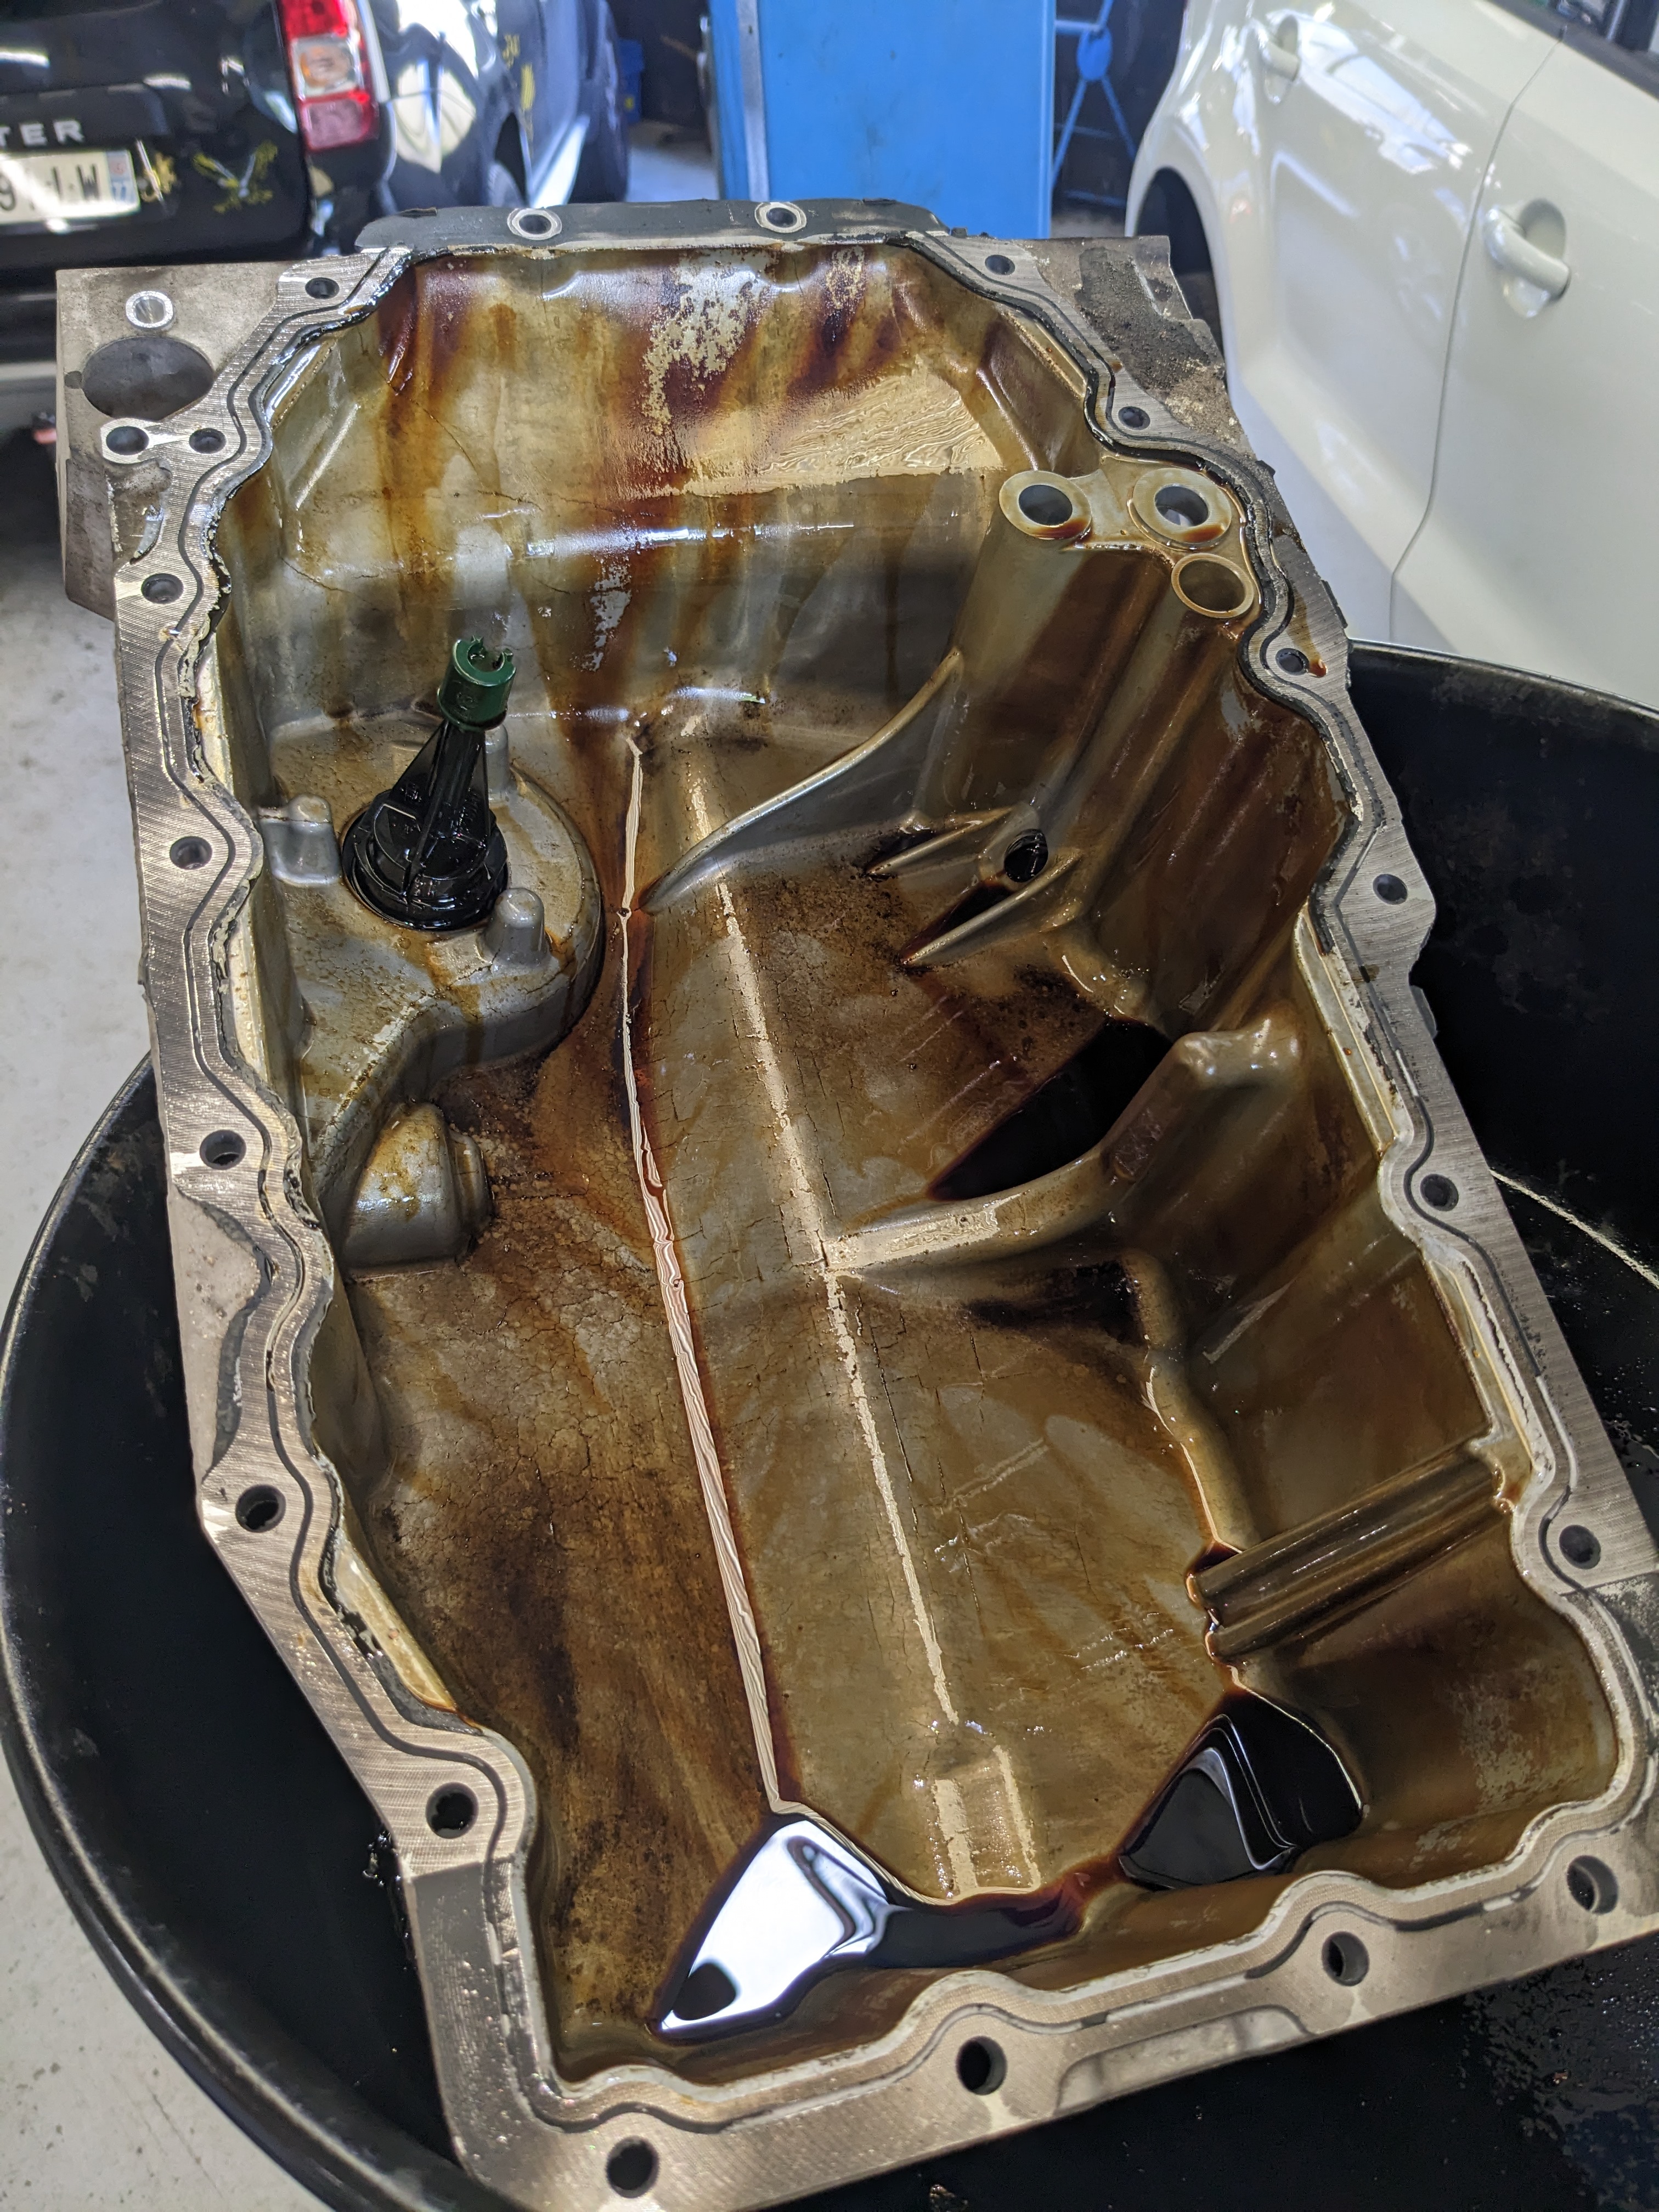
Two kicks with a crowbar and the oil pan is removed.
PXL_20250929_130027710.jpg
PXL_20250929_130027710.jpg (3.08 MiB) Viewed 1180 times
Despite applying tape, the aluminium still left marks where it came into contact. It's incredible how soft this material is.

Overall, it's very clean, with no debris or pieces left behind.

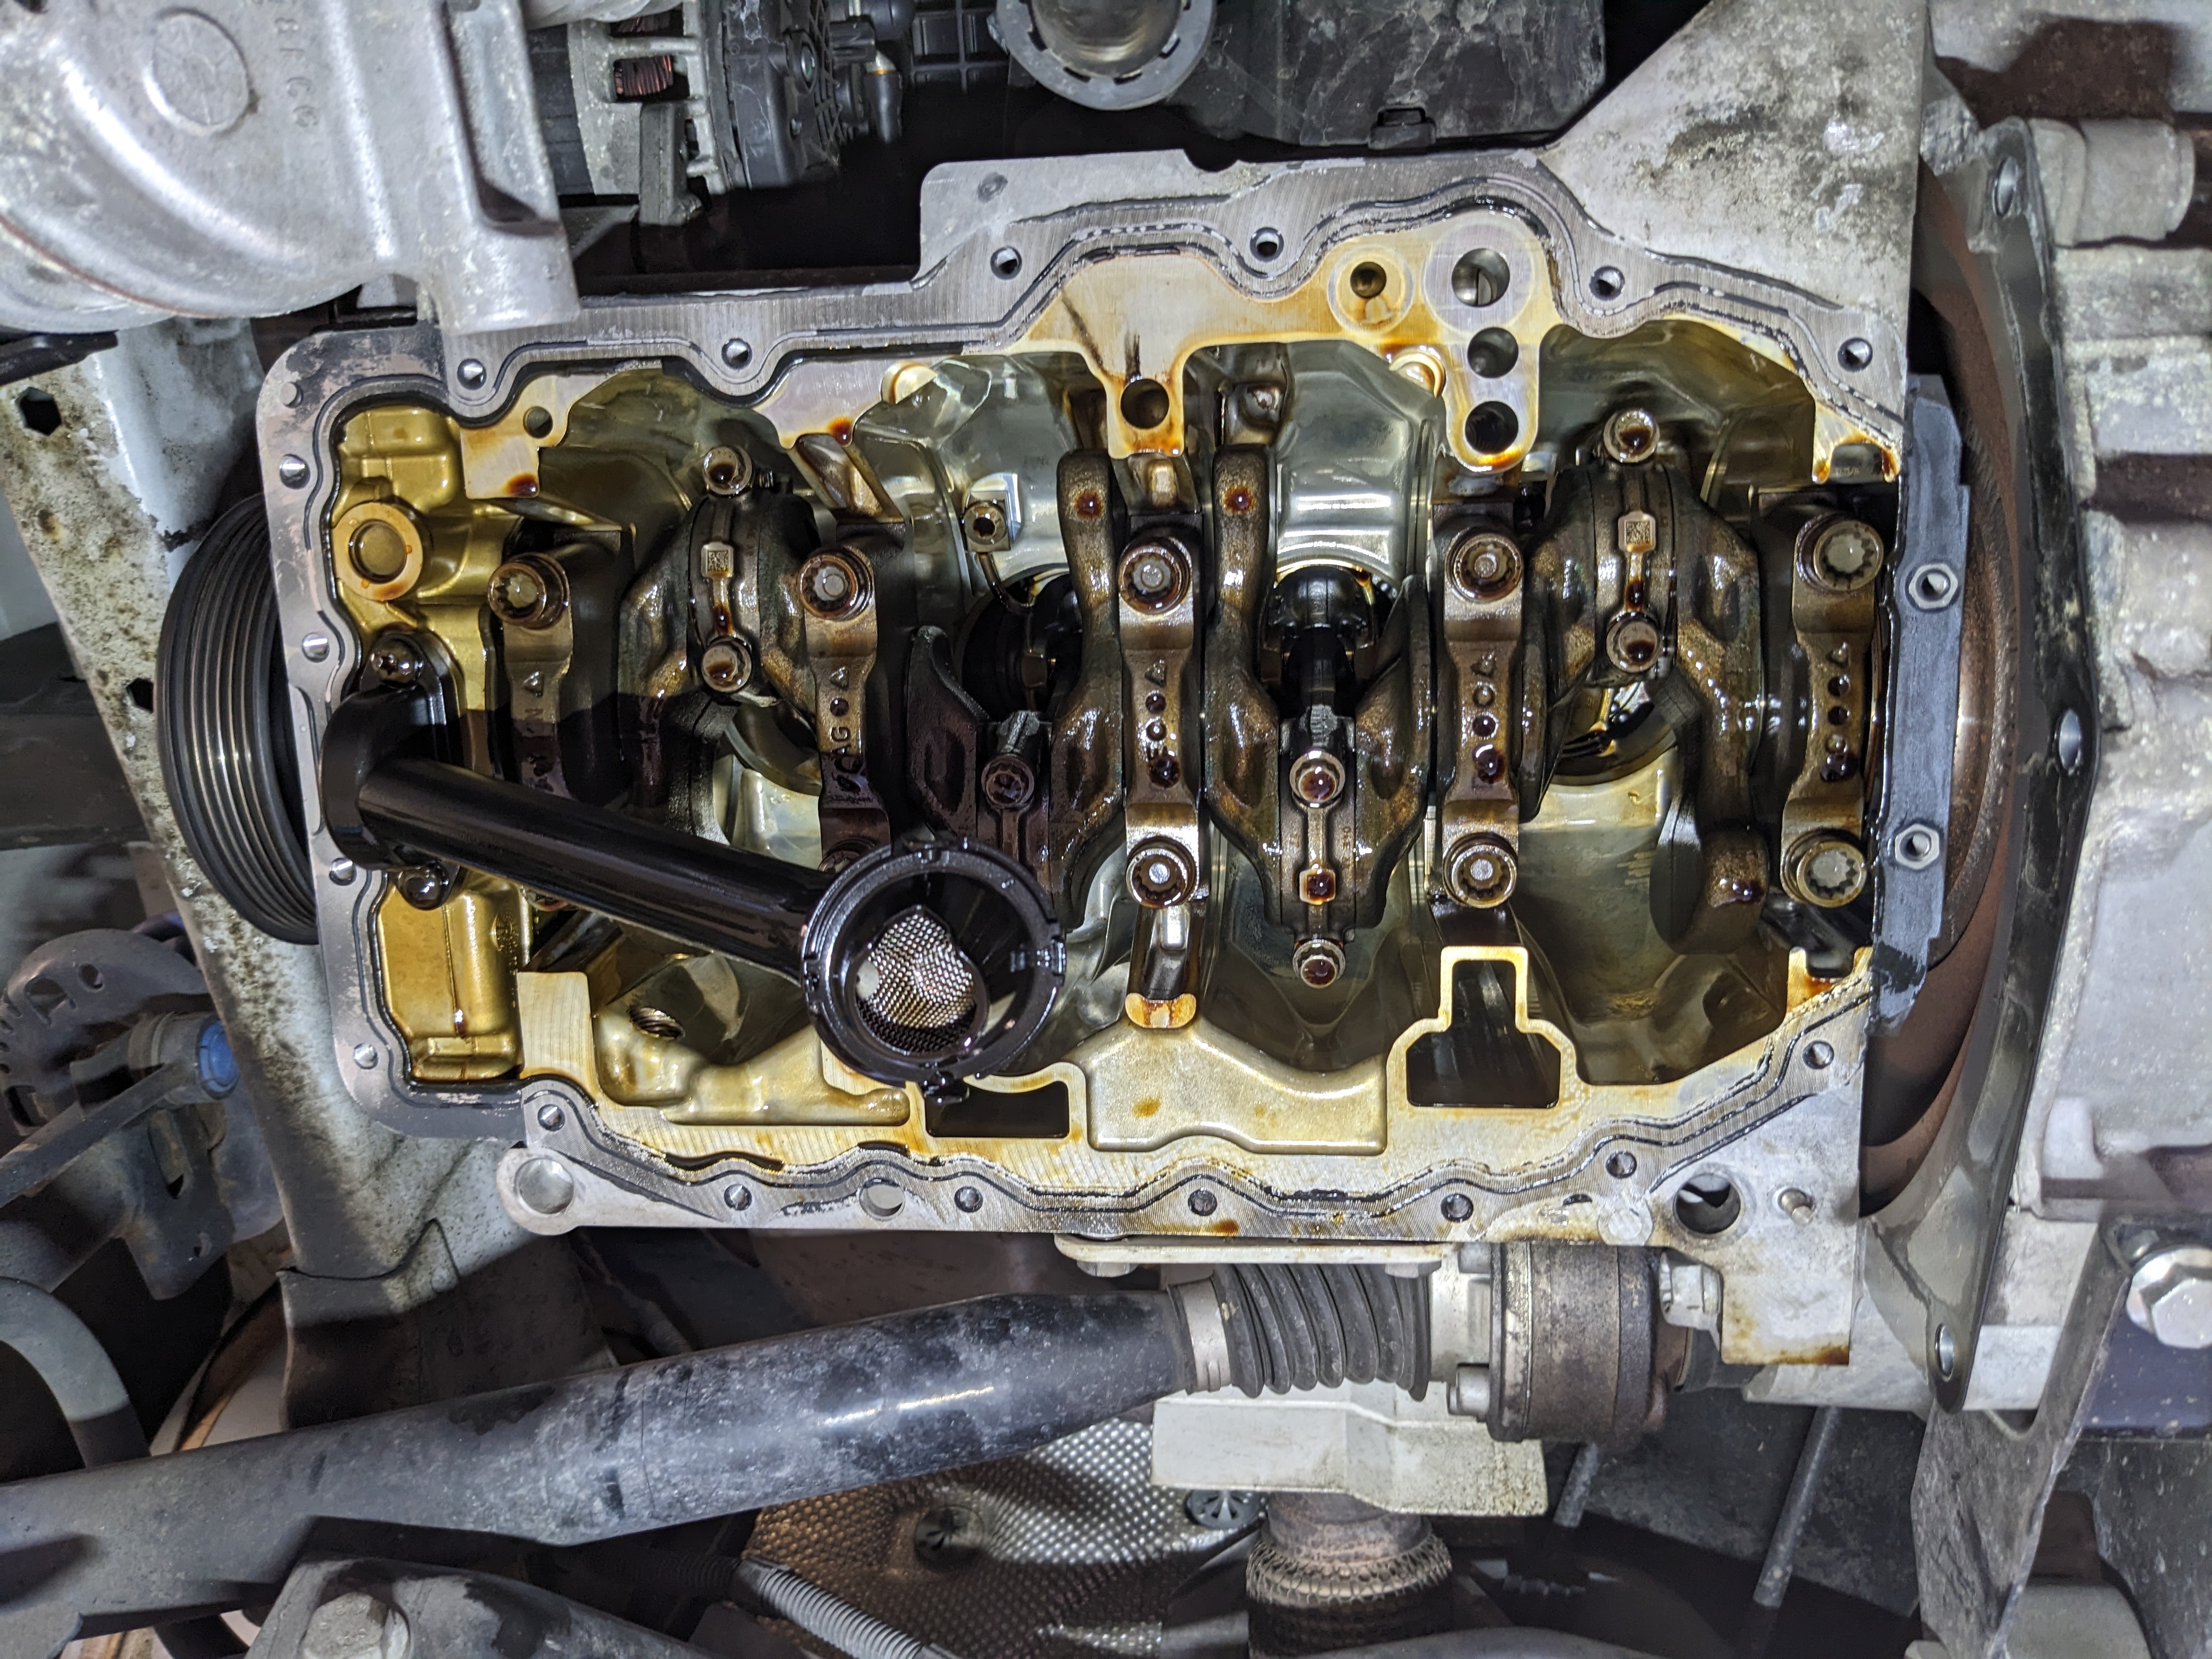
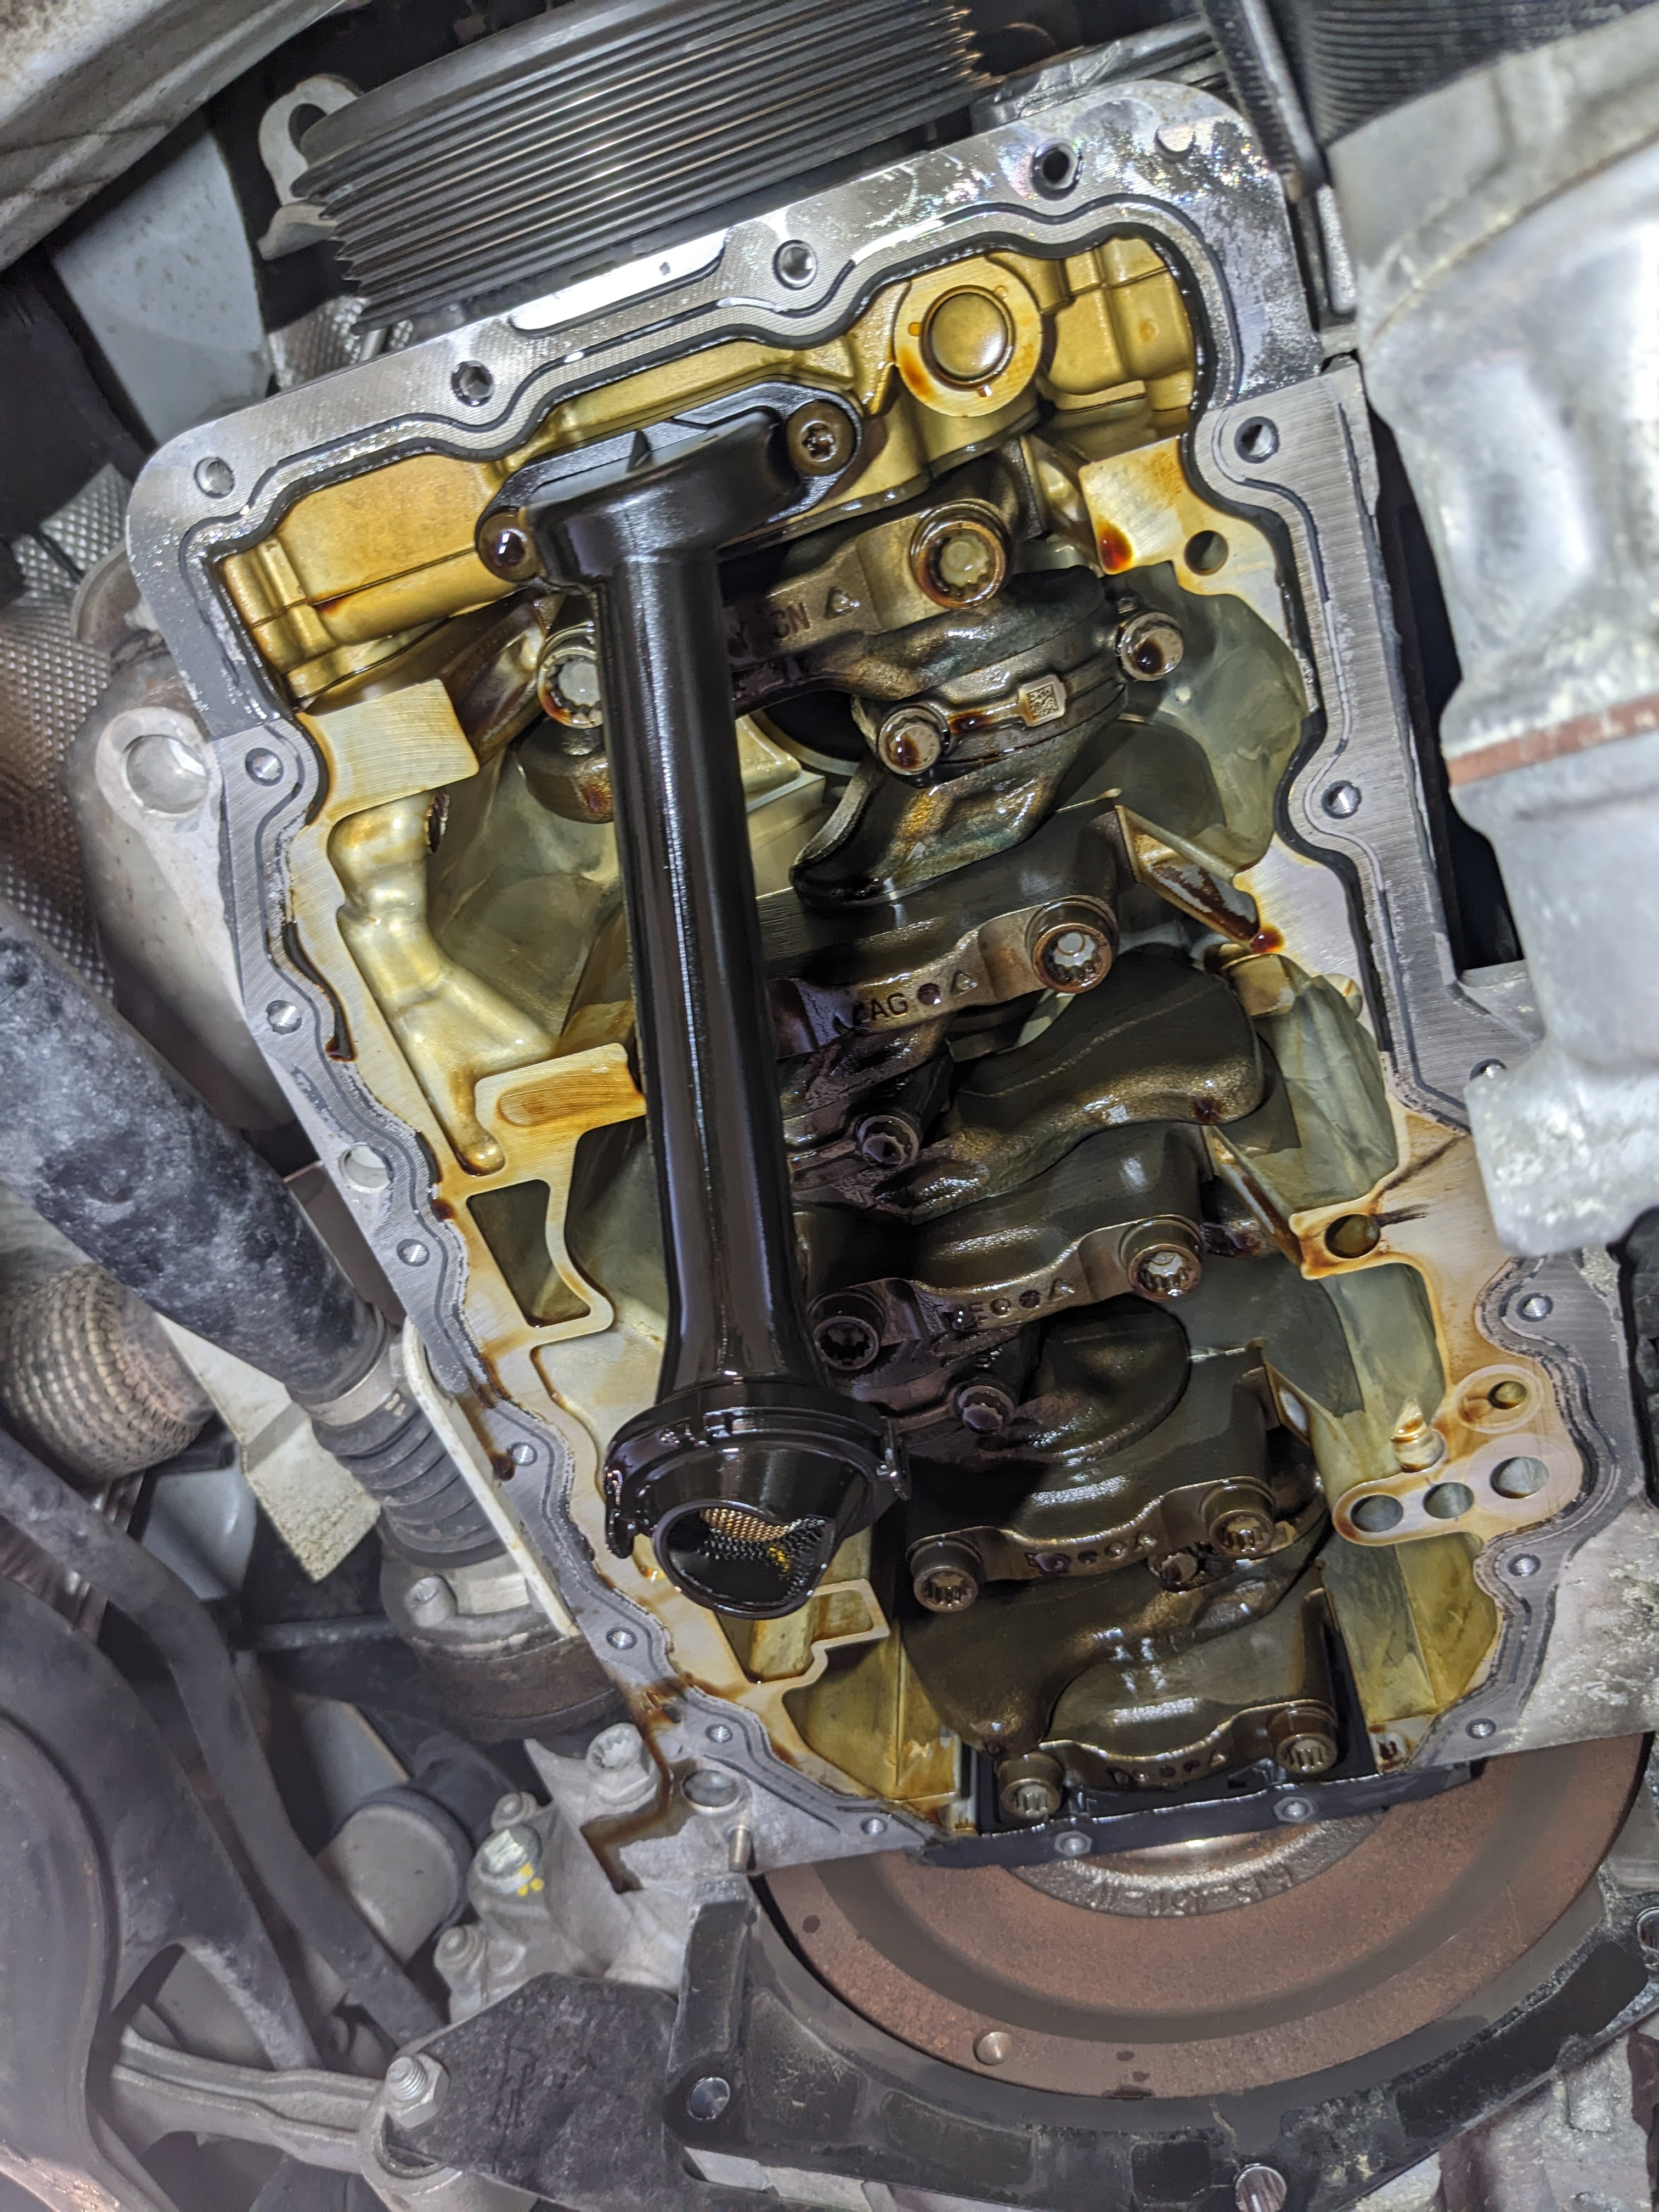
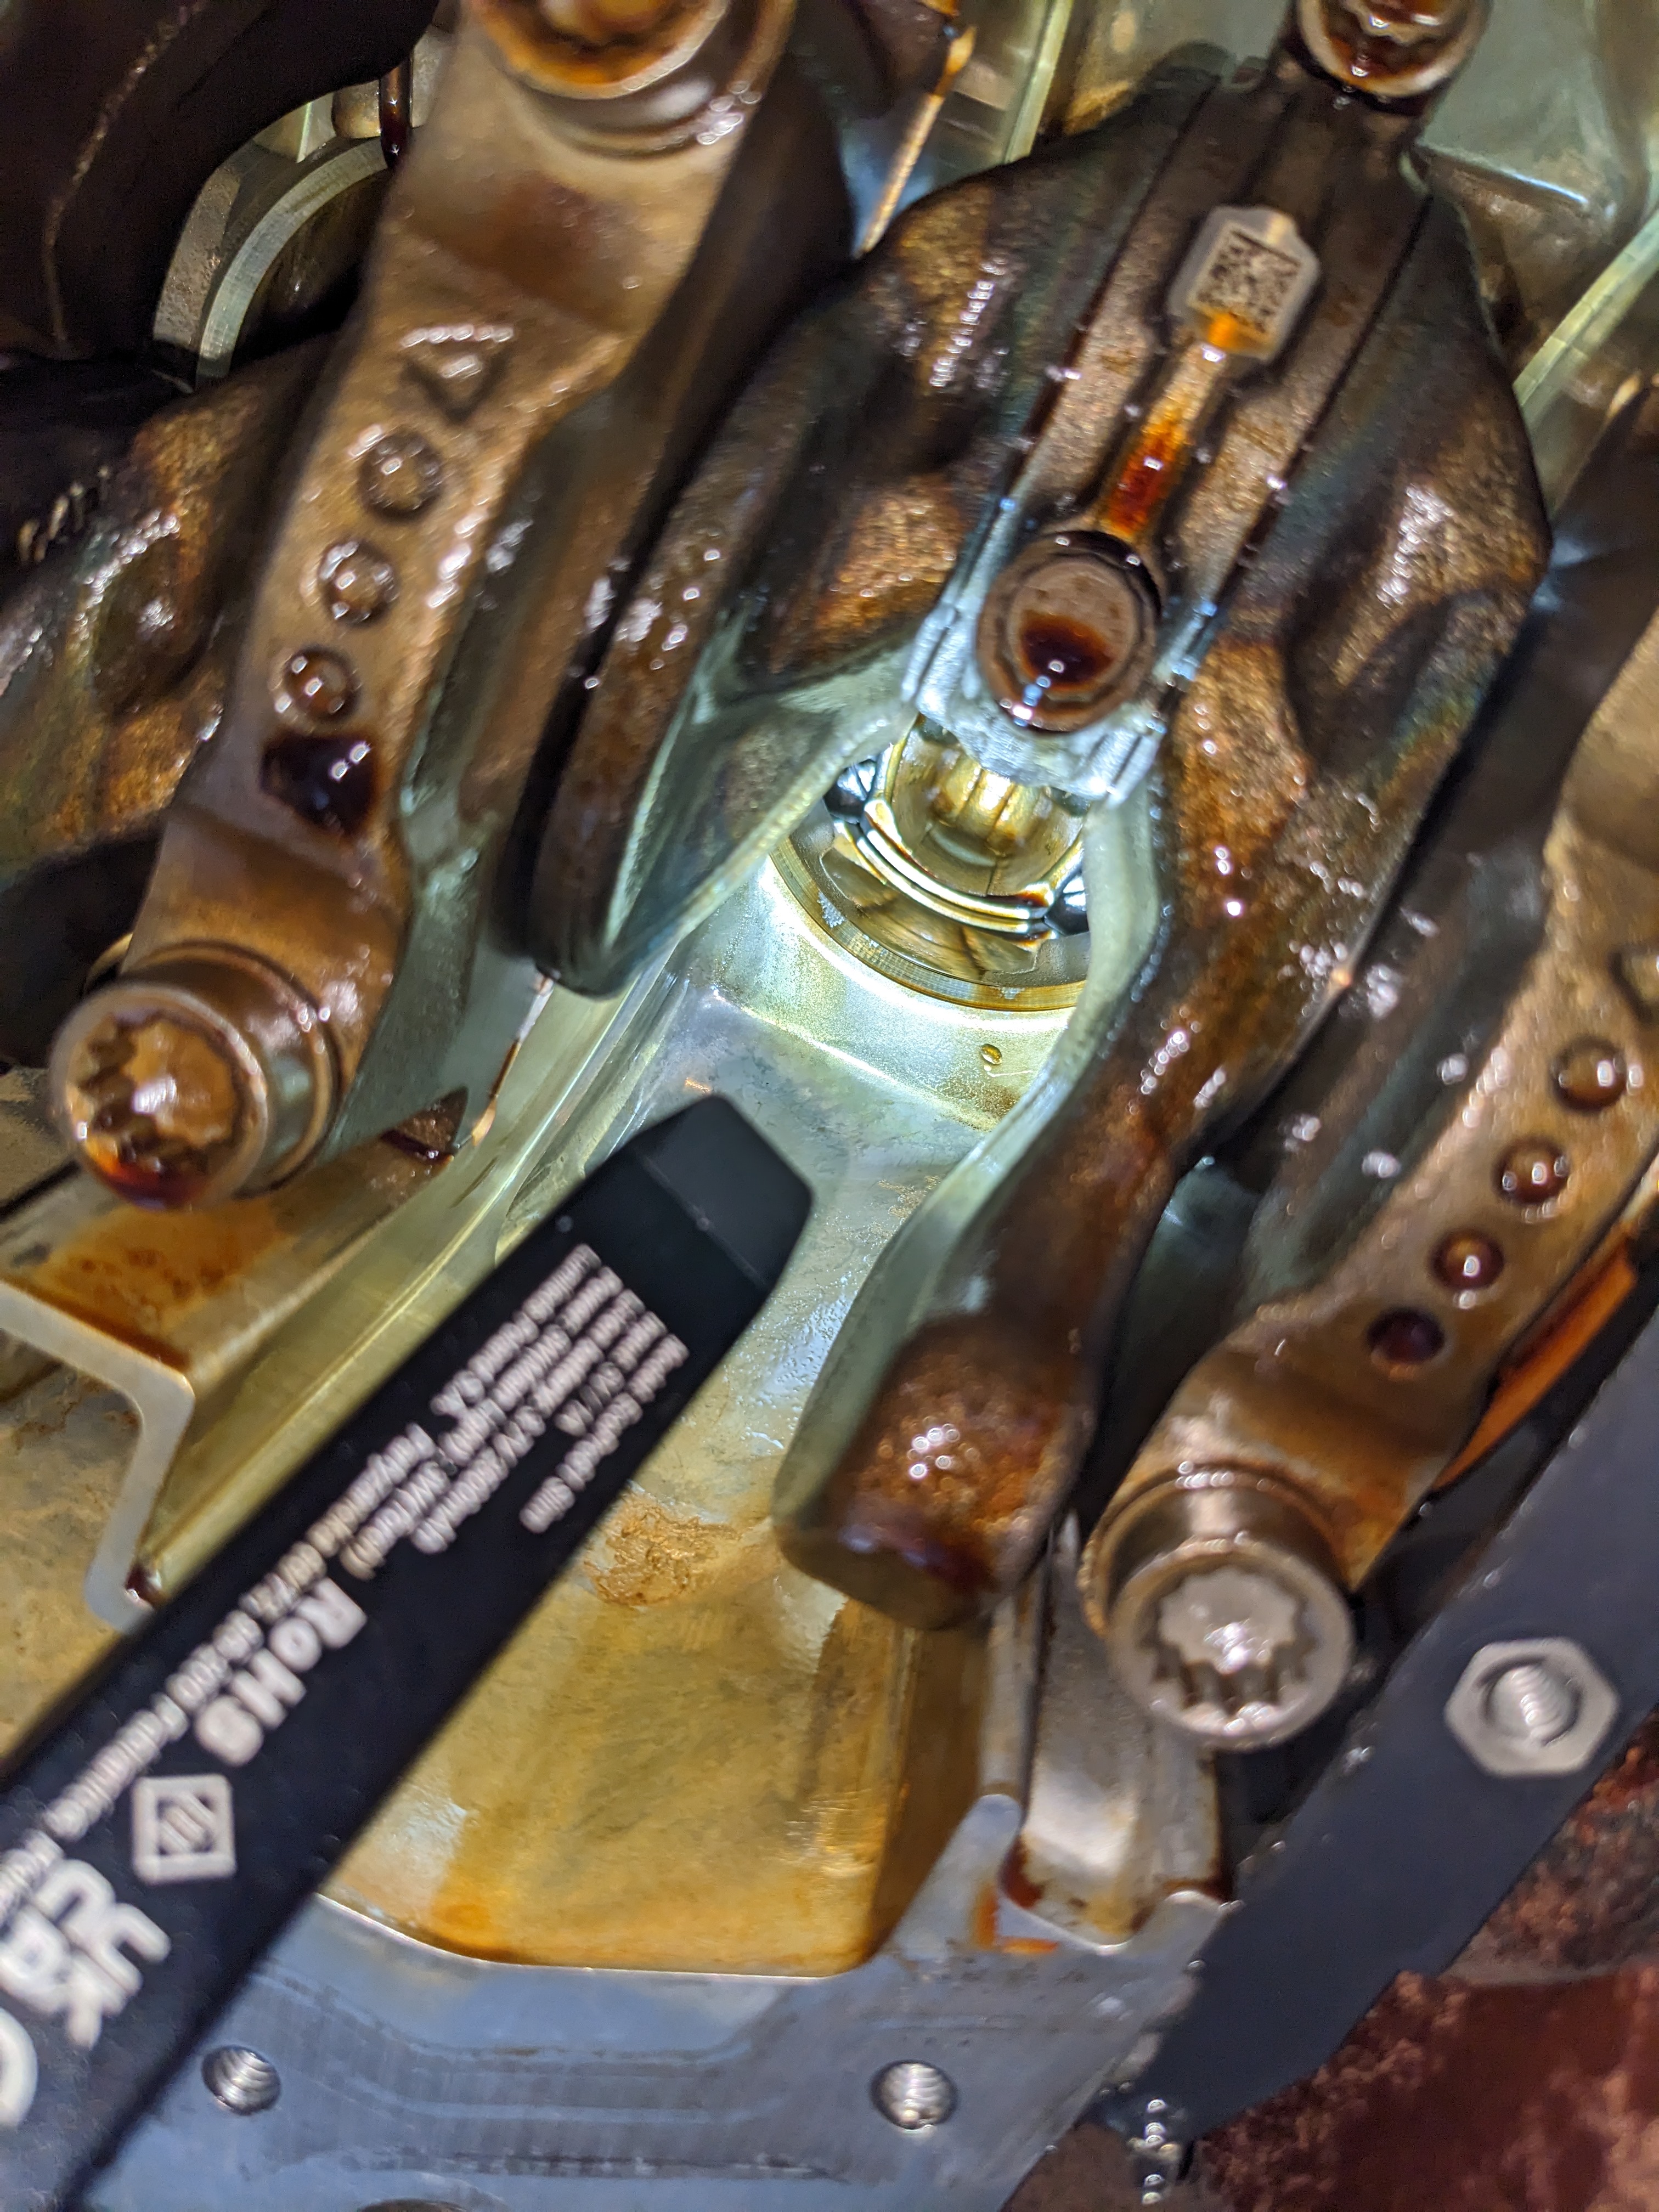
Now for the internals:
PXL_20250929_133256272.jpg
PXL_20250929_133256272.jpg (2.85 MiB) Viewed 1180 times
PXL_20250929_130209708.jpg
PXL_20250929_130209708.jpg (3.34 MiB) Viewed 1180 times
PXL_20250929_130138998.jpg
PXL_20250929_130138998.jpg (3.03 MiB) Viewed 1180 times
Well, same thing: very clean.
I was pleasantly surprised to see that there wasn't too much carbonised deposits (brown colour). There were a few, certainly where the oil tends to stagnate a little.
Overall, the aluminium has taken on a beautiful golden colour.

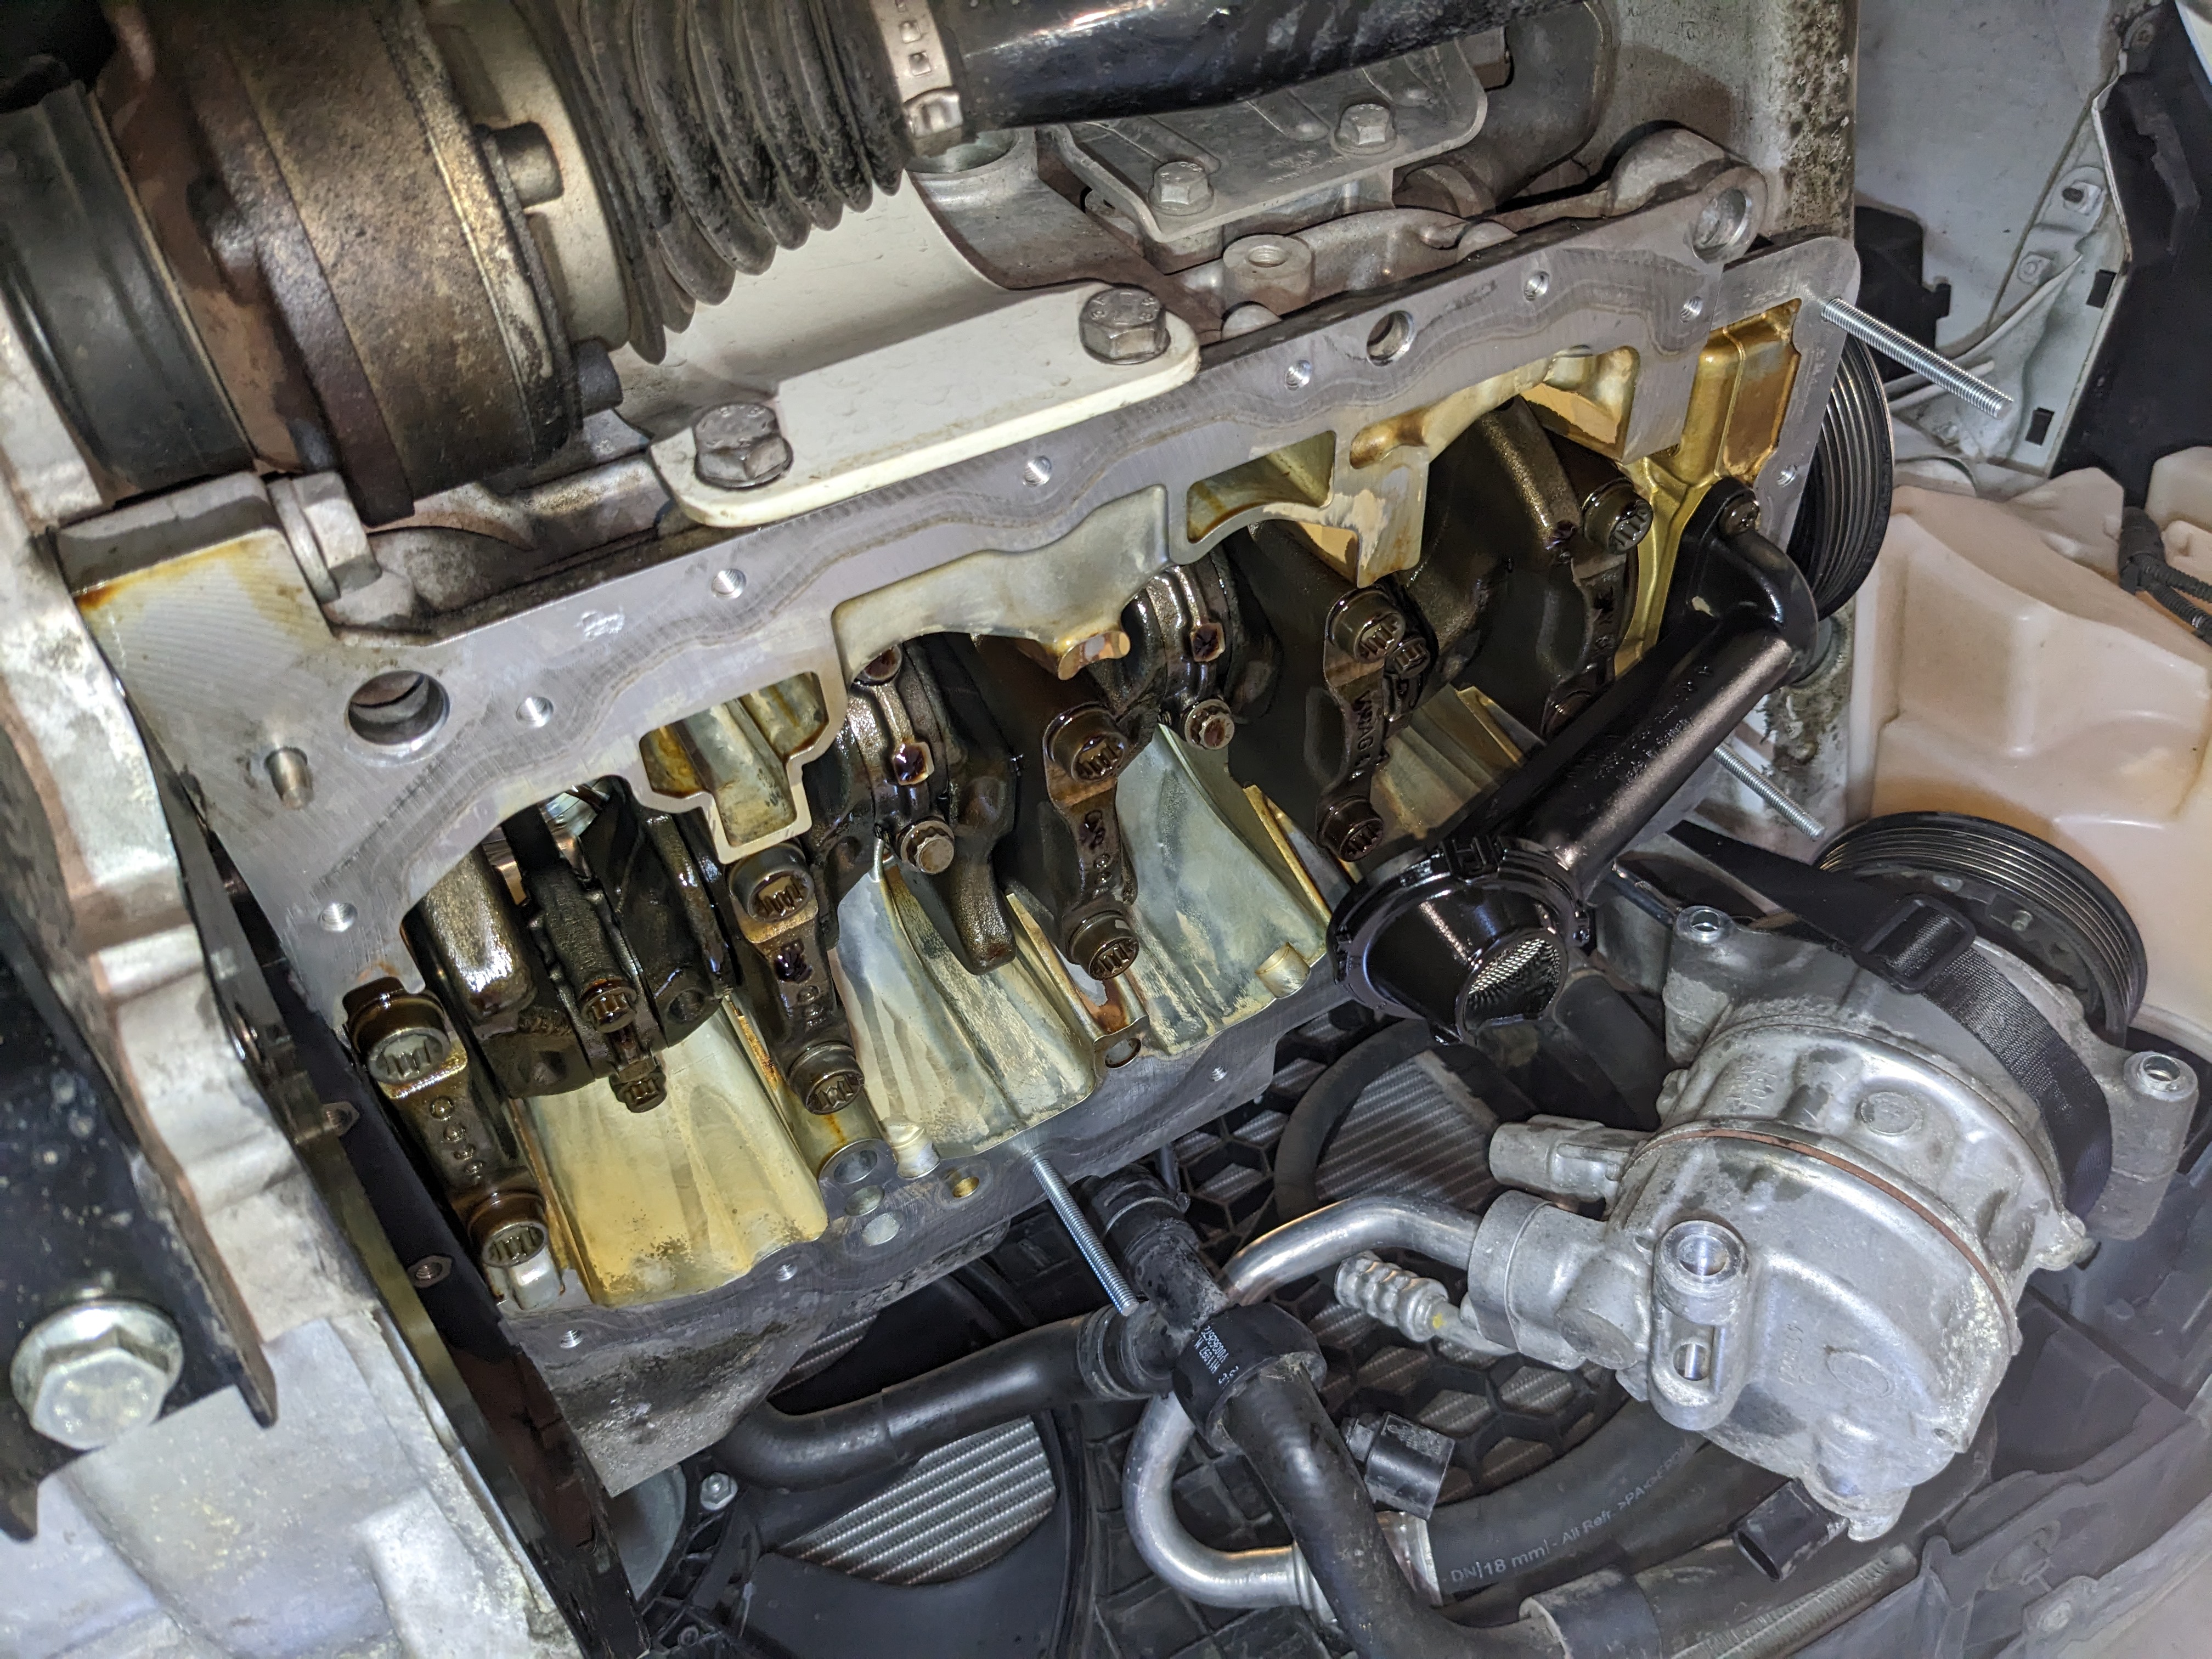
Second step: cleaning.

This is crucial because it will ensure that the surface is properly prepared to receive the new seal and therefore guarantee a good seal.

And since I don't plan on removing it again (except in cases of force majeure), I might as well do it properly :wink:

To do this, I bought Loctite SF7200, a product designed for silicone seals.
Spray it around the edge and leave it to work for 5-10 minutes.

Three passes were necessary with plastic spatulas.
PXL_20250929_135956530.jpg
PXL_20250929_135956530.jpg (3.11 MiB) Viewed 1180 times
It's not as perfect as after machining, but you couldn't feel anything with your fingernail.

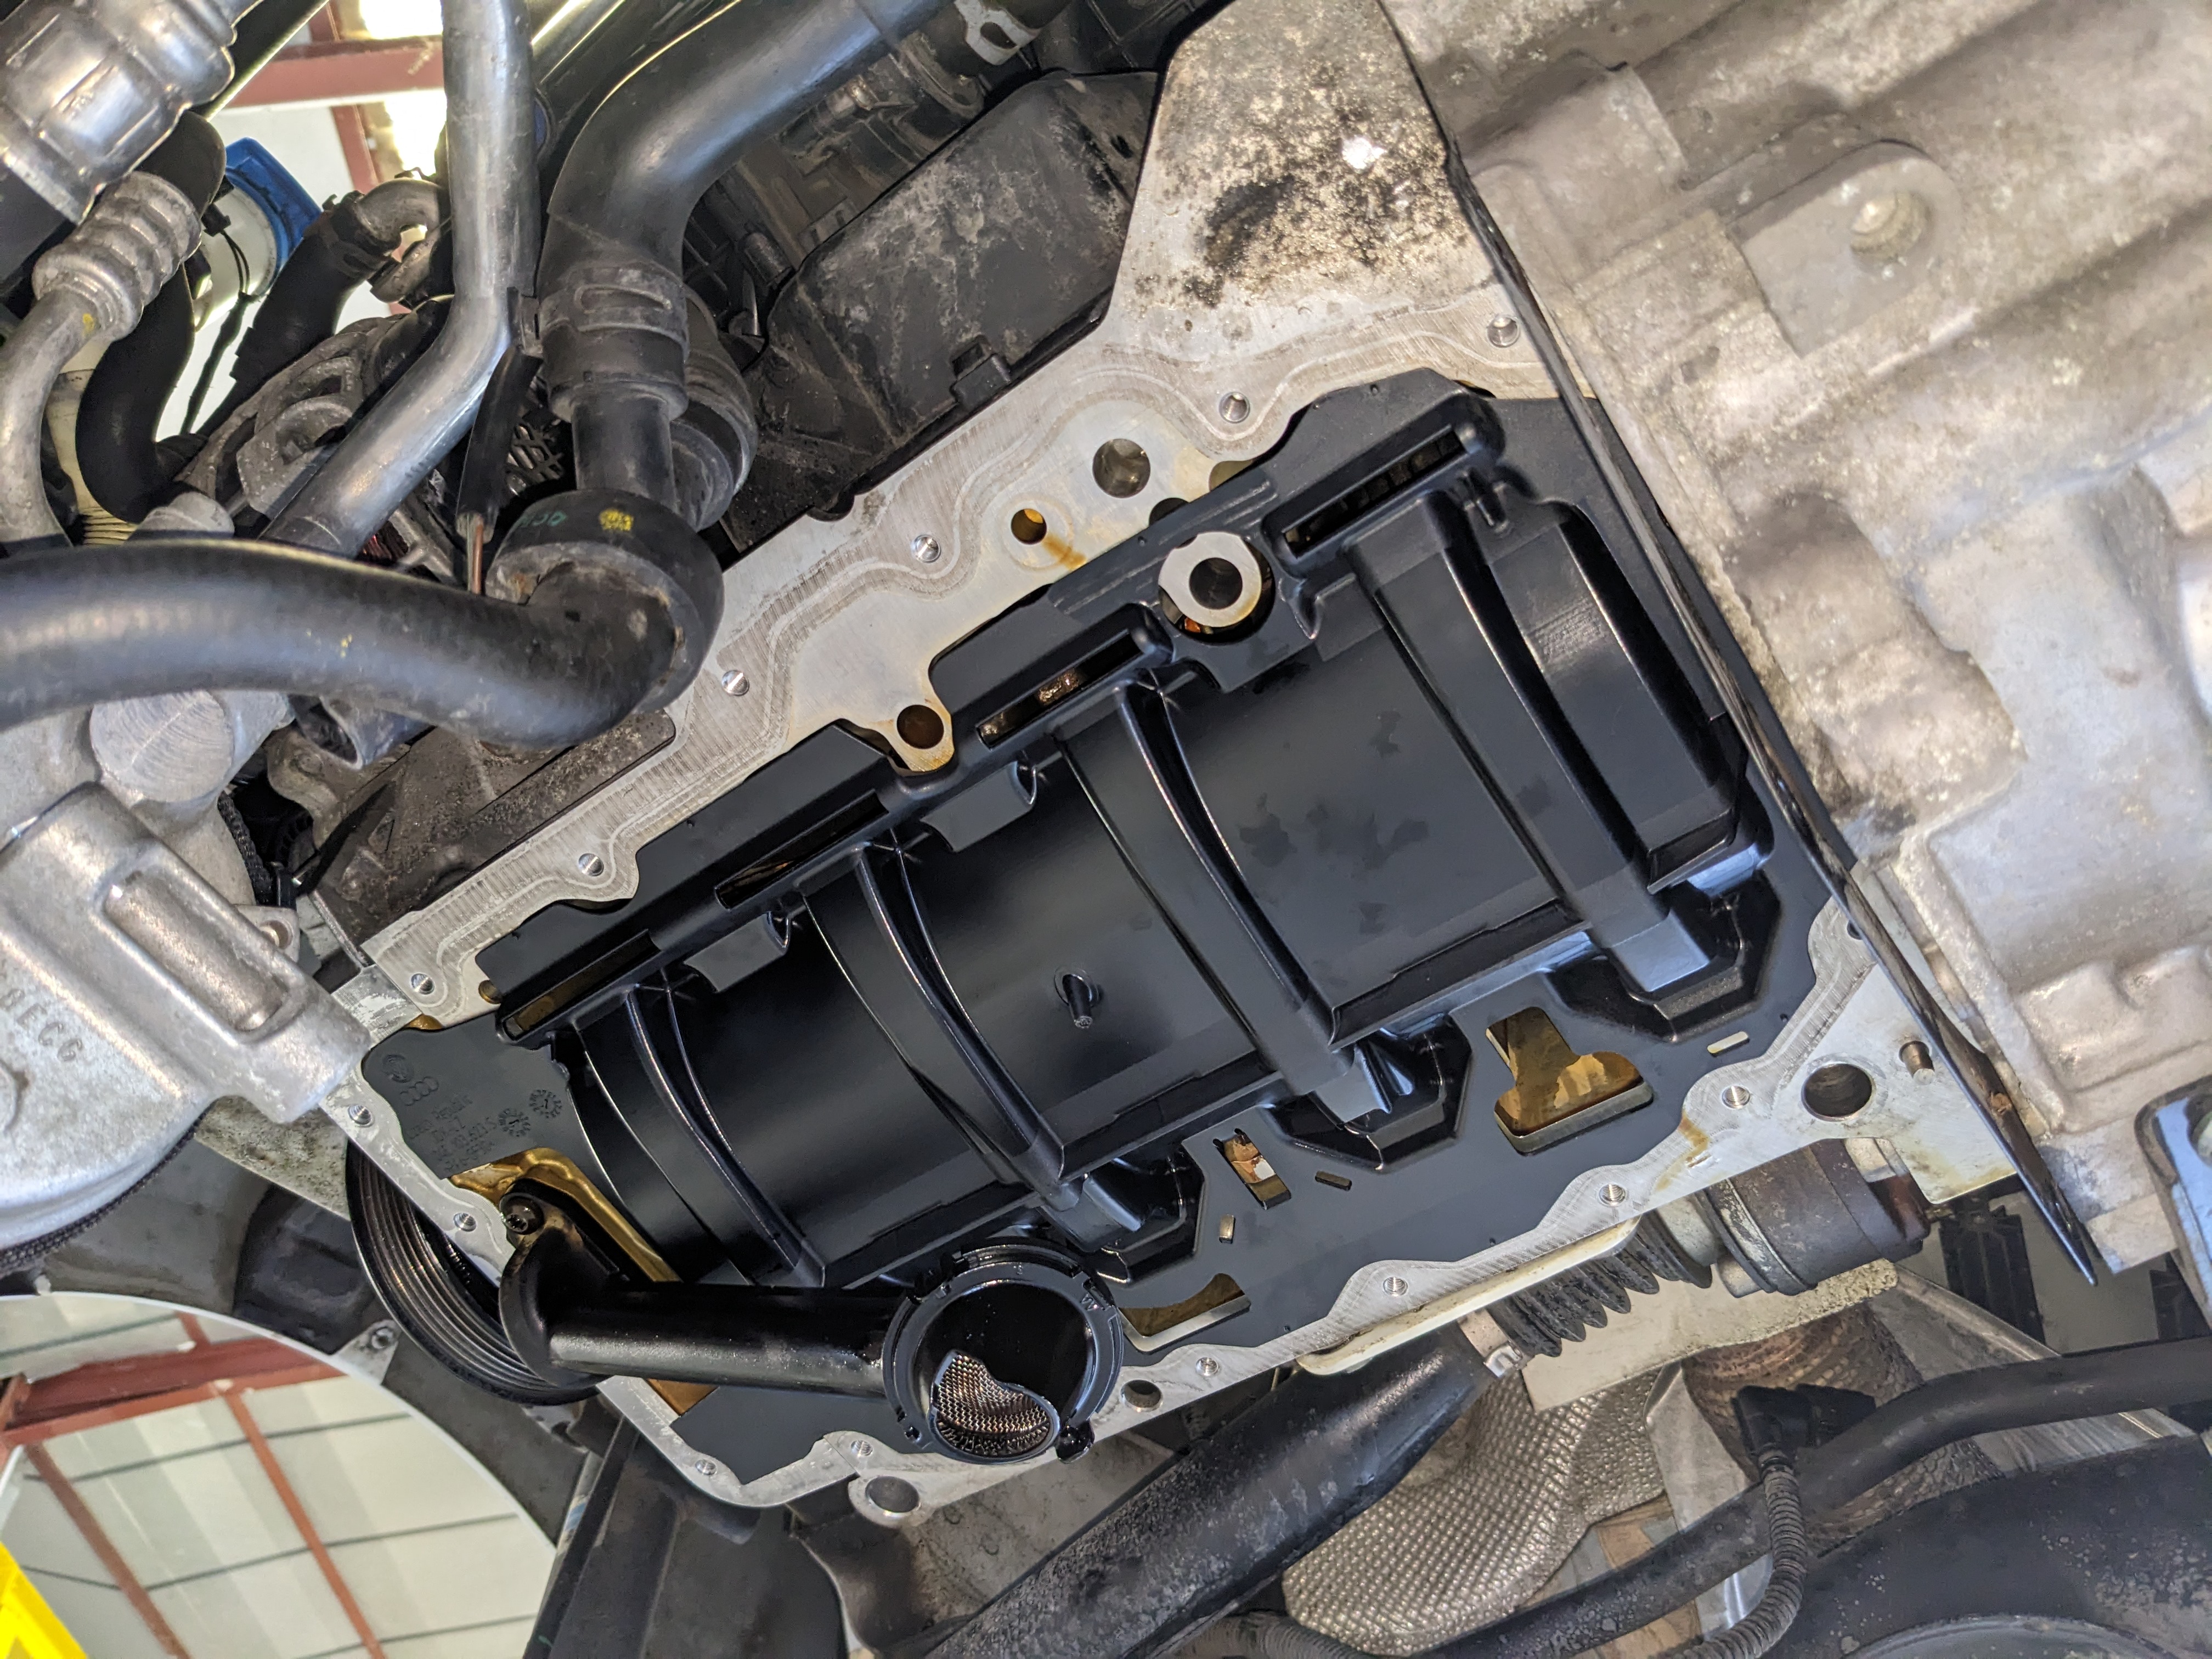
Installation of the new firewall:
PXL_20250929_141005540.jpg
PXL_20250929_141005540.jpg (2.96 MiB) Viewed 1180 times
This part is a bit of a ‘misfit’ in the sense that it is sandwiched between the block and the casing. A slight misalignment is enough for the casing to fit poorly (as seen in the video) and be mounted crookedly.

I did a test with the old oil pan to confirm the position, but even today I still have doubts despite the absence of leaks.

Penultimate step: preparing the new casing

I sprayed brake cleaner as if it were free, paid for by my boss :lol:
No, it's not my boss, it's my bank account :scared:

Brake cleaner all over the area and a blast with an air gun to remove all the dirt.

So, it's clearly not the most beautiful bead. I've done much better and much worse.
Let's say ‘could do better’.
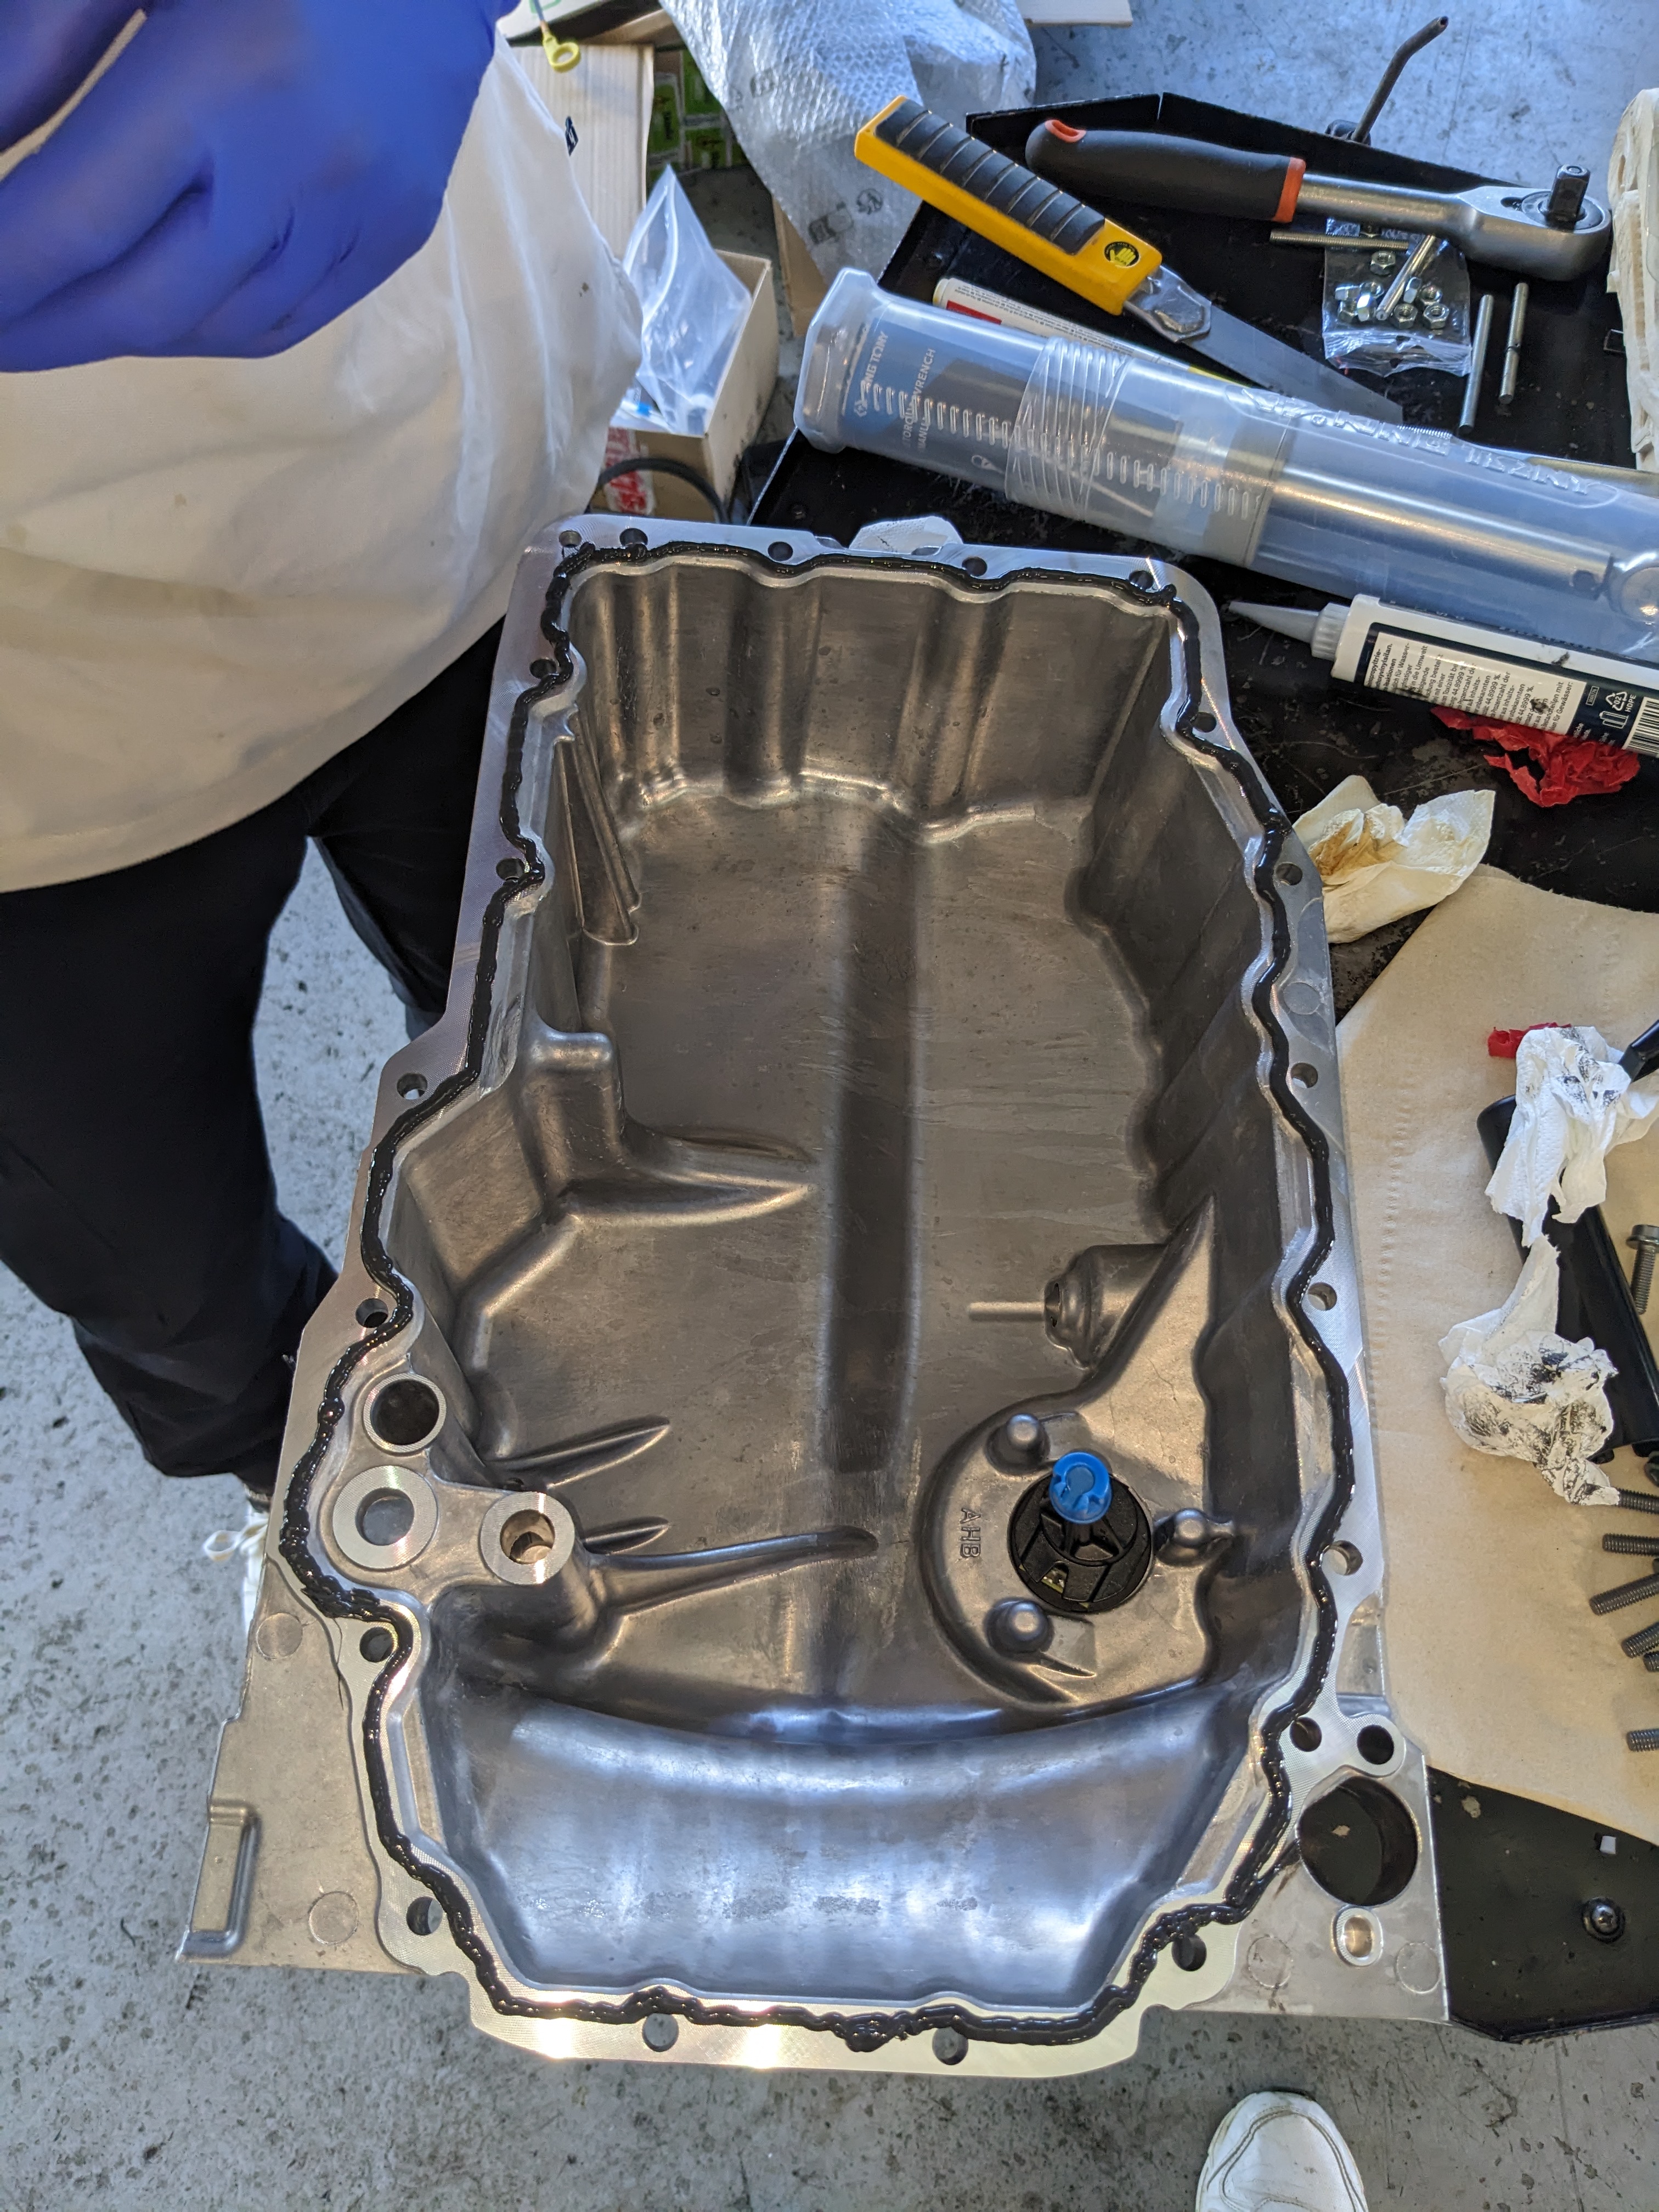
PXL_20250929_142840265.jpg
PXL_20250929_142840265.jpg (2.86 MiB) Viewed 1180 times
The difficulty (and my fear) is not to put too much on to prevent pieces from falling off and clogging the strainer.

VW recommends a thickness of 2-3 mm, but I think I've put on more than that.
And there are certain areas where the sealant (in my opinion) is too close to the edge... I'll check during the next oil change with a borescope.

The strainer is clean, apart from a piece of metal (machining residue?), nothing to report.

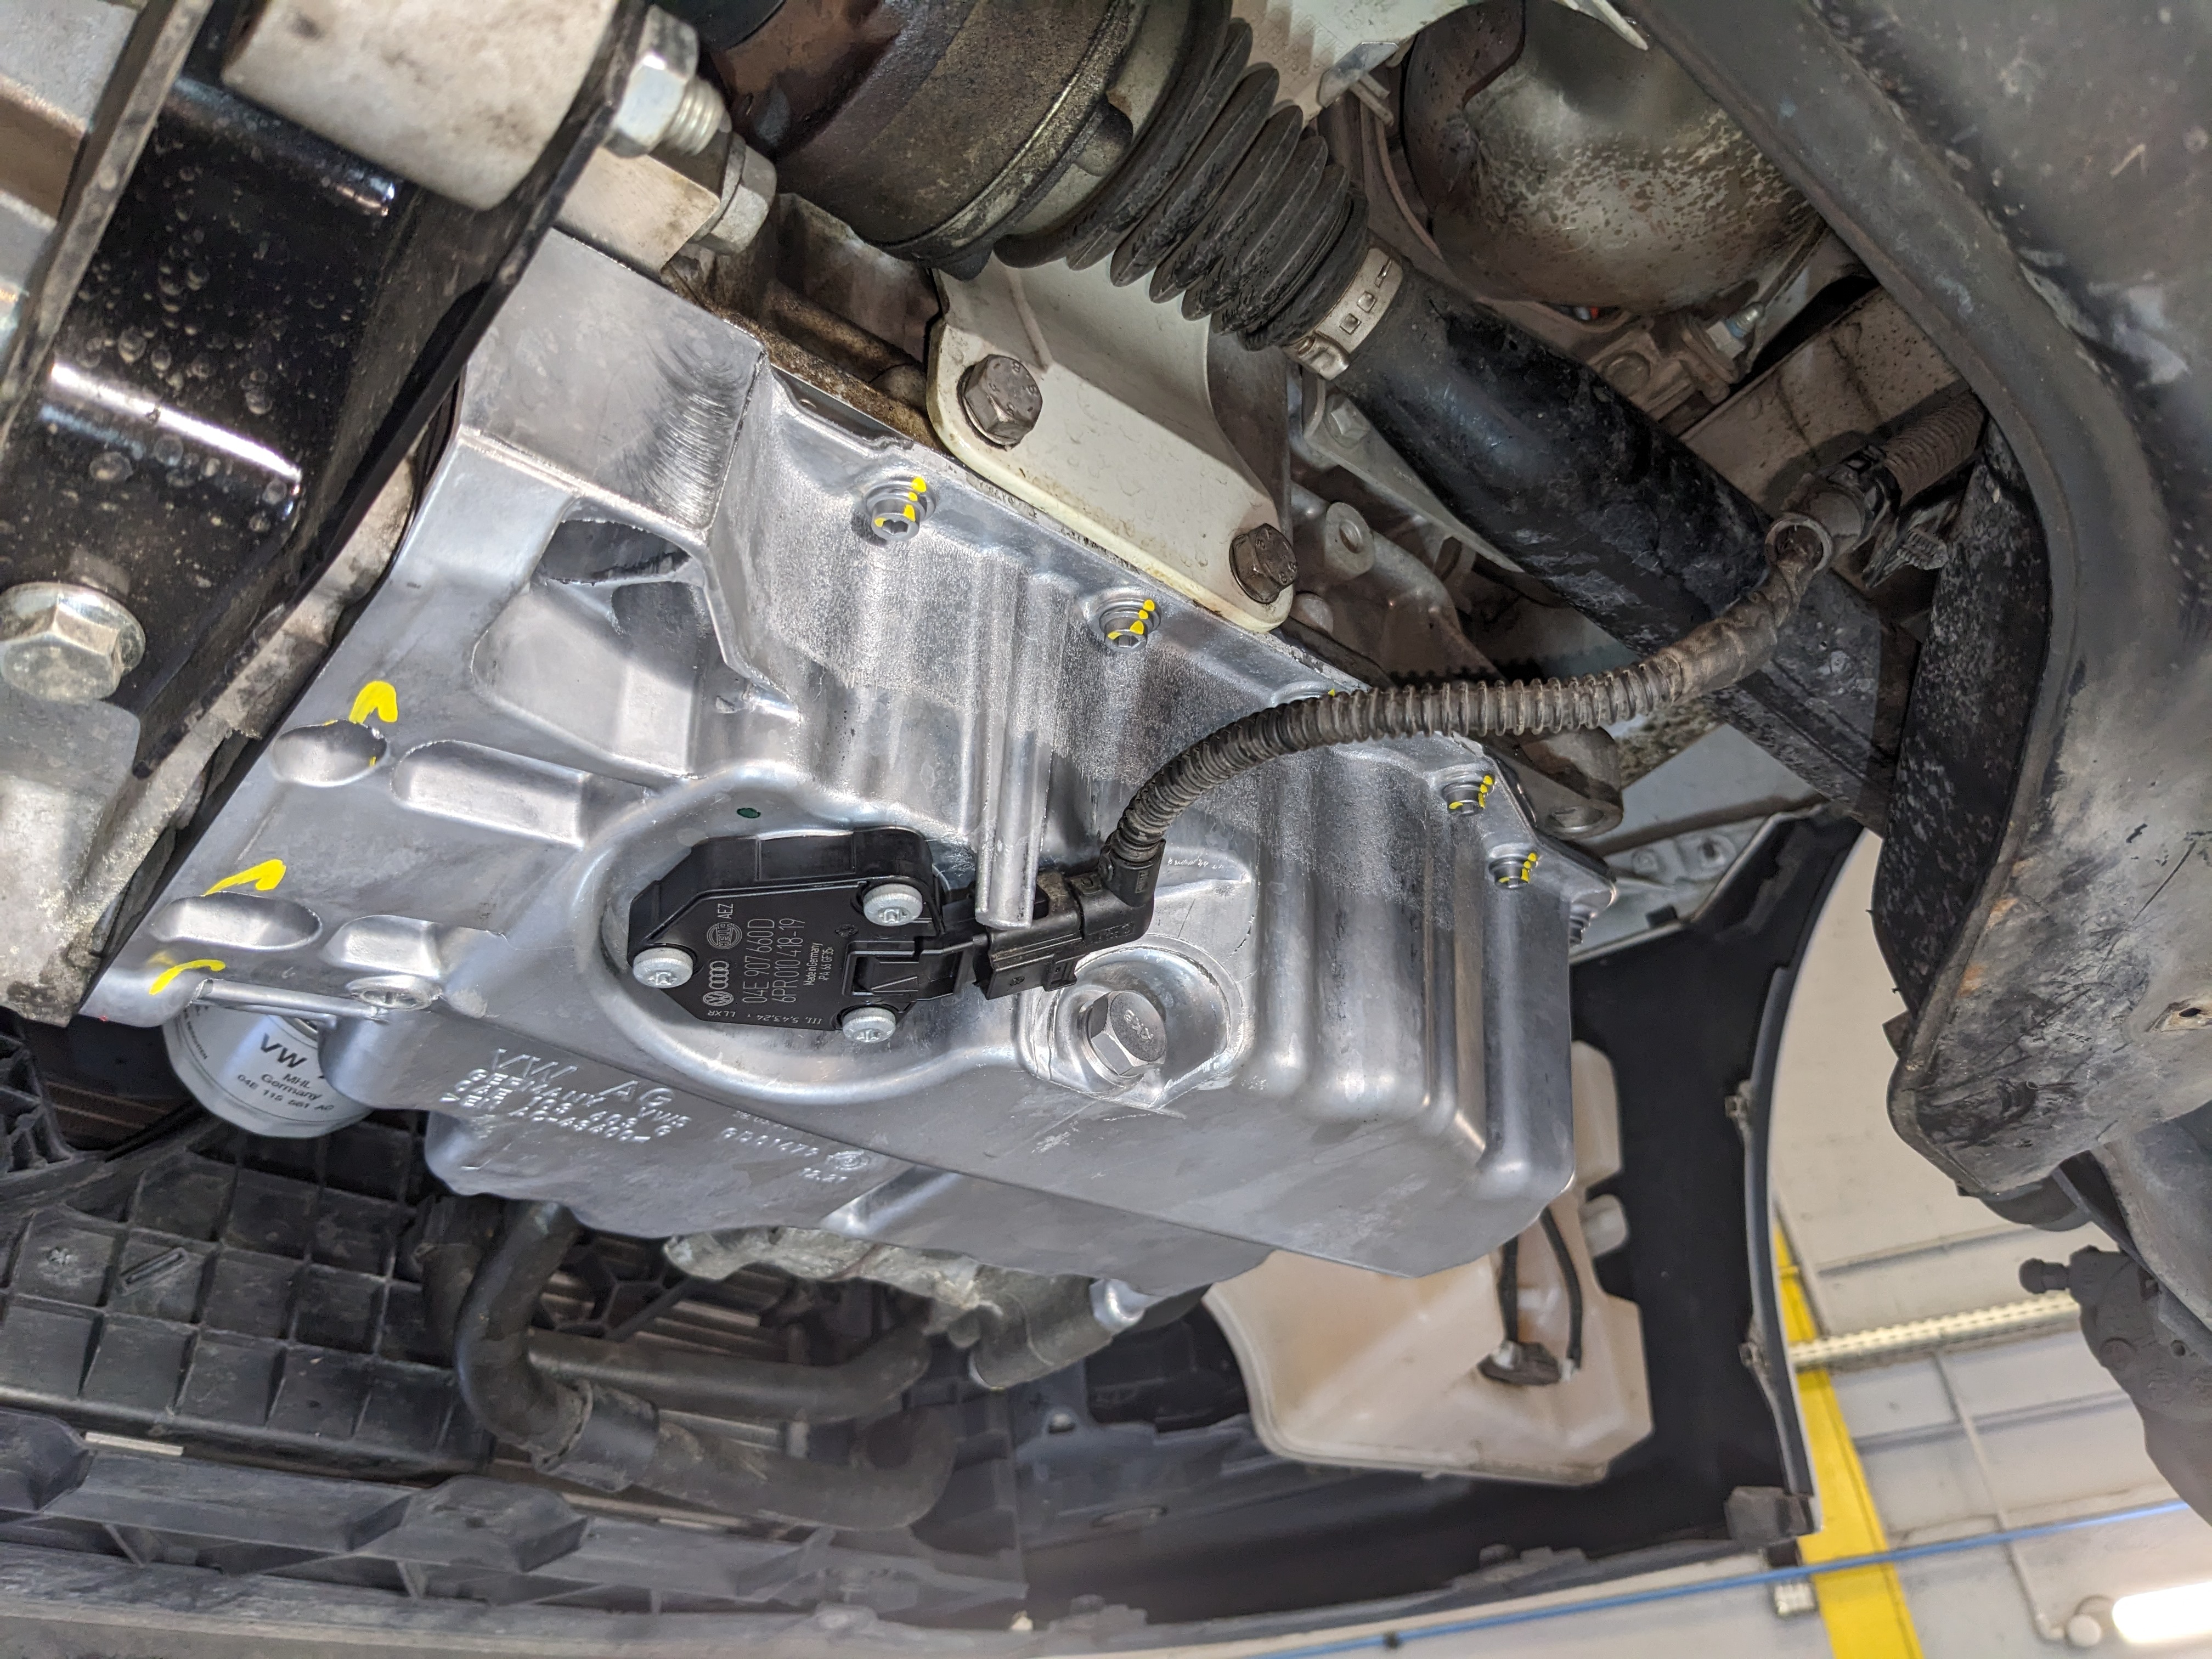
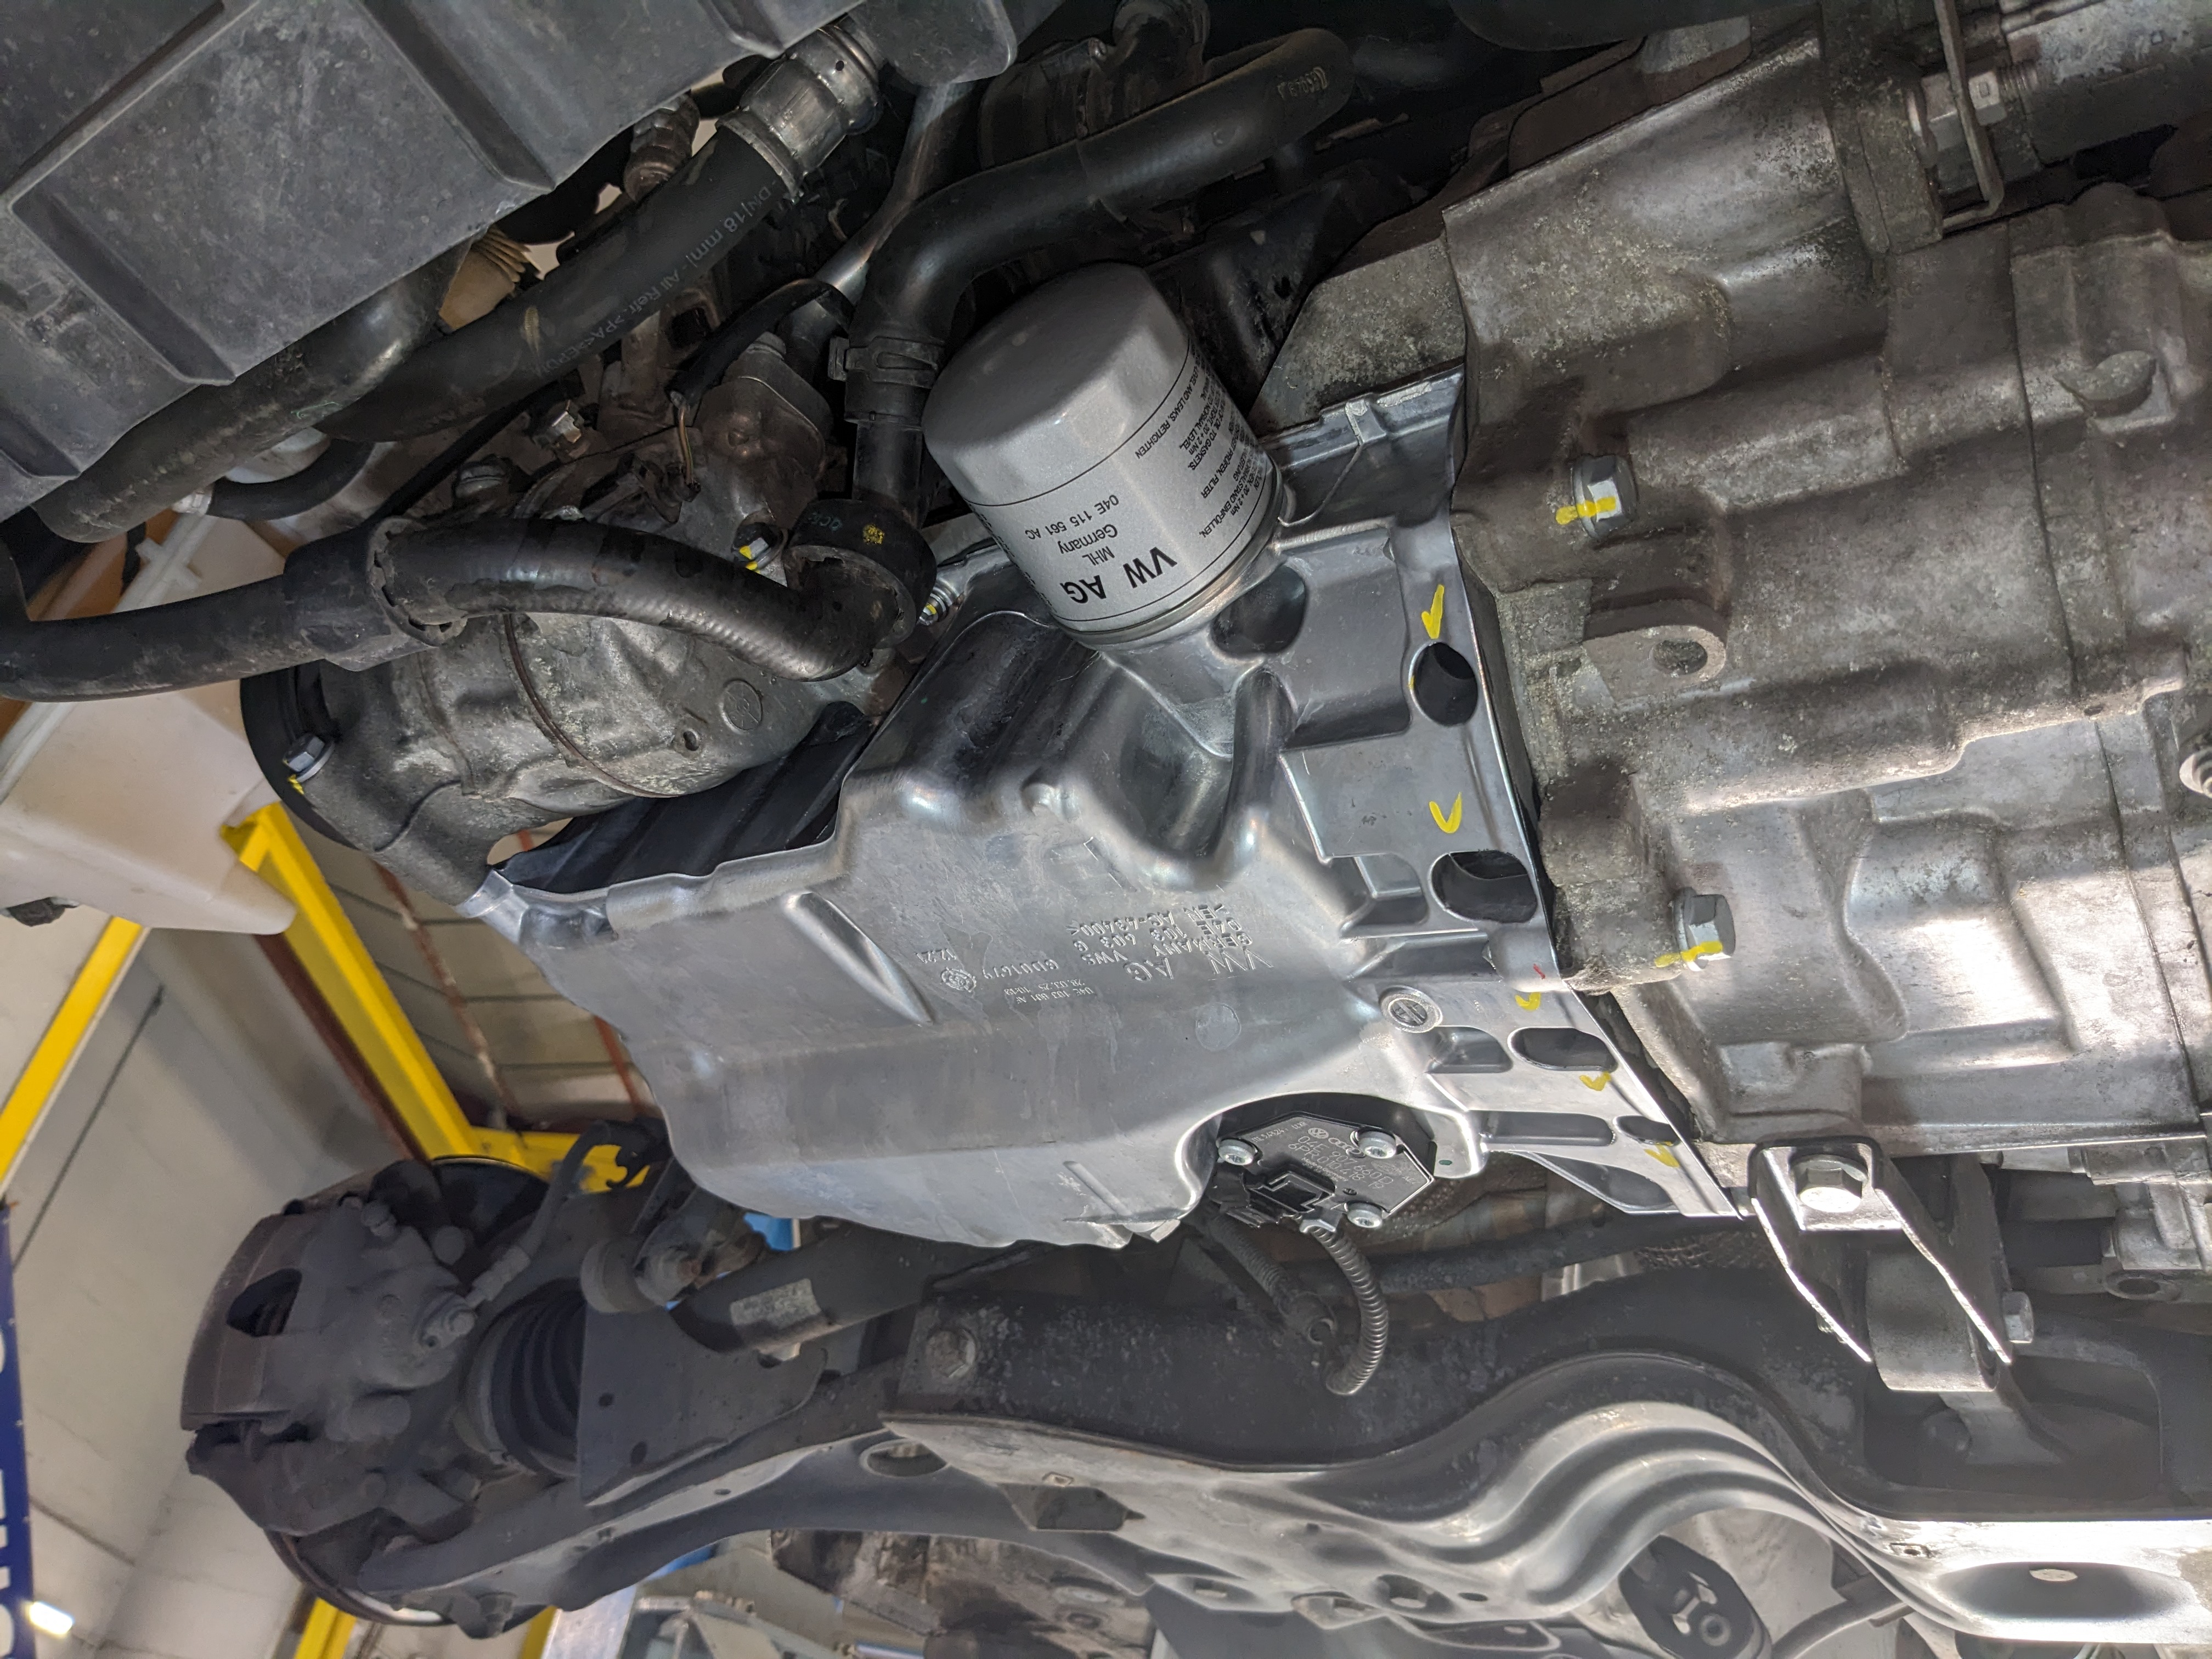
Final step: reassembly
  • Tightening the casing screws: 8Nm + 90°
  • Tightening the gearbox screws: 40Nm
  • Tightening the air conditioning compressor screws: 25Nm-+2Nm
They didn't cause any problems. Angle thightening was good and apart from one (oil pan screw: when tightening at an angle, it feels a little bit off), the feeling was good. No impression of stripping all the threads with each tightening.
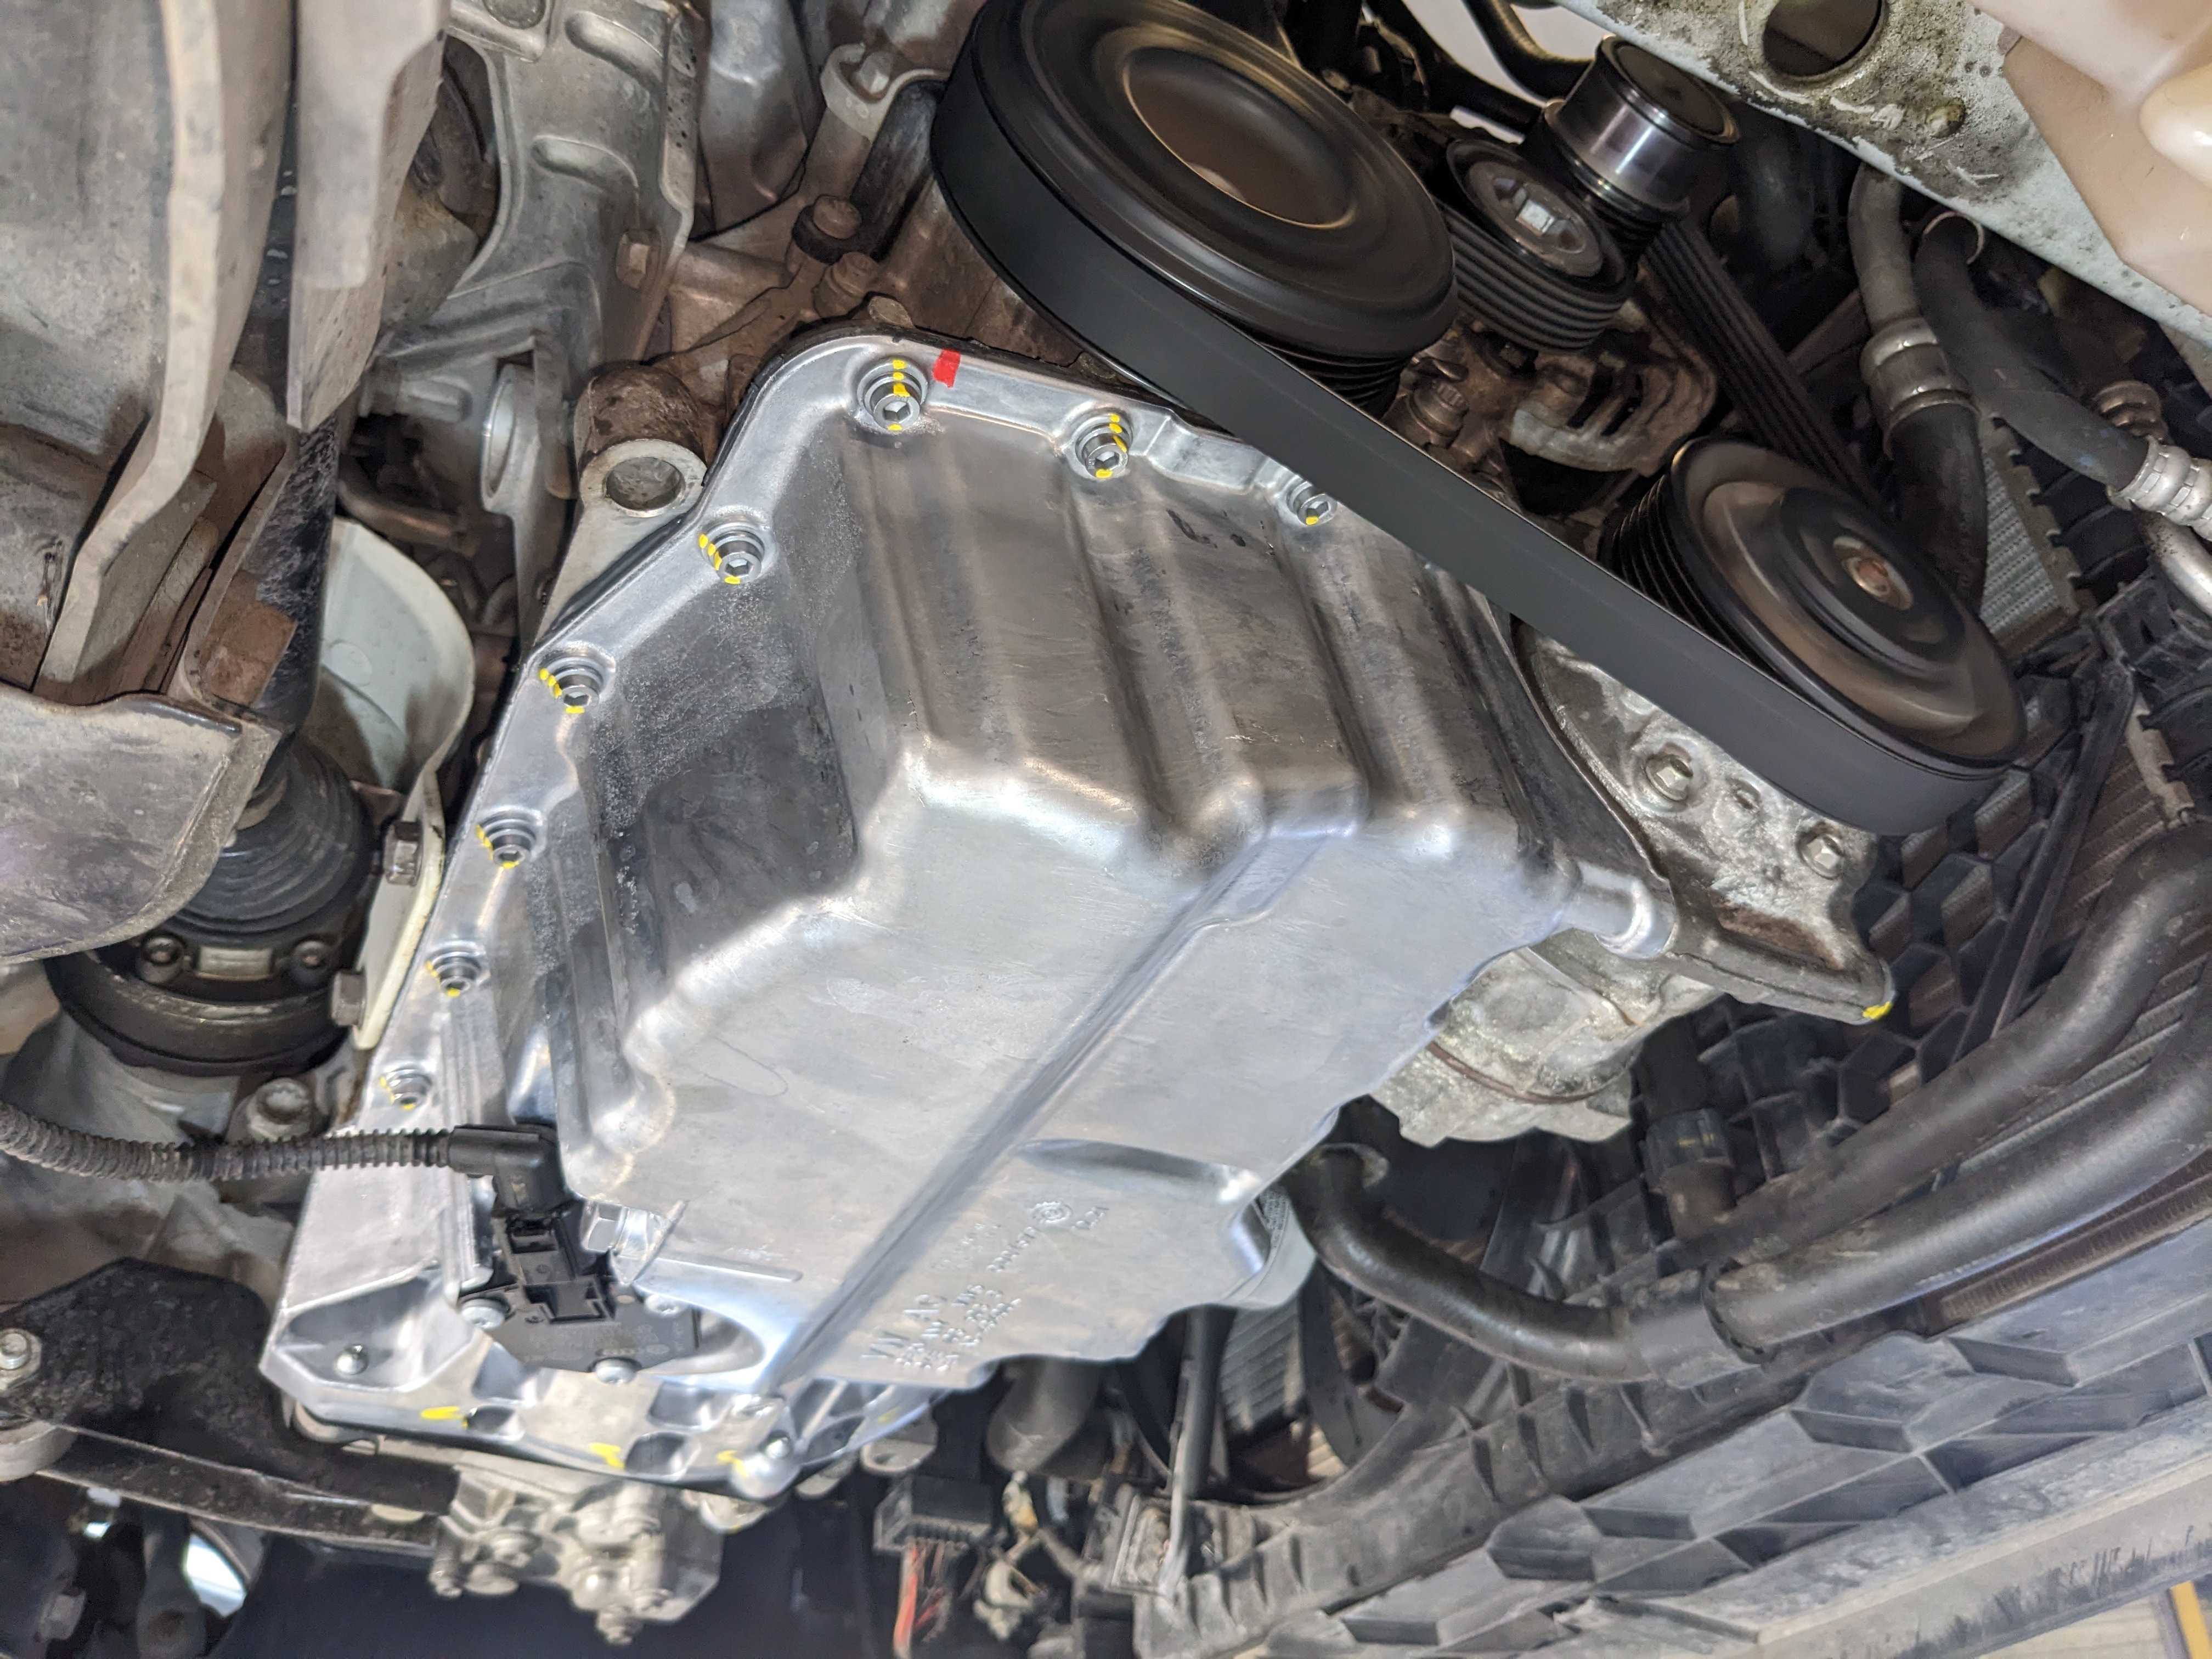
PXL_20250929_152620924.jpg
PXL_20250929_152620924.jpg (2.91 MiB) Viewed 1180 times
PXL_20250929_152613308.jpg
PXL_20250929_152613308.jpg (2.97 MiB) Viewed 1180 times
PXL_20250929_152606499.jpg
PXL_20250929_152606499.jpg (2.78 MiB) Viewed 1180 times
Once again, I had doubts about the ability of the specific tool I had purchased to handle the tightening torque and angular tightening for two screws. But that wasn't the case at all; it was perfect.

In fact, two screws are quite off-centre in relation to the hole in the casing, and VW, to remedy this (without removing the box), offers the tool I posted a little earlier.

VW recommends a drying time of 30 minutes before refilling with oil (this may vary depending on temperature and humidity conditions).
To be on the safe side, we waited an hour...which is how long it took us to finish tightening the casing, reassembling the compressor and gearbox screws, plus a few other few things (inspections etc...).

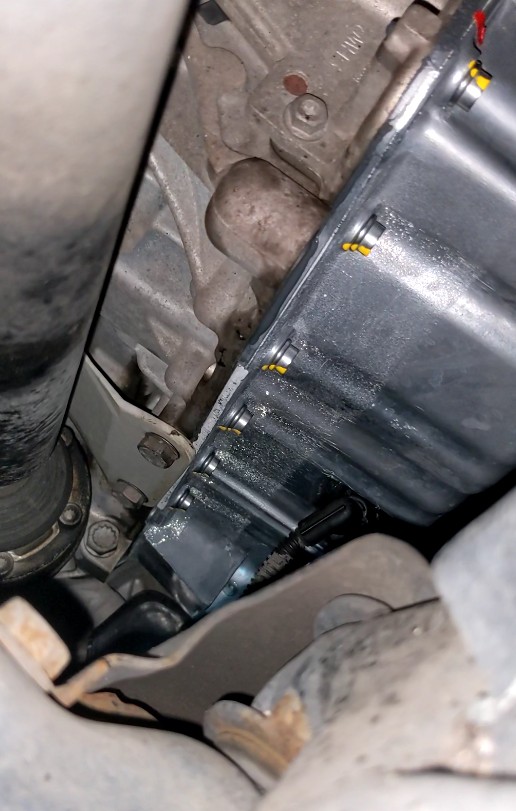
Fill with oil and start up. The car will have been running for 15 minutes: all clear.
No leaks.

Back home, I check under the car: all clear.
Capture d’écran 2025-09-29 211836.jpg
Capture d’écran 2025-09-29 211836.jpg (92.29 KiB) Viewed 1180 times
However, I notice that my oil temperature is higher than usual.
It was 17°C when I set off, and once warmed up, it was around 100-102°C on roads at 90 km/h, and at 130 km/h, it reached 108°C.

I'm used to driving it and I admit that it surprises me a little, no doubt because the new sensor has a different calibration. I'll check tomorrow with the VCDS when the engine is cold. The oil should have the same value as the outside temperature.

Conclusion:

Very pleased with myself, even though I could have done without this kind of work. After that, it allowed me to see the condition of my internals and the small size of the crankshaft: a toy :roll:

No false notes except for the gasket (it could have been better), a screw that didn't feel quite right when tightening it, and the fact that the firewall is poorly fitted. But I'm probably just being paranoid.

See you at 200,000 km, hopefully with the timing belt.
RUM4MO
Bling Bling Diamond Member
Posts: 6077
Joined: Sat Dec 30, 2006 9:12 pm
Drives: B8 S4 & 6R/6C1 1.2TSI 110
Location: Mid Lothian

Re: Polo 6C 1.2 TSI Oil sump drain plug strip

Post by RUM4MO »

Good result!

I see that you used a couple of lengths of threaded rod to use as positioning dowels instead of cutting the heads of a couple of bolts.

Yellow paint touch up pencils, yes, ideal for marking torqued bolts and the "target" position after applying the angle tightening - I've had to buy my second yellow paint touch up pencil due to the first one now being too old and being tricky to open!
User avatar
Le_Combattant
Gold Member
Posts: 511
Joined: Sun Mar 07, 2021 4:04 pm
Drives: Polo 6C 1.2 TSI 90 Cup
Location: France

Re: Polo 6C 1.2 TSI Oil sump drain plug strip

Post by Le_Combattant »

RUM4MO wrote: Tue Sep 30, 2025 1:55 pm Good result!

I see that you used a couple of lengths of threaded rod to use as positioning dowels instead of cutting the heads of a couple of bolts.

Yellow paint touch up pencils, yes, ideal for marking torqued bolts and the "target" position after applying the angle tightening - I've had to buy my second yellow paint touch up pencil due to the first one now being too old and being tricky to open!
I tried with rods but it's way better without. With you hand and the guide pins on the engine block (one on the side) it's way better as you have to make a slight rotation to pass the oil pan in the gearbox hulll.
As soon I torqued the bolt, I put a yellow paint at 12'' to mark the position and, so I will know if one didn't received the +90°. Except the two in the gearbox, the pen was too big haha.

Final touch of yellow between the bolt and the assy to confirm the final installation.
RUM4MO
Bling Bling Diamond Member
Posts: 6077
Joined: Sat Dec 30, 2006 9:12 pm
Drives: B8 S4 & 6R/6C1 1.2TSI 110
Location: Mid Lothian

Re: Polo 6C 1.2 TSI Oil sump drain plug strip

Post by RUM4MO »

Ah, so long studs etc can't be used here due to needing to move the sump around slightly - very annoying.

I'm usually a bit concerned about using "ball ended" Allen keys or Allen key bit, as they are a compromise, but sometimes you just have to take a chance.
User avatar
Le_Combattant
Gold Member
Posts: 511
Joined: Sun Mar 07, 2021 4:04 pm
Drives: Polo 6C 1.2 TSI 90 Cup
Location: France

Re: Polo 6C 1.2 TSI Oil sump drain plug strip

Post by Le_Combattant »

RUM4MO wrote: Tue Sep 30, 2025 7:41 pm Ah, so long studs etc can't be used here due to needing to move the sump around slightly - very annoying.

I'm usually a bit concerned about using "ball ended" Allen keys or Allen key bit, as they are a compromise, but sometimes you just have to take a chance.
I had the same feeling about the ball ended Allen key but I took a nice brand to handle the job: Beta tools.

Metal is tough and handle well the torque but still, it's not a very pleasant feeling.
User avatar
ciclo
Bling Bling Diamond Member
Posts: 8862
Joined: Sun Feb 24, 2013 10:20 am
Drives: 6R'13/G7.5'19
Location: Earth ♥, Spain.
Contact:

Re: Polo 6C 1.2 TSI Oil sump drain plug strip

Post by ciclo »

I sincerely thank you for posting this elaborate work. 😎
Please let us know more about the new temperature sensor according to your observations. THANK YOU!👍
2226
Gold Member
Posts: 534
Joined: Fri Apr 12, 2019 9:35 pm
Drives: Cross Polo 1.2TSI 2017
Location: Cape Town, South Africa

Re: Polo 6C 1.2 TSI Oil sump drain plug strip

Post by 2226 »

Do those 2 sensor have different colour tops? Or did the old one just discolour in the sump?
User avatar
Le_Combattant
Gold Member
Posts: 511
Joined: Sun Mar 07, 2021 4:04 pm
Drives: Polo 6C 1.2 TSI 90 Cup
Location: France

Re: Polo 6C 1.2 TSI Oil sump drain plug strip

Post by Le_Combattant »

2226 wrote: Tue Sep 30, 2025 9:49 pm Do those 2 sensor have different colour tops? Or did the old one just discolour in the sump?
Both are same part number so color variation is maybe about the oil, temp and age
User avatar
Le_Combattant
Gold Member
Posts: 511
Joined: Sun Mar 07, 2021 4:04 pm
Drives: Polo 6C 1.2 TSI 90 Cup
Location: France

Re: Polo 6C 1.2 TSI Oil sump drain plug strip

Post by Le_Combattant »

ciclo wrote: Tue Sep 30, 2025 8:37 pm I sincerely thank you for posting this elaborate work. 😎
Please let us know more about the new temperature sensor according to your observations. THANK YOU!👍
Your are welcome.

It's seems oil temp return back to almost normal values.
I will continue to monitor of course and gives you feedback
User avatar
iichel
Bling Bling Diamond Member
Posts: 6687
Joined: Fri Nov 14, 2014 2:14 pm
Drives: Polo 6R 2.0 TDI, Passat B8 2.0 TSI
Location: http://mypassat.nl/

Re: Polo 6C 1.2 TSI Oil sump drain plug strip

Post by iichel »

Great write-up. My compliments
Post Reply