Page 1 of 2
6n 16v front bumper smoothing, edit, step 5-9
Posted: Wed Jun 04, 2008 10:38 pm
by BIG4244
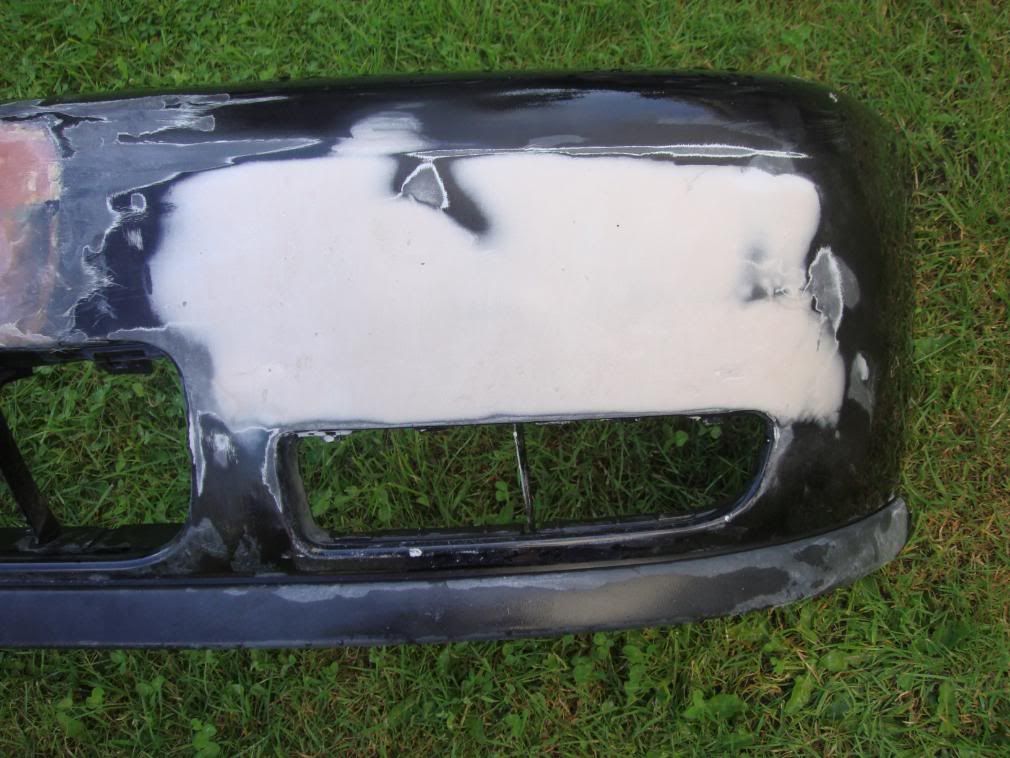
Well thought id make a guide for everyone who wants to smooth there bumpers, but doesnt want to pay bodyshop prices (A.K.A TIGHT) like me...
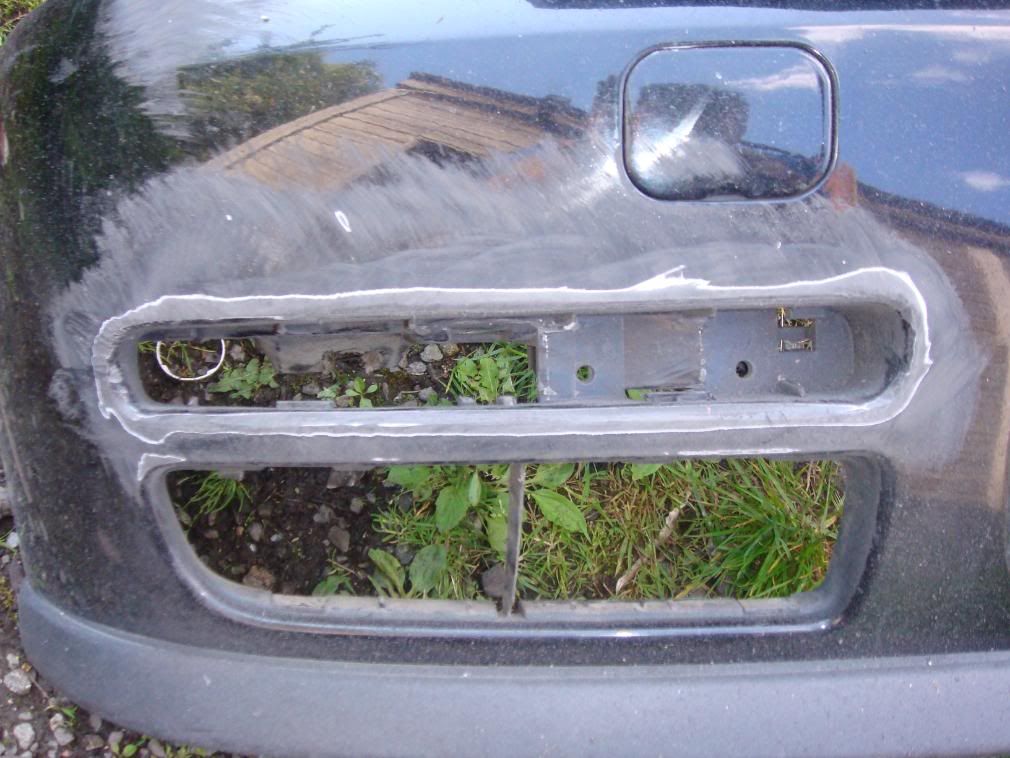
Step 1.
Remove front bumper, pretty easy, remove indicators, grill, 2x torx screws under the grill, then remove the centre lowere grill, 2 more screws, then the 2 outer grills, 1 screw behind each, and finaly, 2 or 3 screws each side on the wheel liners
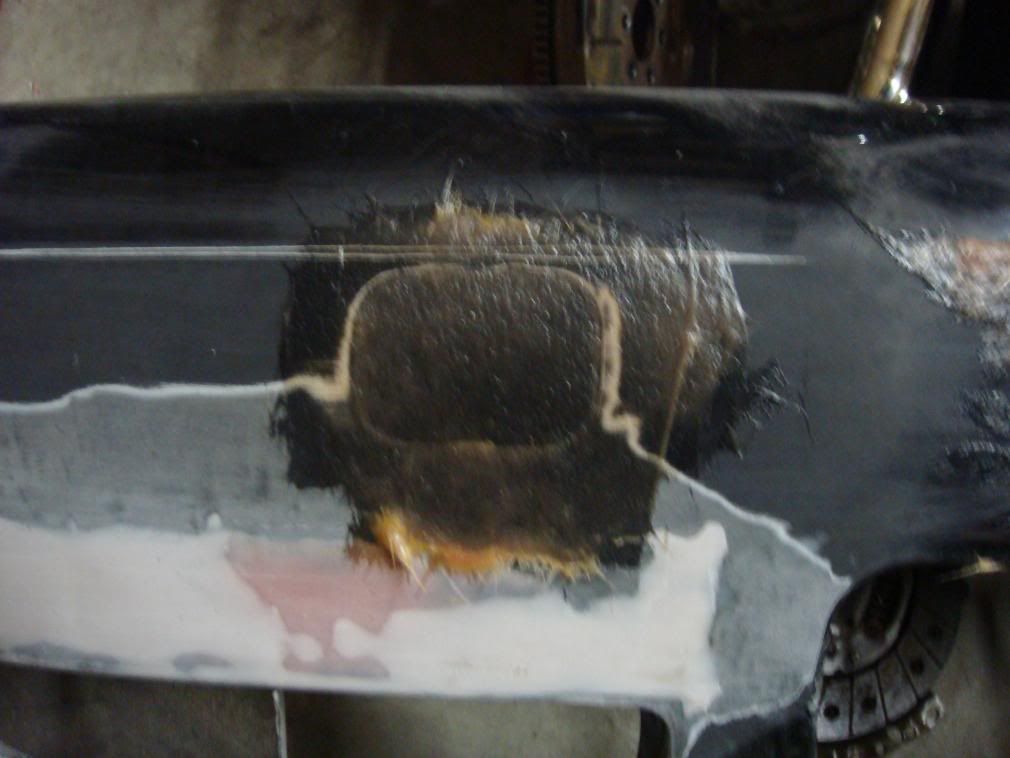
Step 2.
Sand paint around area to be filled, I'm doing it by plastic welding pieces of an old 8v bumper with a soldering iron, cut the pices so there tight in the hole, and recess them back abit so you can fill it, the welding technique requires abit of practice, but pretty simple
Step 3.
All filled in and part sanded a little
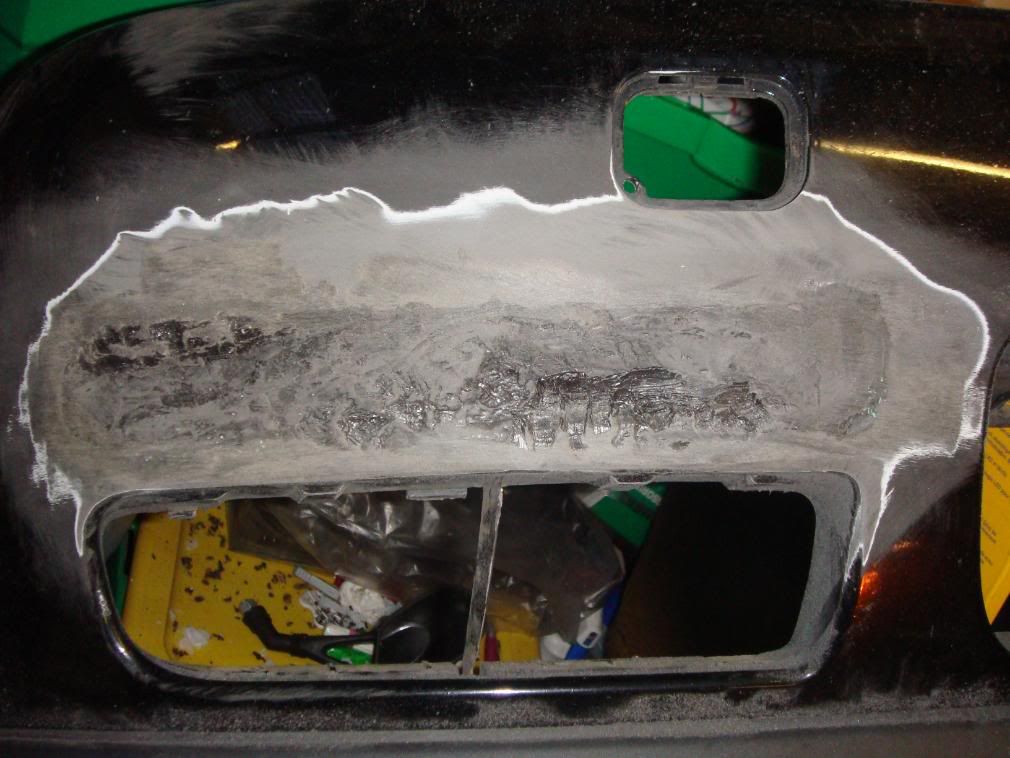
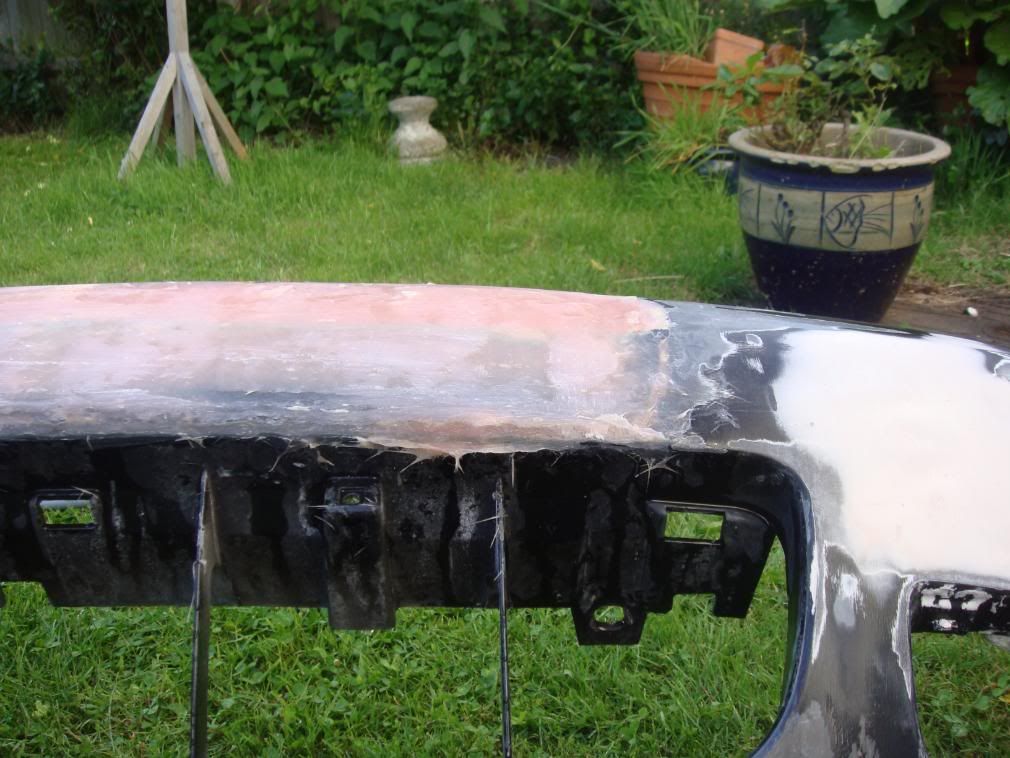
Step 4.
Sanded further and then a light coat off fiberglass filler to fill the big gaps
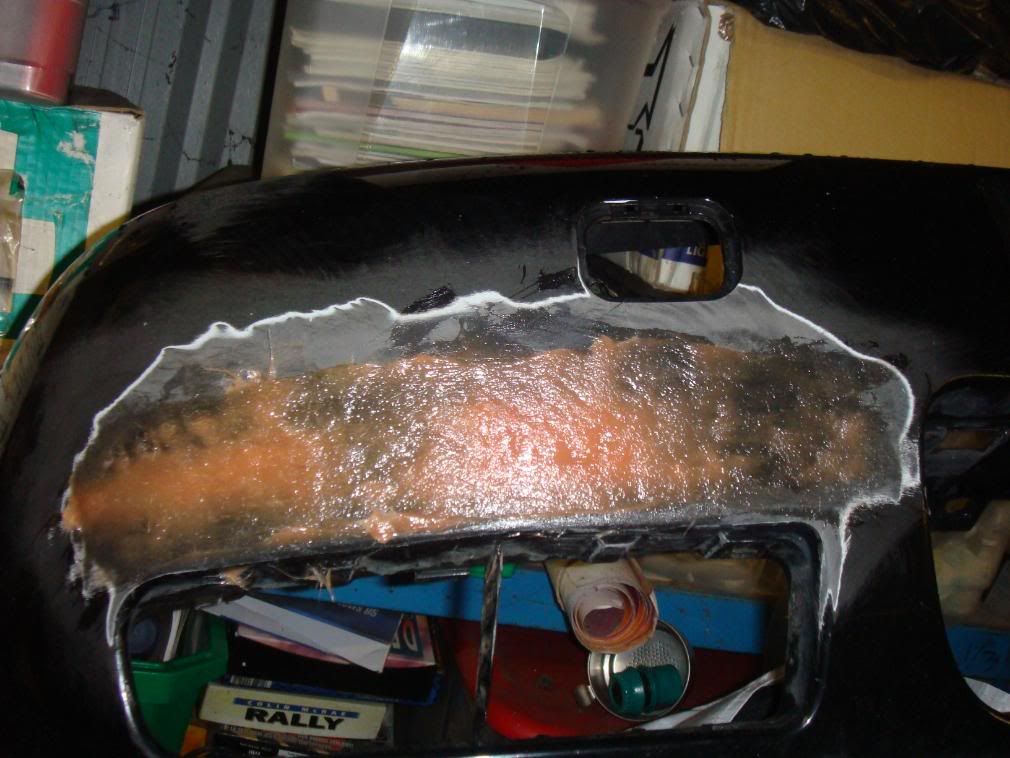
Step 5.
Apply body filler
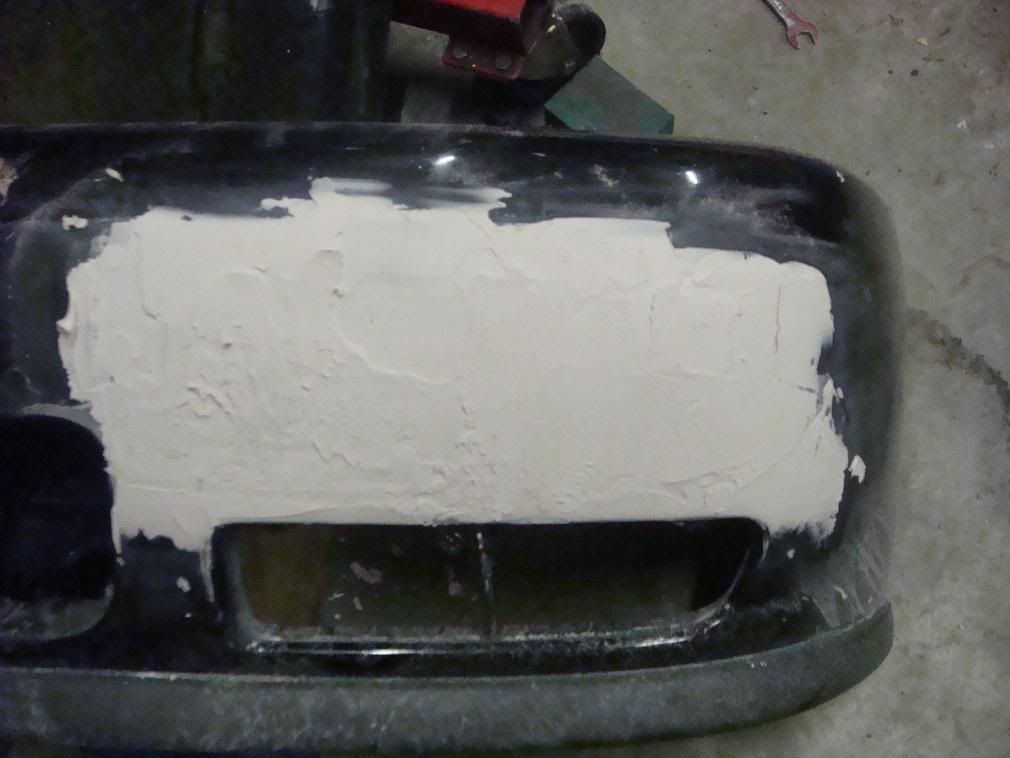
step 6.
Sand until smooth

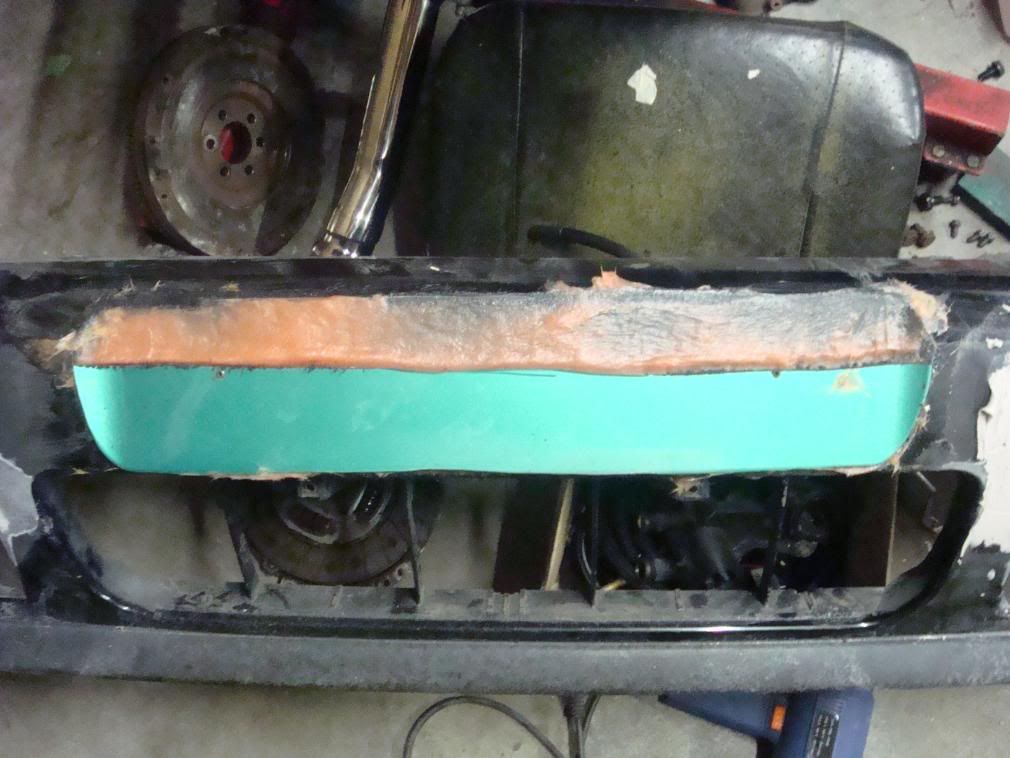
Step 7.
Plastic weld tow eye cover in place and slight skim of fibreglass
Step 8.
Key up recess, then apply thin layer of fibreglass filler, and push and rock plastic to fill number plate recces
Step 9.
Anothe thin coat of fibreglass ontop (after last coat has dried) of numberplate to fill rest
What do people think so far?
Posted: Thu Jun 05, 2008 12:18 am
by polo-sib
Brilliant guide so far, would like abit more detail between stages two and three. Such as:

How did you cut the old pieces (did you cut bigger than sand/file down)
Did you then glue in?
How did you solder/weld it in more detail?
Did you use additional filler whilst welding/soldering?
Would like to see more as i got a recked 8v bumper and planning to switch to 16v later. But thumbs up

Posted: Thu Jun 05, 2008 2:01 am
by timmywills17
plz continue
Posted: Thu Jun 05, 2008 6:27 pm
by BIG4244
How did you cut the old pieces (did you cut bigger than sand/file down)
Used carboard and made a template, then just cut it out with a hacksaw, needed abit of filing
Did you then glue in?
no, just plastic weld
How did you solder/weld it in more detail?
its quite hard to explain, and takes a while to get started, but just rub the soldering iron on the 2 edges you want to join until they are 1, then let it cool, if you got holes, just use thin strips of plasti an fill in by melting it in
Did you use additional filler whilst welding/soldering?
no, just the welding, then fiberglass filler after it had hardened to fill big gaps, then tomo i can use a proper body filler to get it smoother still
Posted: Thu Jun 05, 2008 6:45 pm
by polo-sib
^^ Many thanks Big, can't wait to see more!
Are you going to smooth the toe-bar cap as well? If yes, is the toe bar itself removable? Many thanks again and in advance.
Posted: Wed Jun 18, 2008 8:14 pm
by BIG4244
BUMP, edited, addes step 5 through to 9
Posted: Wed Jun 18, 2008 9:23 pm
by polo-sib
Loving it all the way, I've got my 16v bumper coming tomorrow, a compressor and paint tools on the way as well so I'll be doing this. Many thanks.
I do have one question, is the toe bar removable or is it welded to the chassis?
Posted: Wed Jun 18, 2008 9:51 pm
by BIG4244
Cheers amte!, the cover just hides a thread that you screw the towing eye into so nothing to remove realy, but if you wanted to the threaded part is held on by 3 or 4 13mm bolts
Posted: Wed Jun 18, 2008 10:54 pm
by polo-sib
BIG4244 wrote:Cheers amte!, the cover just hides a thread that you screw the towing eye into so nothing to remove realy, but if you wanted to the threaded part is held on by 3 or 4 13mm bolts
Cheers,I was after the threaded bit, glad to know I can take it of. Should be taking that off too, noticed your located in Dartford. Work for beadles by any chance

Posted: Wed Jun 18, 2008 11:10 pm
by BIG4244
Yeah man, wanna leave though!
Posted: Thu Jun 19, 2008 9:49 am
by polo-sib
BIG4244 wrote:Yeah man, wanna leave though!
How come if you don't mind me asking?
My new 16v bumper should come today with my wing then I might pop down bexleyheath to find out how much paint I need and how much it'd cost. Should get cracking on my bumper soon just got to sort my work shed out as it looks like its been hit by a hurricane

Got a clue where I can find the paint number on the car or on a can? I got a can for the car which says "Black magic pearl effect" but can't find a paint numbers anywhere for it, as the paint suppliers say they prefer paint codes.
Posted: Thu Jun 19, 2008 9:58 am
by b-random
the paint code is located on the sticker inside the boot underneath the carpet
Posted: Thu Jun 19, 2008 10:10 am
by polo-sib
b-random wrote:the paint code is located on the sticker inside the boot underneath the carpet
Thanks turned out to be LC9Z
Posted: Thu Jun 26, 2008 7:33 pm
by jaycee
so to get this right does the 16 v bumper go straight on to the 8 v 6n ?
sorry if i sound stupid but i have to replace mine and if it fits i may consider the valver 1
cheers jamie
Posted: Thu Jun 26, 2008 10:16 pm
by polo-sib
jaycee wrote:so to get this right does the 16 v bumper go straight on to the 8 v 6n ?
sorry if i sound stupid but i have to replace mine and if it fits i may consider the valver 1
cheers jamie
Yep straight swap!