ag69 wrote: Thu Aug 04, 2022 8:17 am
fluidicjoySujoy --
finally after read only access on team-bhp -- I can say -- hi and i have been keeping a eye on your updates on your thread there.
Many tempting mods. With a lot of details shared.
Hello sir. I have gone through your thread on this forum a few times and you have made quite a lot of upgrades yourself.

iichel wrote: Thu Aug 04, 2022 9:59 am
Welcome with your excellent car and even more excellent upgrades. It's good to see that the cluster came with the coolant pre-heated and a bit of fuel so you can drive away safely directly after install.
Thank you for sharing and good luck with the future mods, keep us posted.
Thanks for the welcome
iichel! I'm a huge fan of your cars and have been in awe of your stylish and functional upgrades, from even before I joined the forum. Yes, turning the ignition during testing purged much needed fuel and coolant so I could drive back in lightning speed
 OEM Flip Camera
This is one of those unique VAG specific
quirks which I first saw on a Passat and on the Golf and really wanted to do on the Polo. Team-BHPian Graaja, who is also on UKPolo had done this on his car a few years back and shared it on Team-BHP and it is a very popular thread on the Indian forum. He was also kind enough to share the flip camera template so other could install the Flip Camera too.
Little did I know that it was master Ciclo who had shared the Flip Camera template with him and I only came to know about this when I got in touch with the master himself a few months later. However, the camera Graaja installed was an aftermarket flip-camera assembly. The Polo 6R to the best of my knowledge was never offered with a Reverse Camera from the factory, which is quite sad considering how popular the car is around the world. In India, almost every new budget car in 2020 had a decent helpful reverse camera but not the Polo 6R and so a usable Camera was definitely on the cards.
Most new Polo 6Rs being sold by the dealership were being offered
aftermarket cameras which needed Delay Timers, CAN-Decoders and what not to work with the stock RCD330 and R340 Head-Units being offered in our country. These cameras all sat in the rear bumper and were just
too LOW for the PoLOw. The Flip-Camera retrofit was no doubt known even then, but to the best of my estimation, only 1 in 500 owners was opting for a Flip Camera then. The sad part is, these after-market cameras had a low viewing angle, bad resolution and the cost was about $150, which was more than what an OEM Flip Camera retails for on Aliexpress. Because of these multiple reasons, I was not convinced to opt for a camera directly from the VW dealership, and so I ended up ordering the Flip Camera from Aliexpress and the seller even sent me an
OEM Drain Pipe with a grommet in the end.
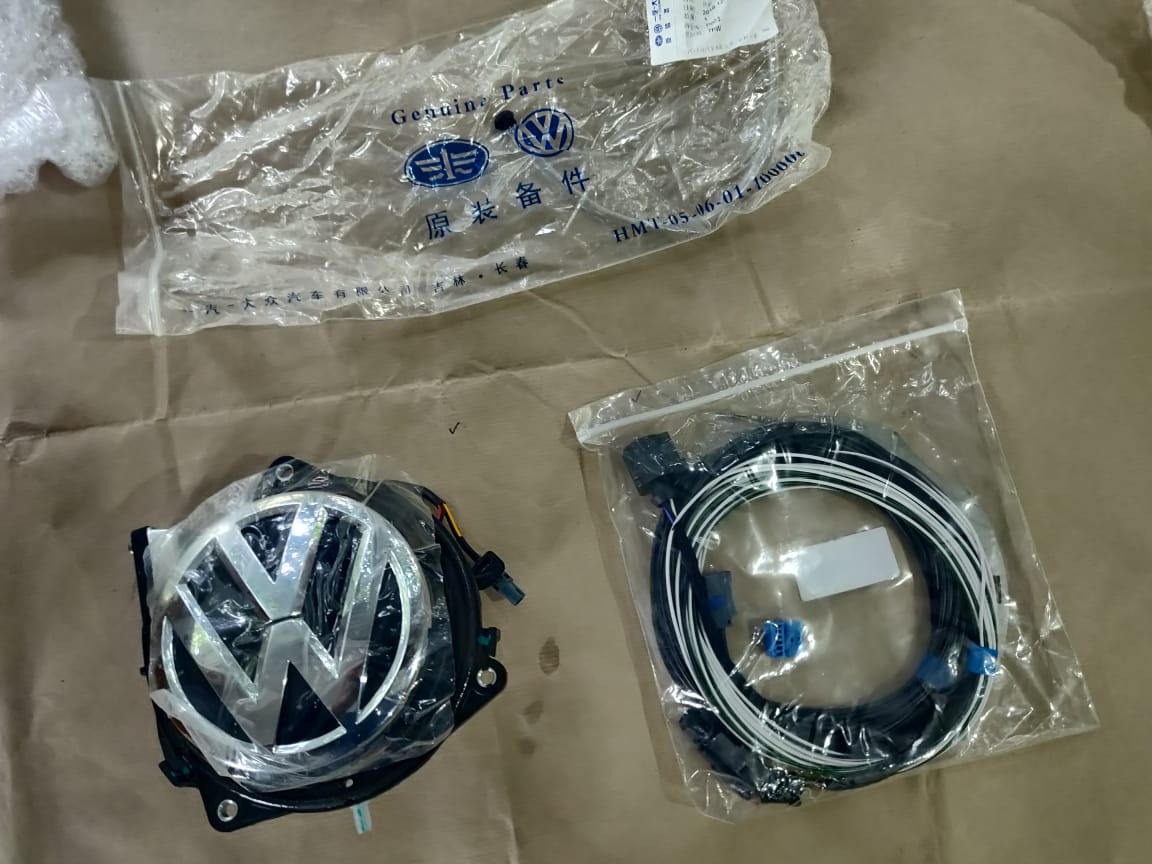
- Flip Camera Kit Overview.jpg (112.1 KiB) Viewed 5368 times
This camera needs a
mounting ring to match the stock holes on the Polo 6R.
Master Ciclo's Flip Camera guide which he made for the OEM camera he installed was quite helpful in the initial prep work for this installation. I used 2mm SS304 for cutting the camera ring, but a little thinner or thicker shouldn't harm as long as the screws are properly threaded in.
Aligning the logo to be straight is also a challenge, and even a little offset does most certainly trigger an OCD
Today, such a flip Camera is also available with the new style of Volkswagen logos which would be great to have, but I haven't had much luck with a newer front logo to match it.
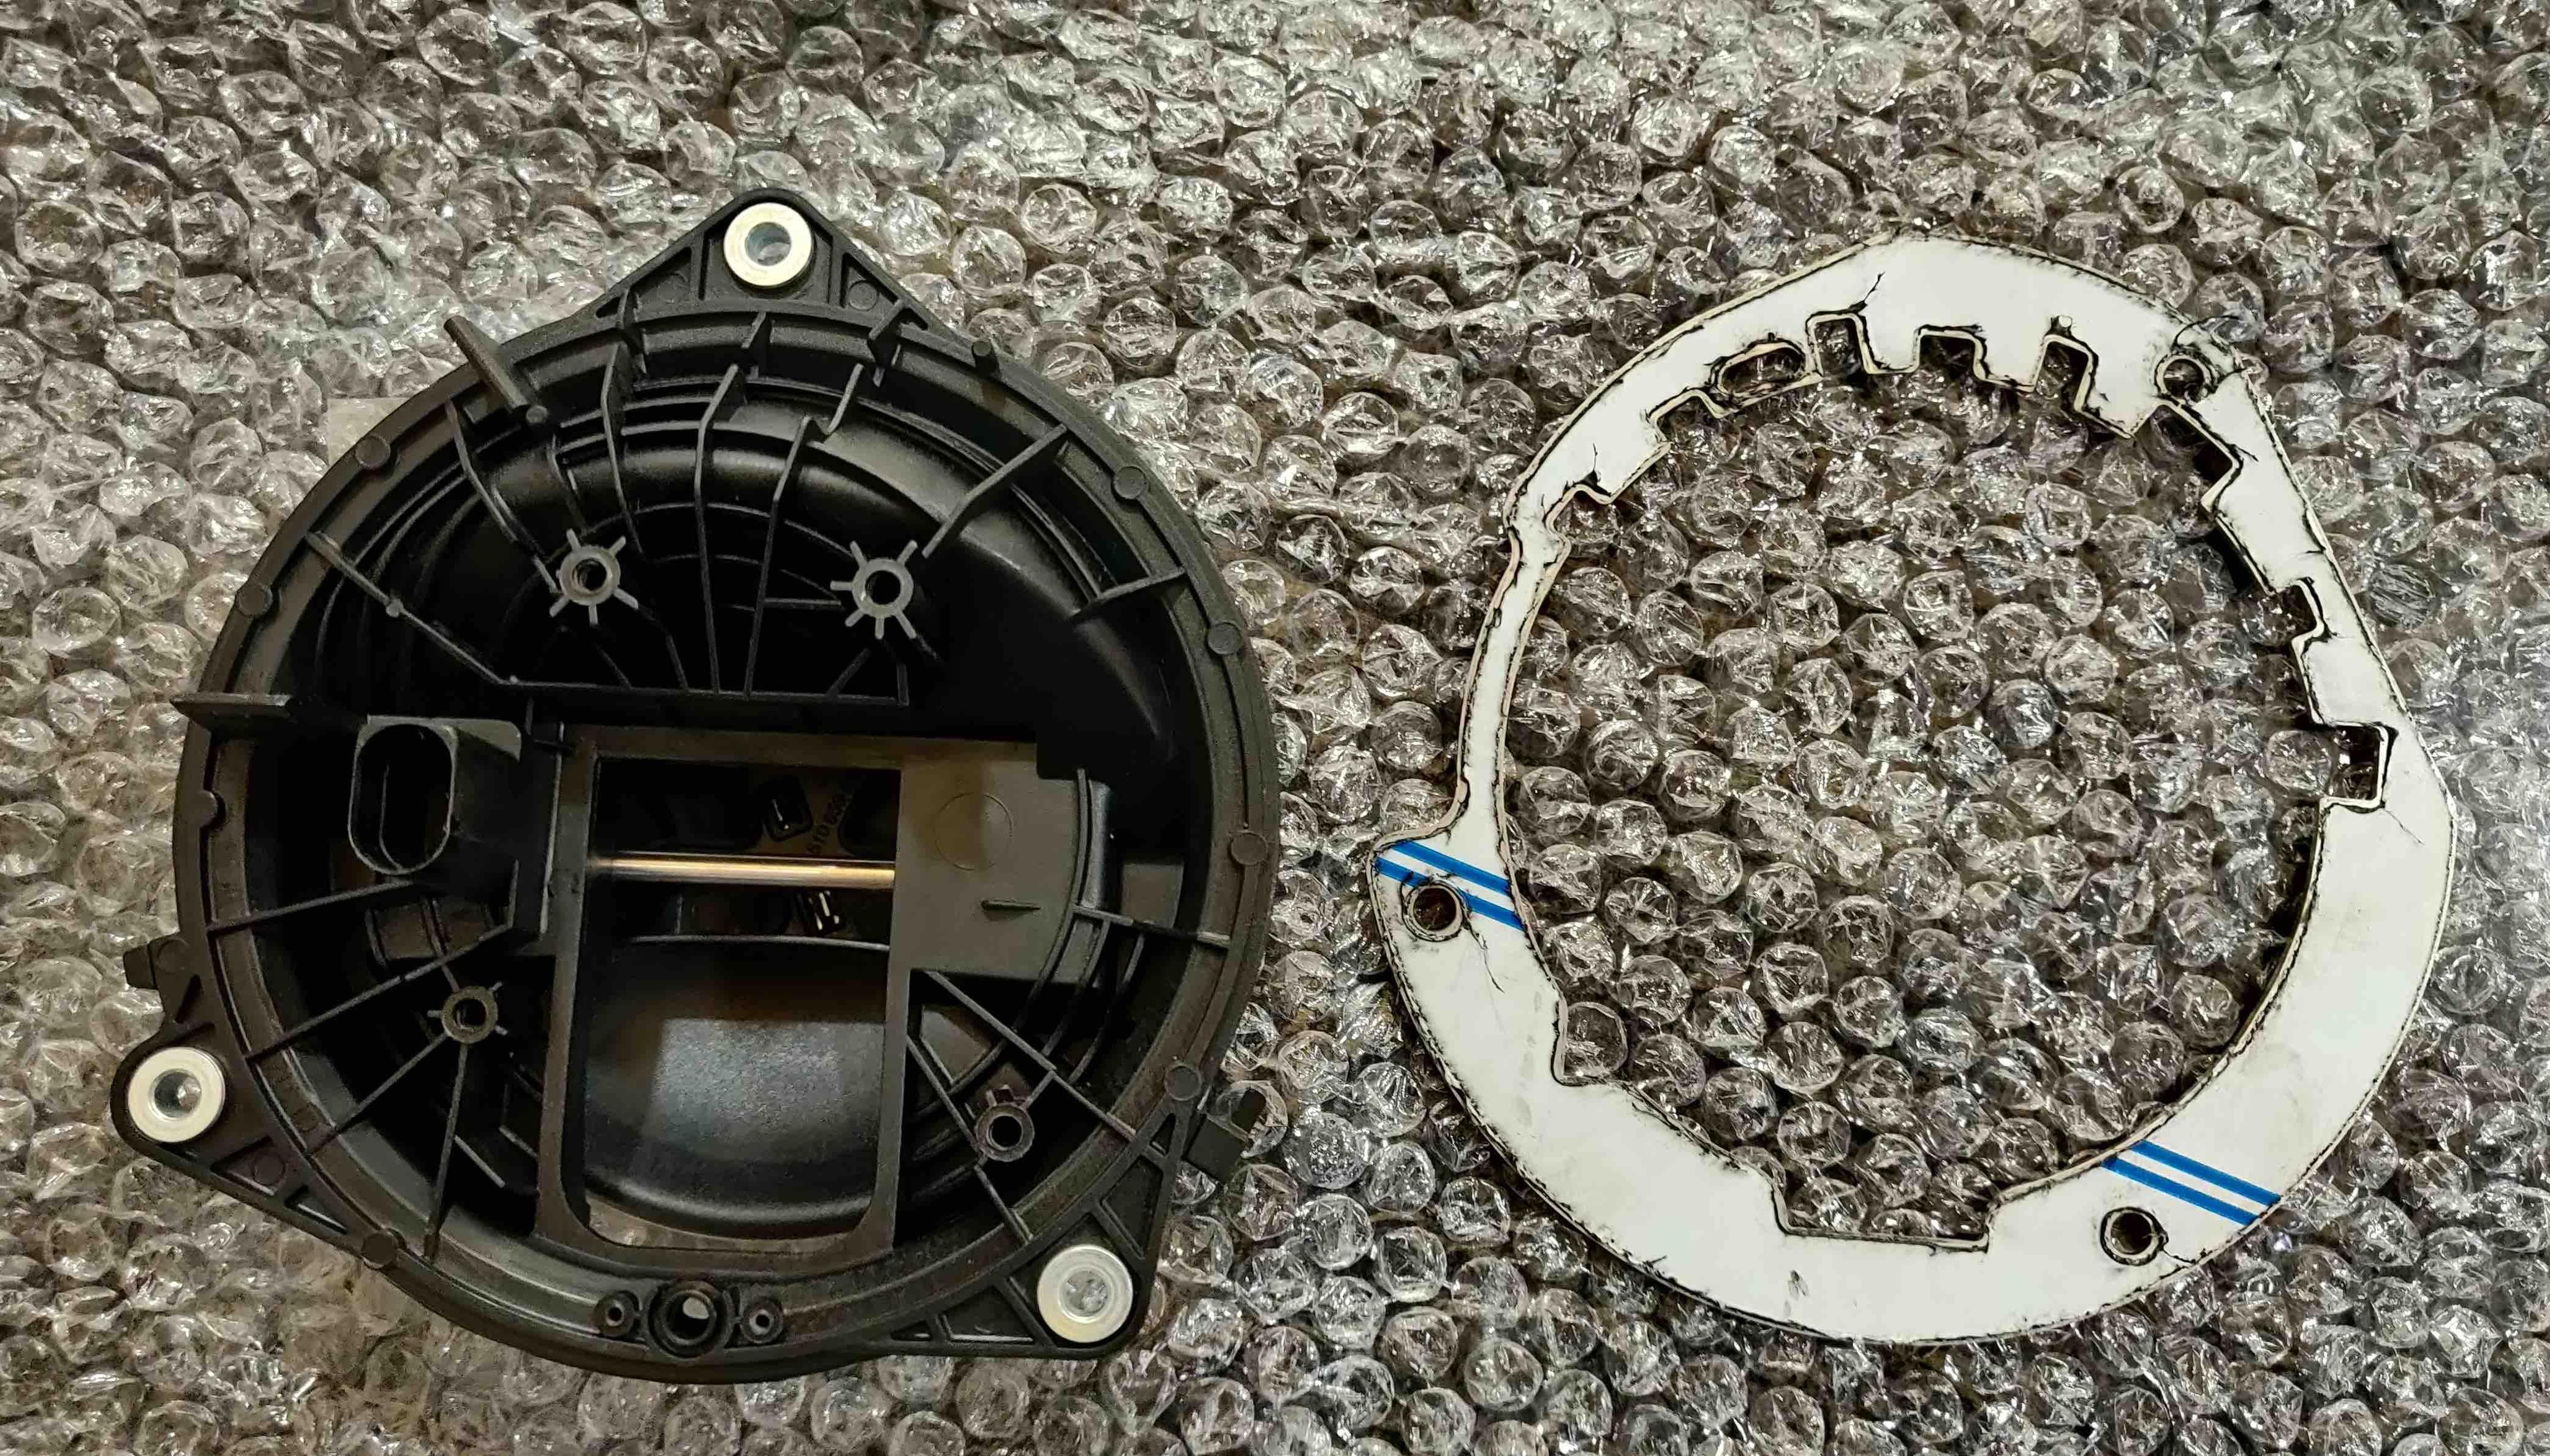
- Laser Cut Plate.jpg (1.55 MiB) Viewed 5368 times
So here's a quick
summary of the installation.
- Opening the boot trim.
- Removing the old emblem.
- Mounting the new flip camera.
- Routing wires to and from the hatch.
- Crimping and plugging in connectors and cables.
- Coding the Headunit.
- Testing all functions.
- Routing the drain pipe.
- Water leak testing the drain pipe.
- Putting everything back together.
Tools I used for the task:
- Torx T8 : Water Drain Pipe Bolts
- Torx T20, T25, T30 : VW Specific Bolts on the Body, Camera etc.
- Wire Strippers for clean wire ends.
- Electrical Connector Pin Removal Tools - Might help sometimes.
- Plastic Trim Tools
- Vaseline/Silicone Grease to make passing wires a simpler affair.
- Firm Wires/Fishing Wires to route cables through the car.
- Zip ties
- Tessa/ Insulation Tape for reinforcing harnesses
- Luster Terminals if you intend to avoid soldering for joints
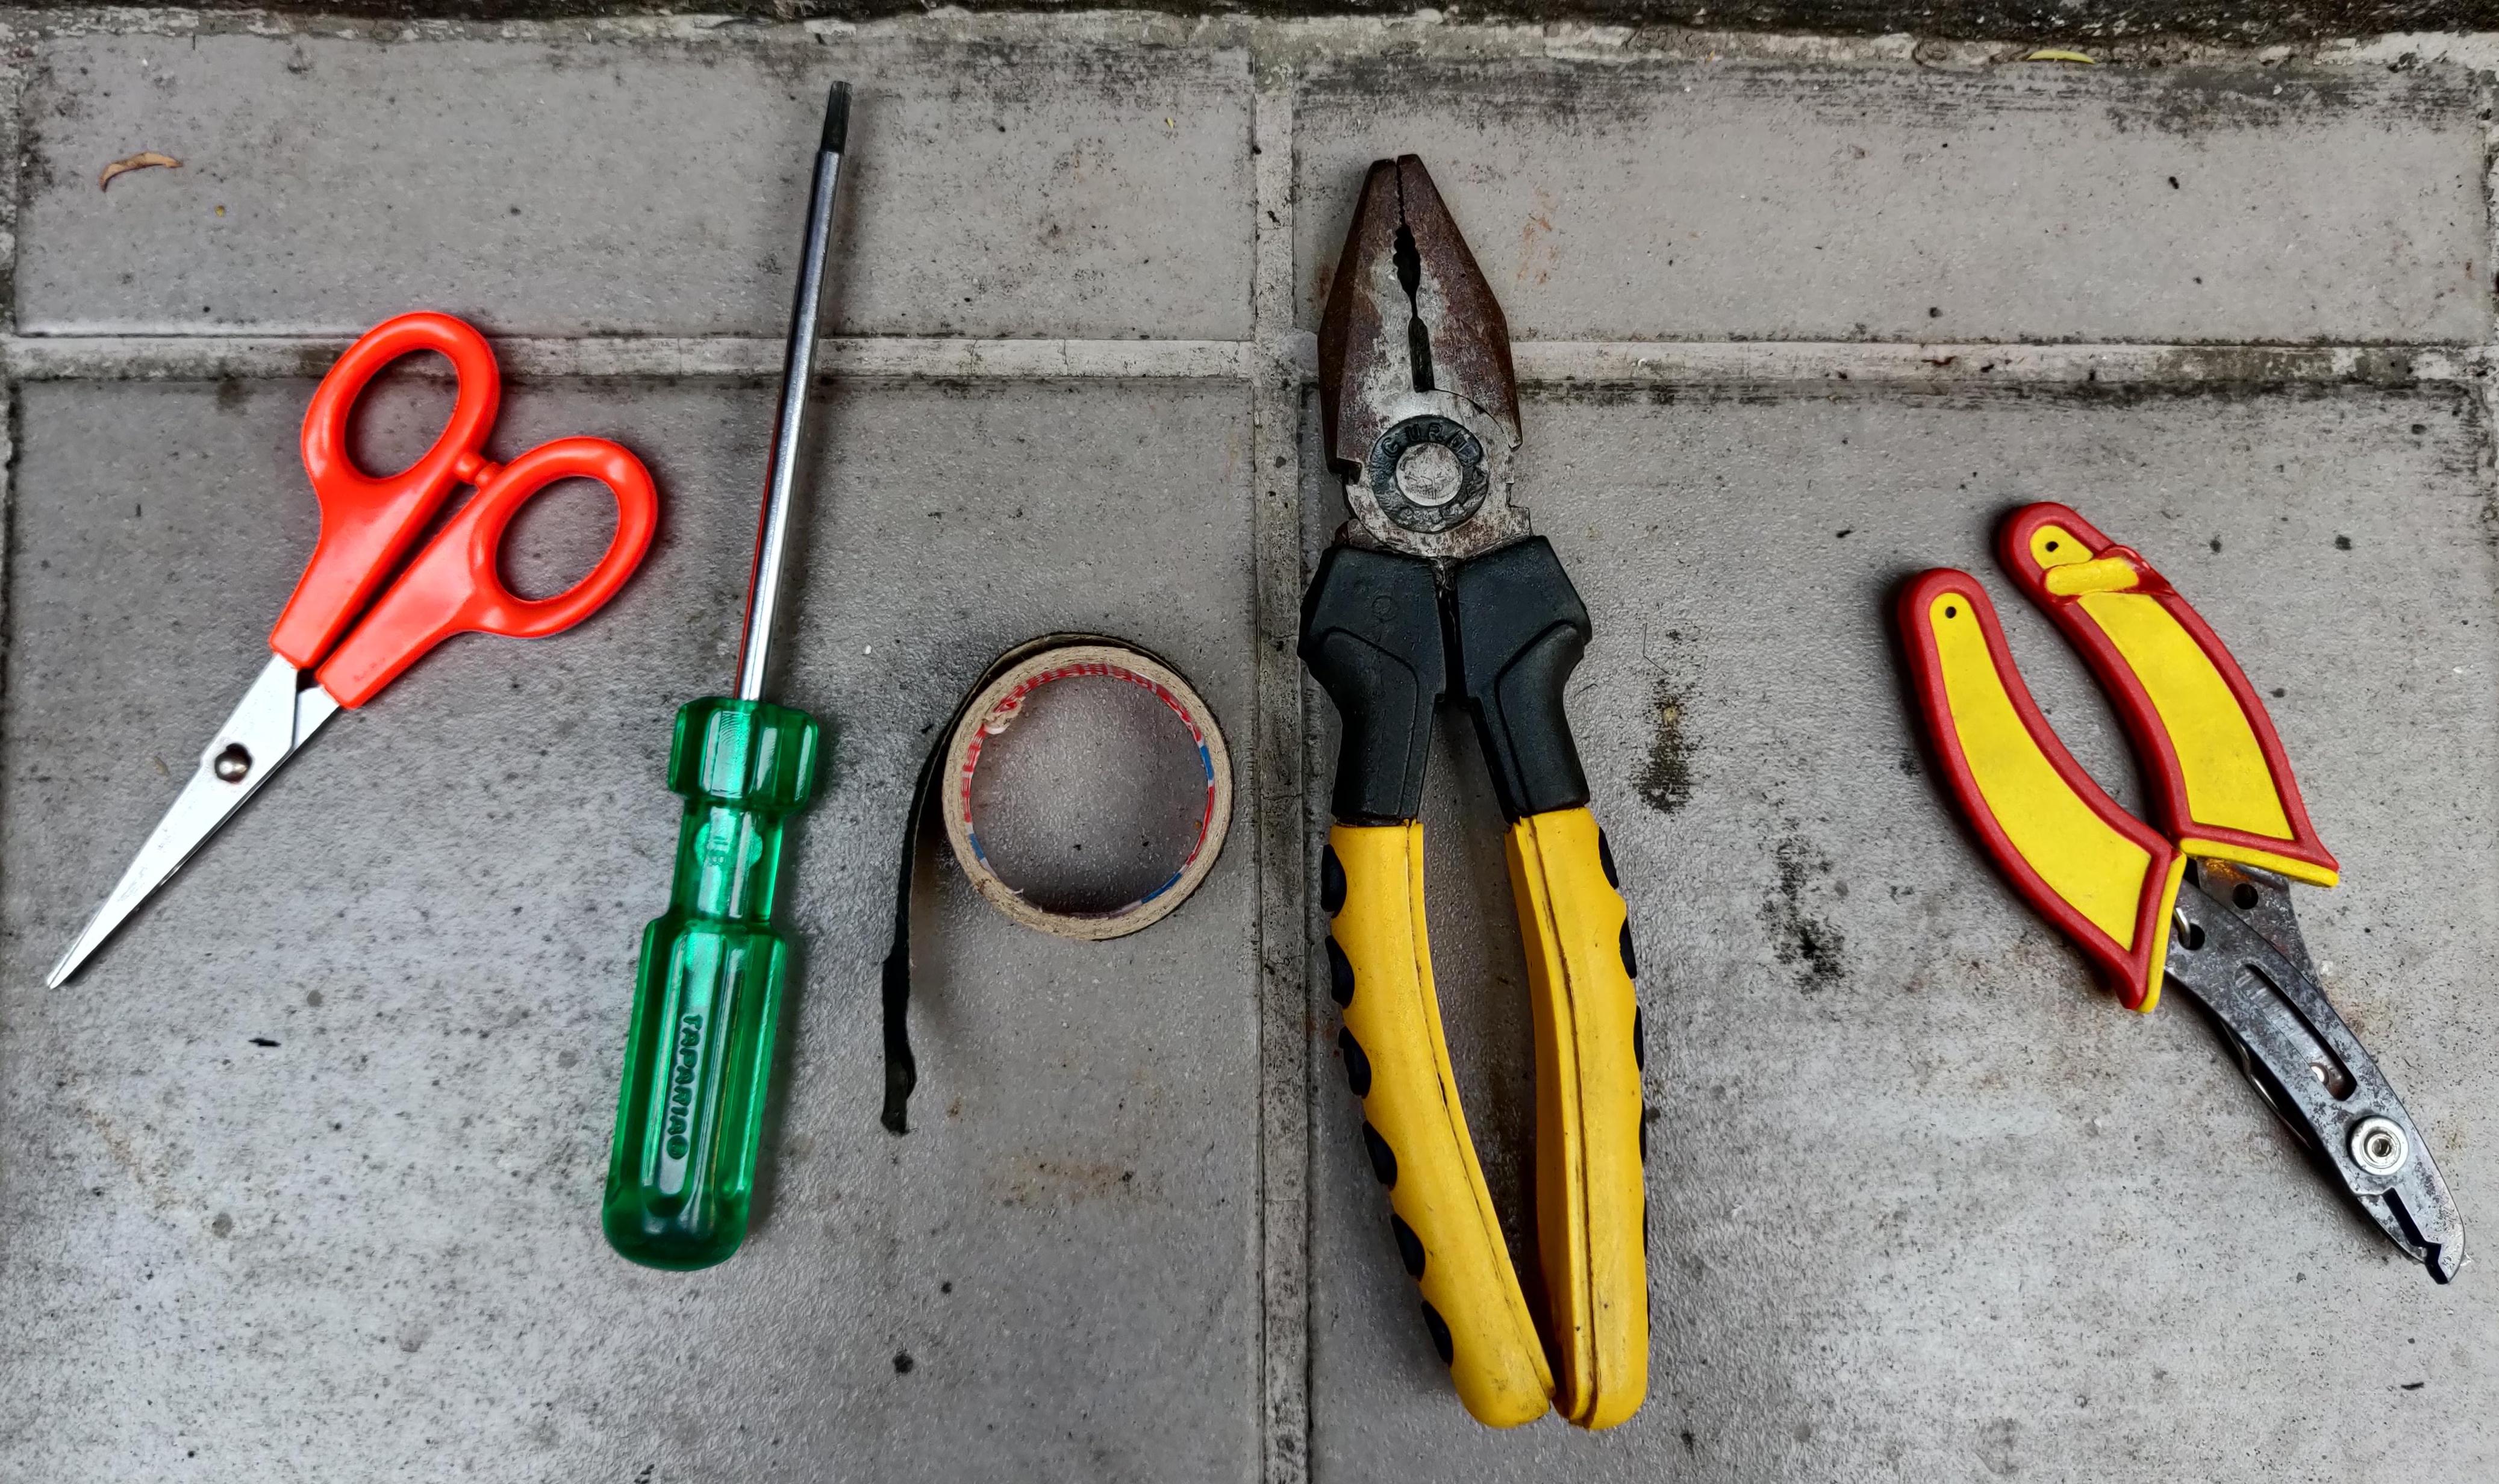
- Flip Camera Tools.jpg (1.38 MiB) Viewed 5368 times
- The Beginning.jpg (6.28 MiB) Viewed 5368 times
On taking out the hatch plastic trim which is held by two
T20 Torx screws, this is what the
stock boot release T2 connector looks like. This connector mates to a new T2 connector which makes this a plug and play fit.
- Boot Connector Connected.jpg (4.48 MiB) Viewed 5368 times
Routing The Wire
The wires need to be routed all the way ahead to the head-unit and one wire also goes to the Fuse Power. Making use of silicon
grease, and smartly opening a few tabs on the way is a good approach to smoothly route the wire into the car.
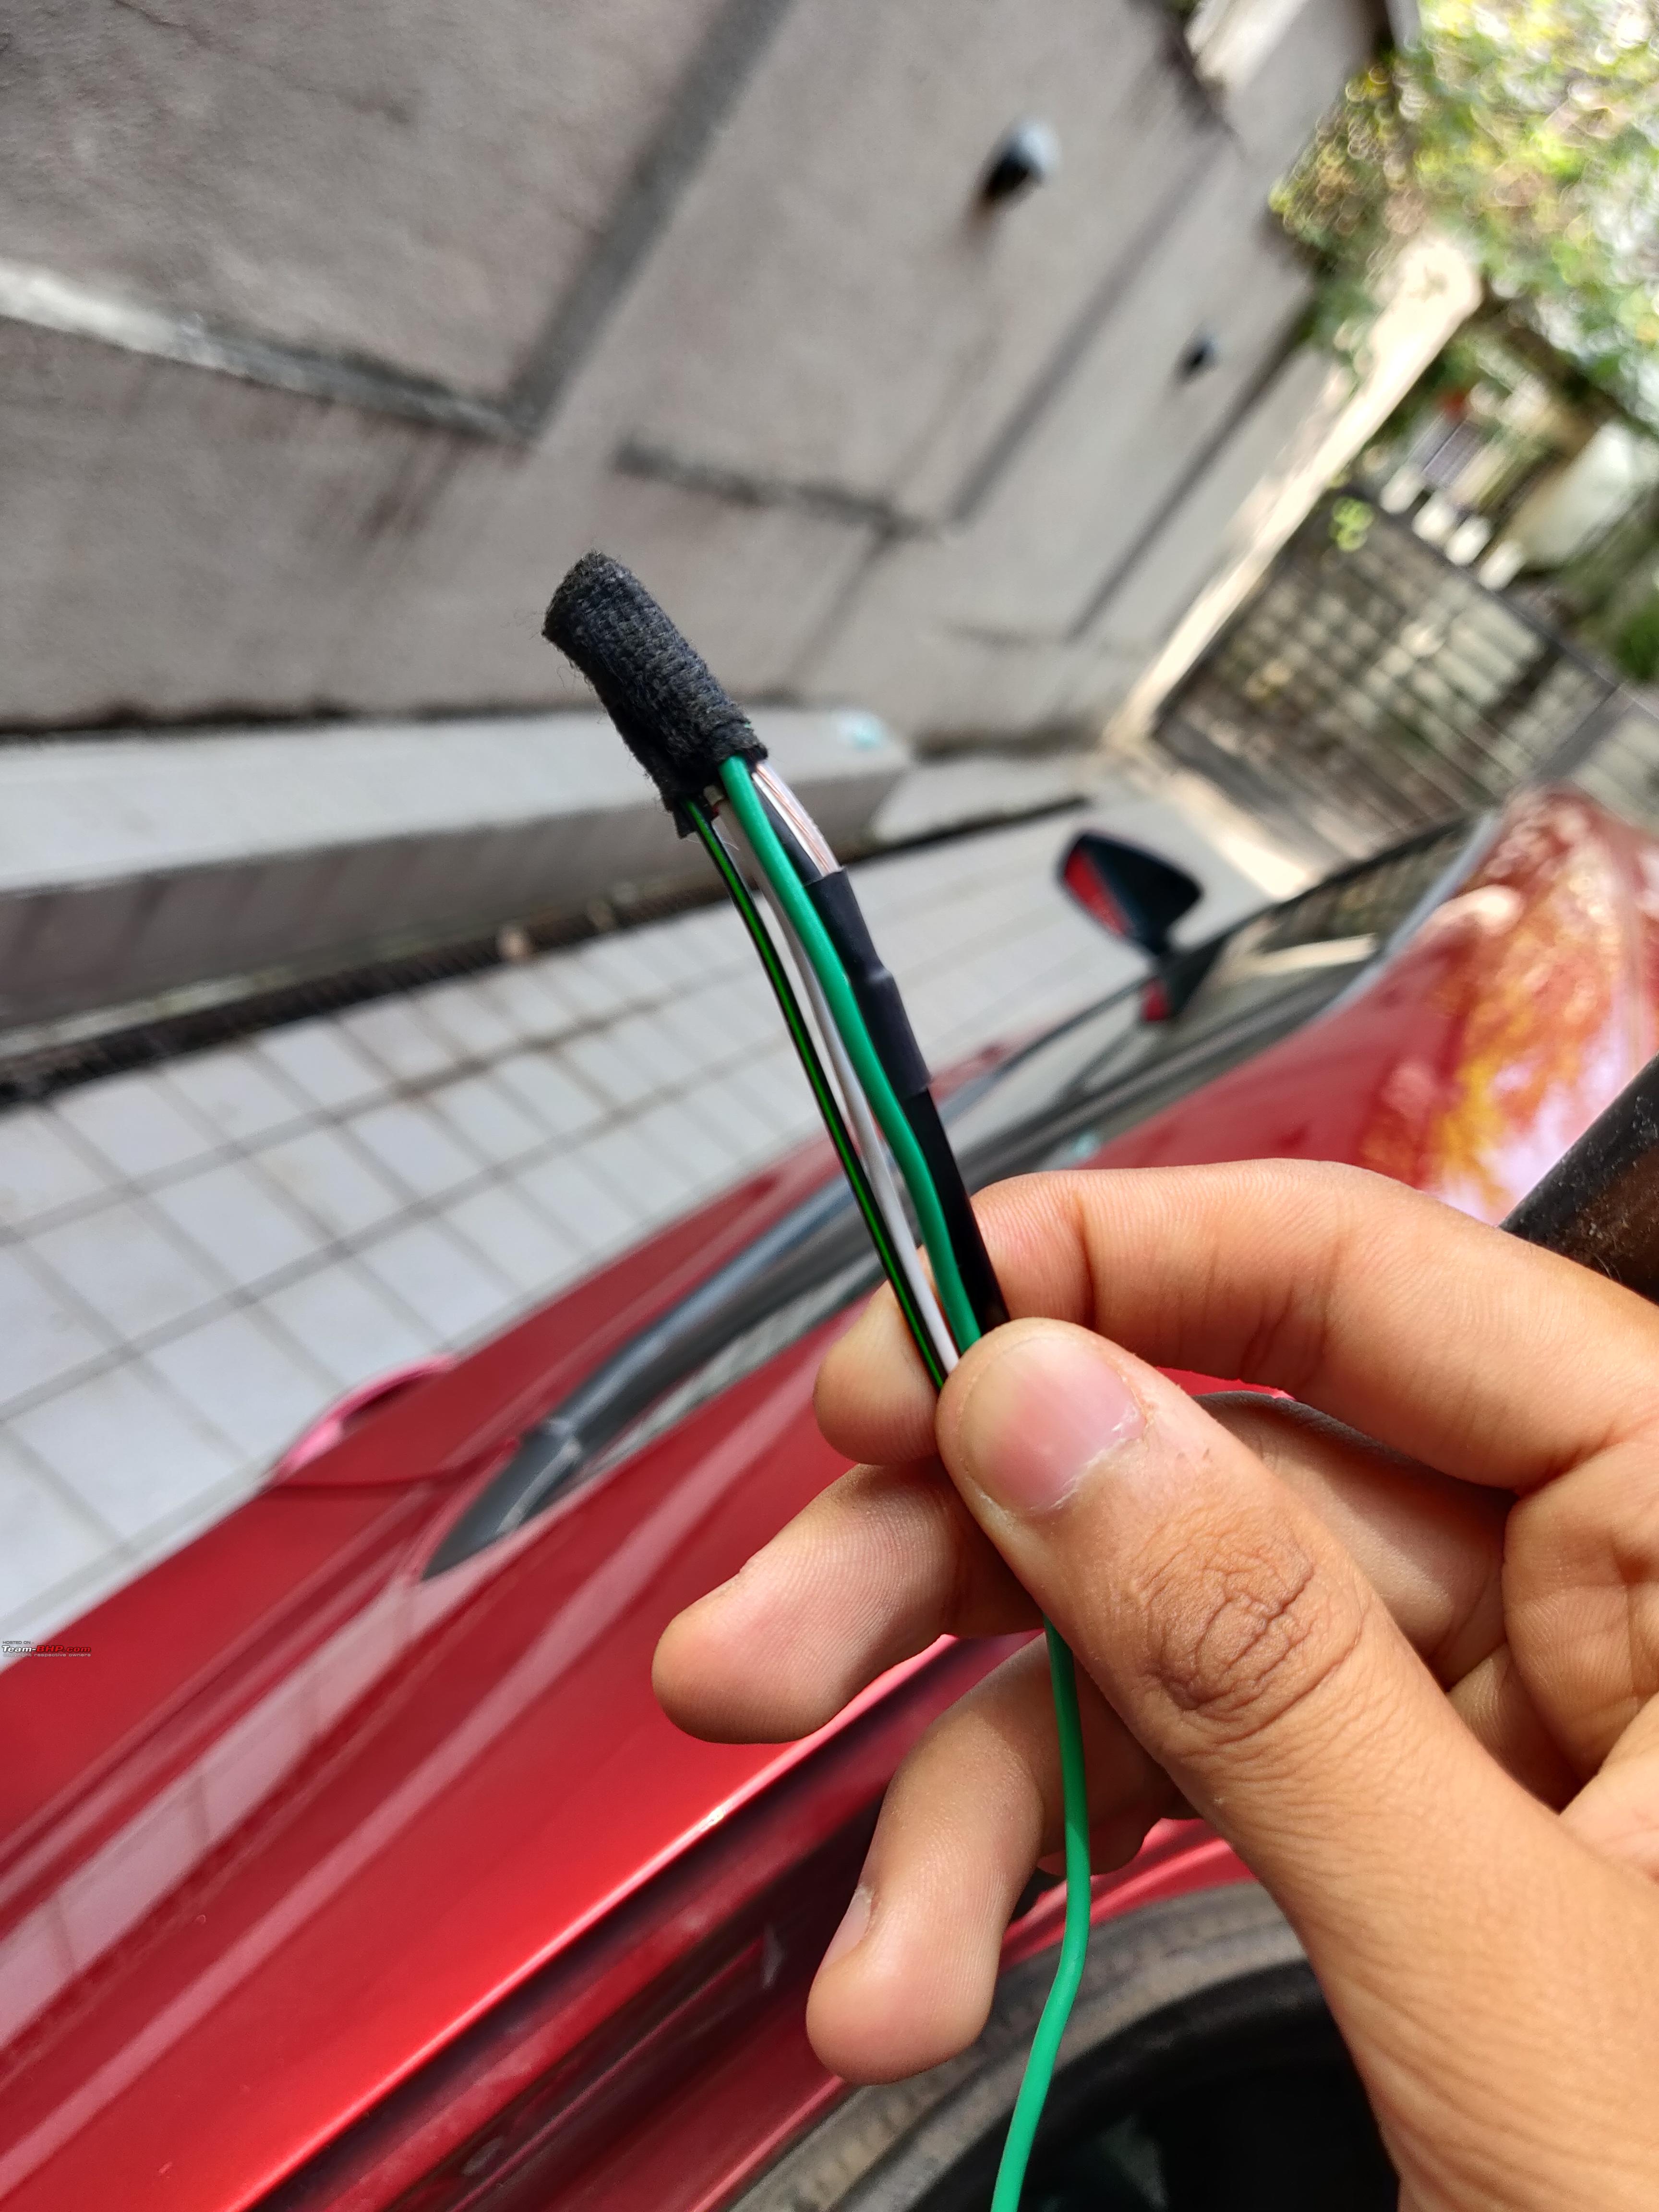
- Taping Ends For Pulling.jpg (4.5 MiB) Viewed 5368 times
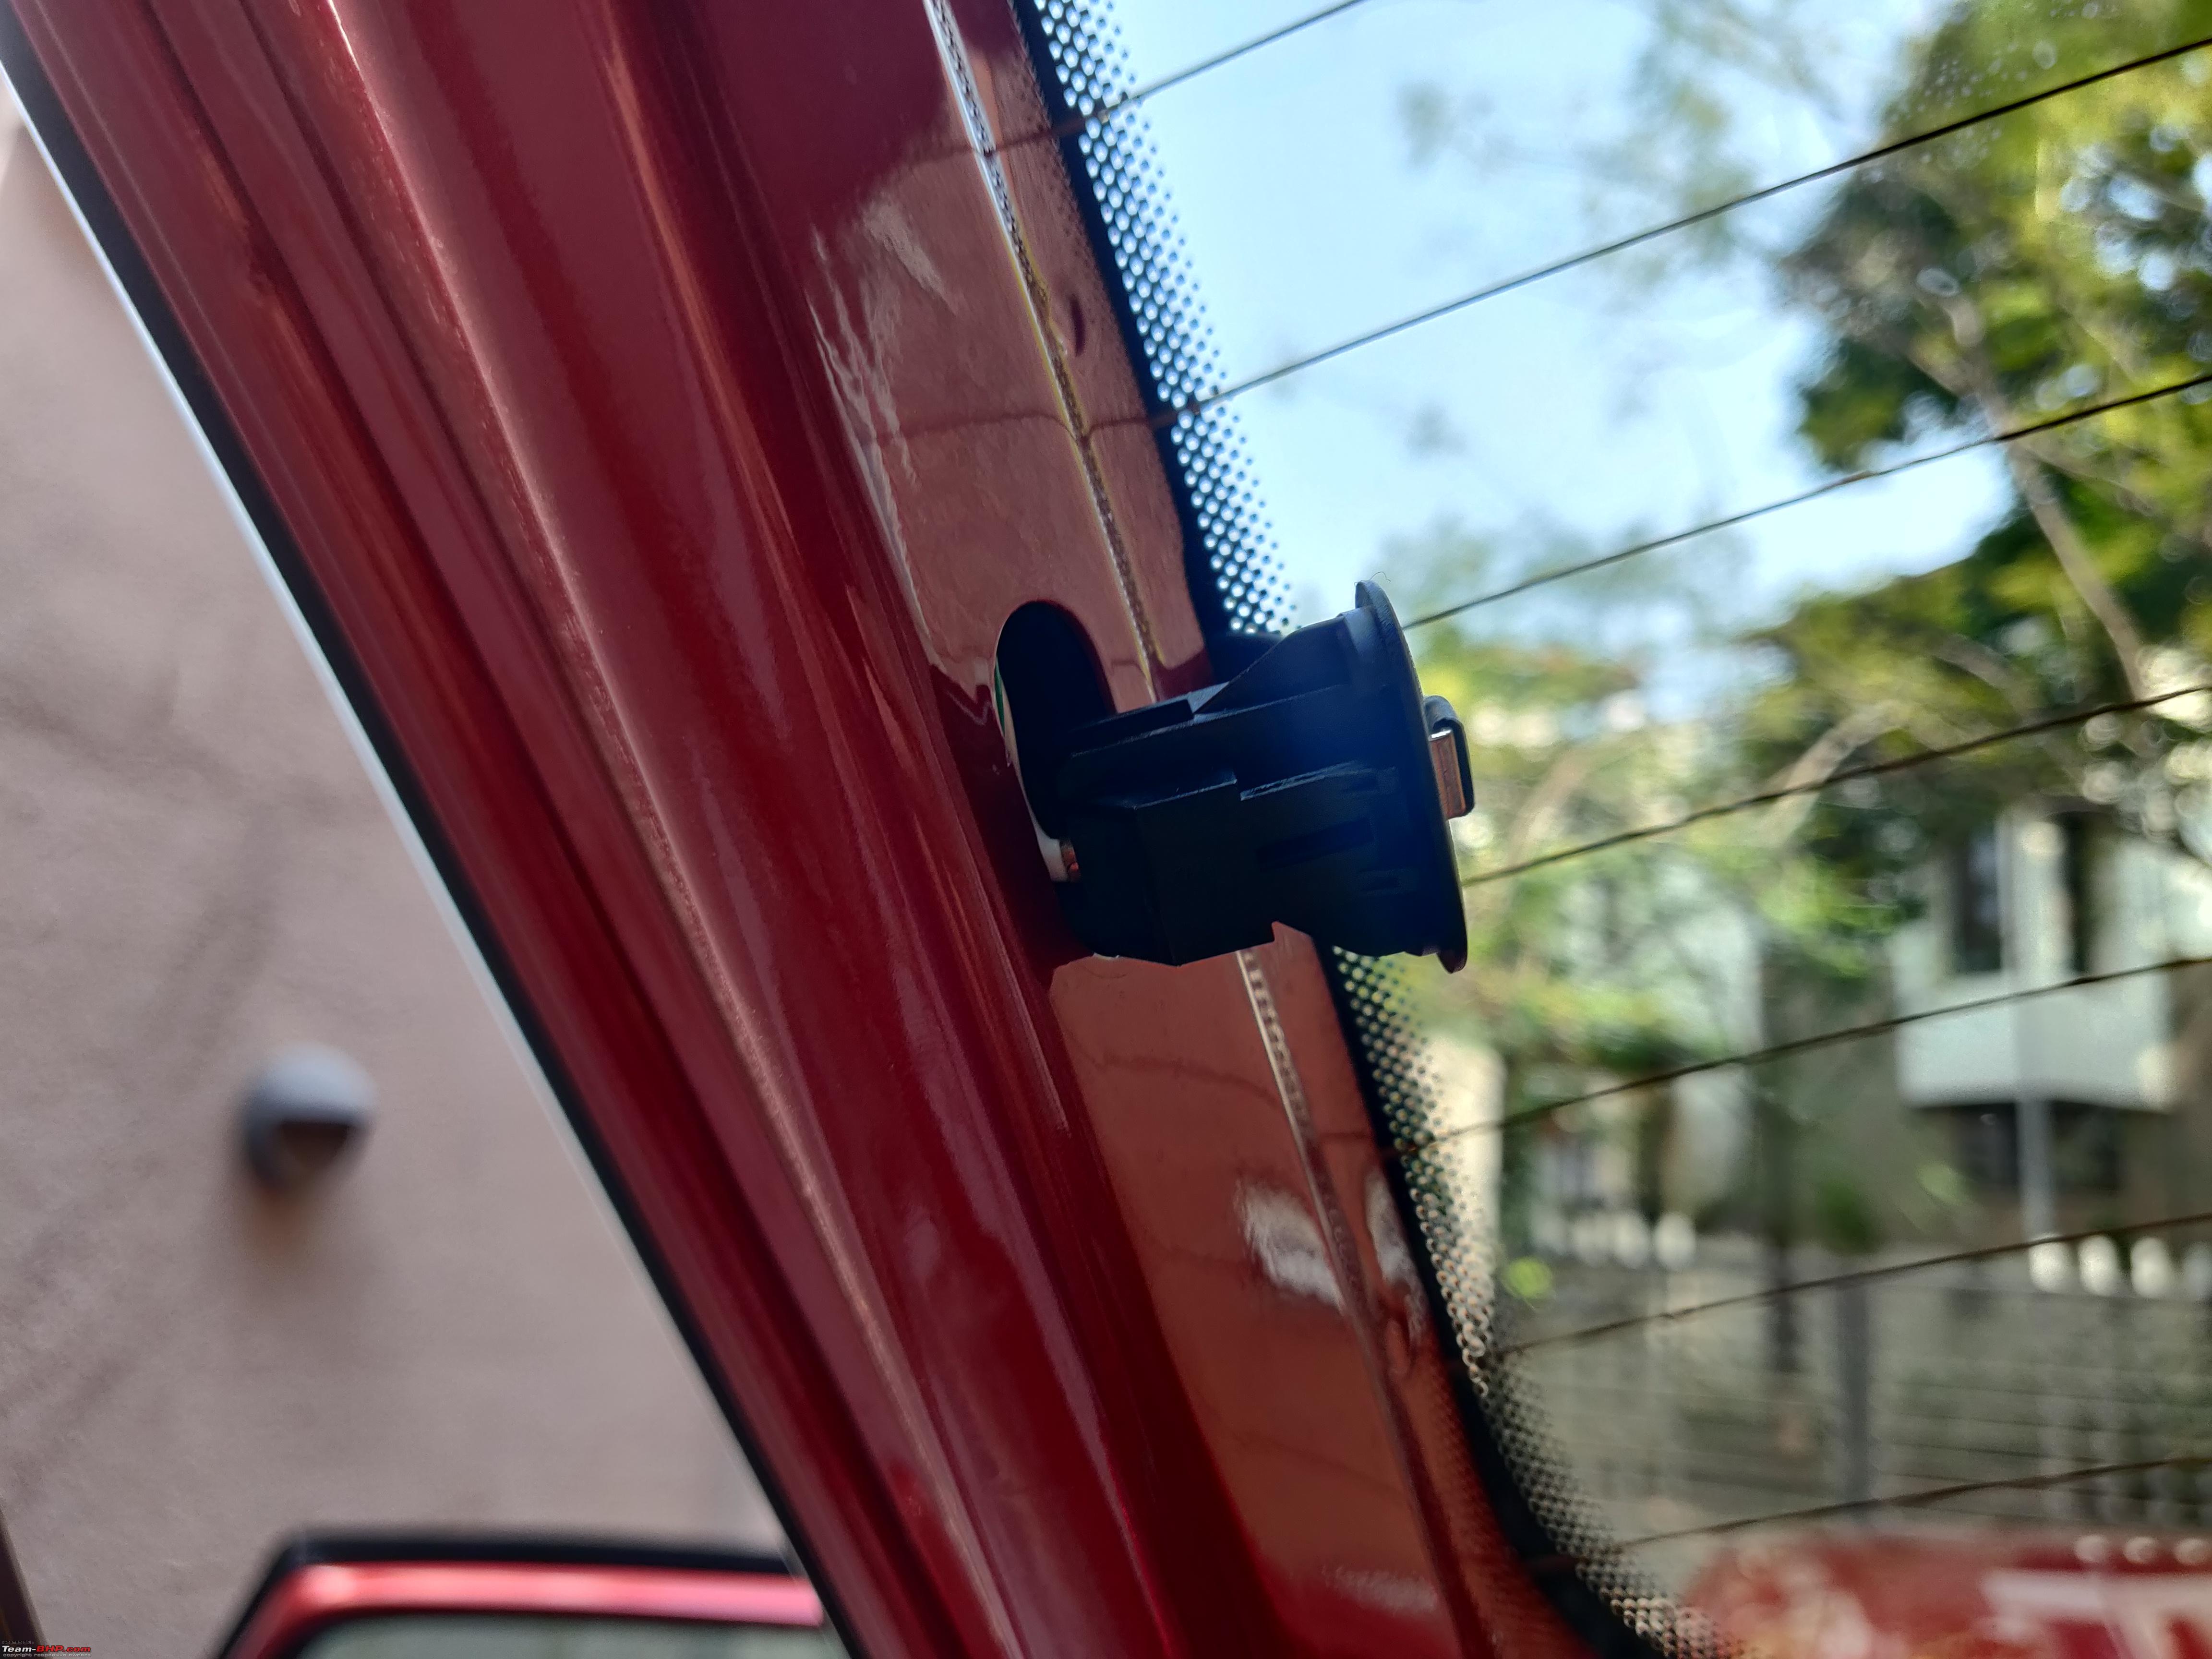
- Defogger Grommet.jpg (4.22 MiB) Viewed 5368 times
- Wiring Through Rubber Grommet.jpg (5.1 MiB) Viewed 5368 times
- Rubber Grommet Close Look.jpg (5.42 MiB) Viewed 5368 times
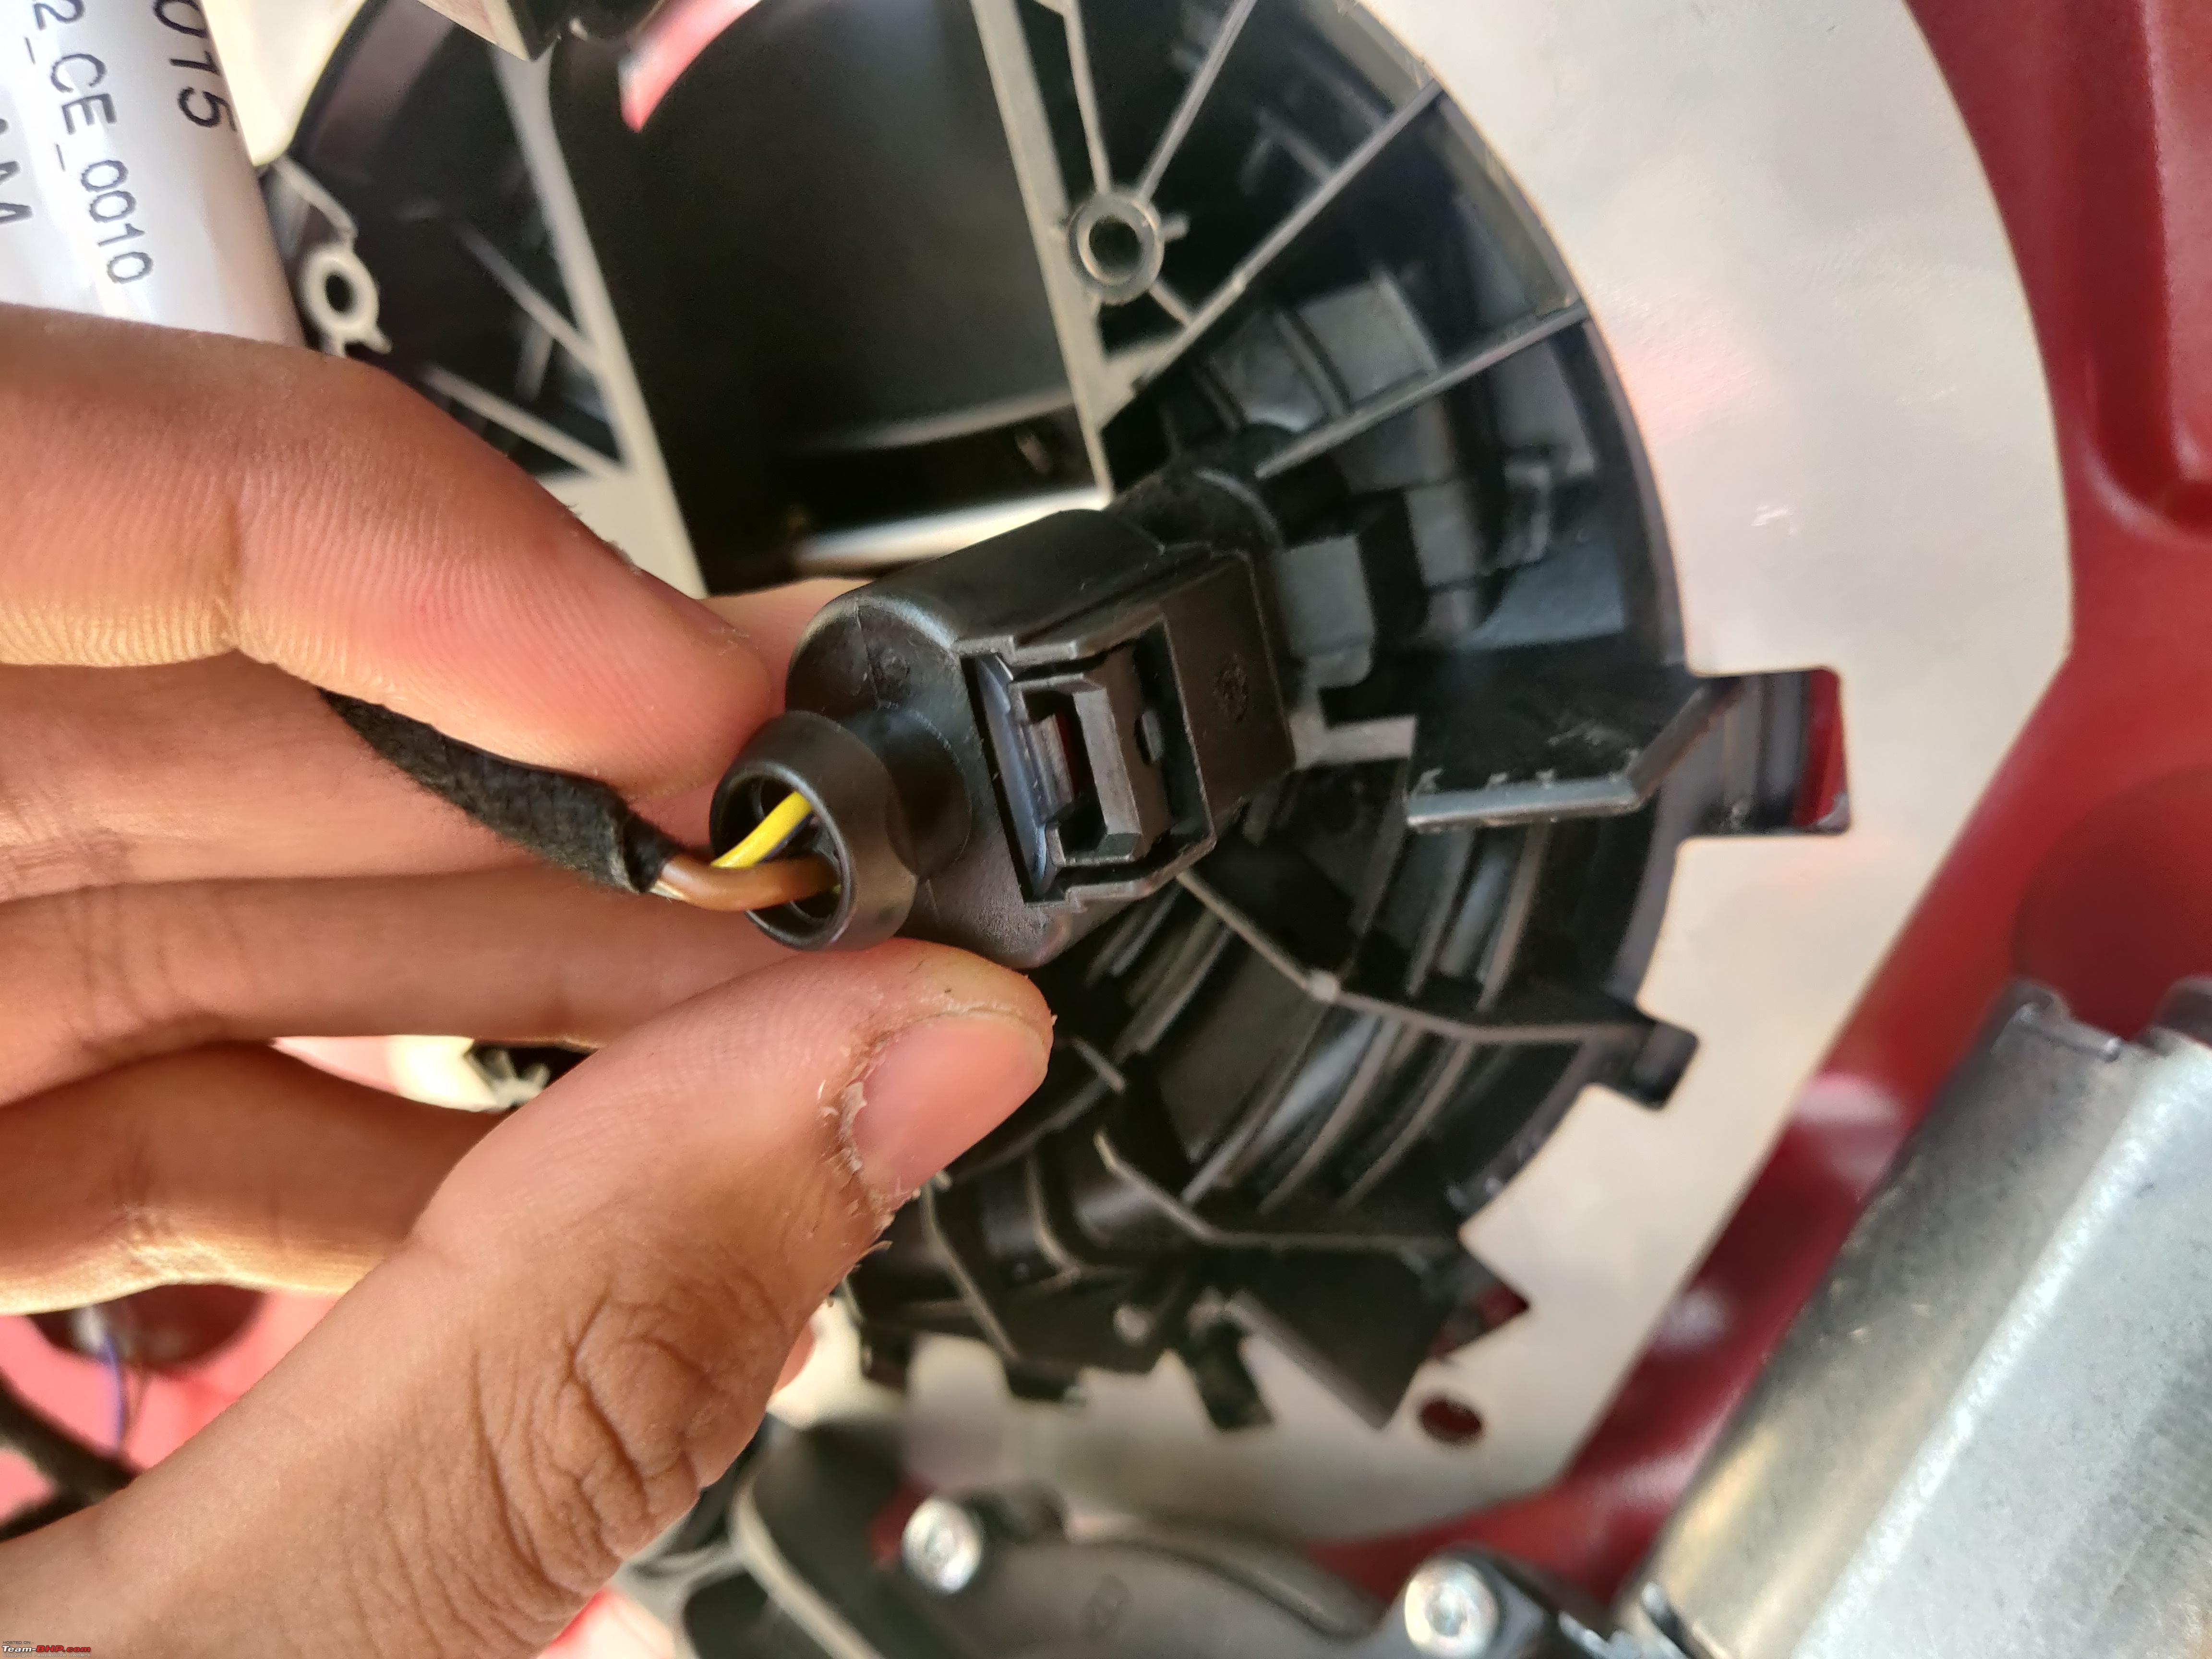
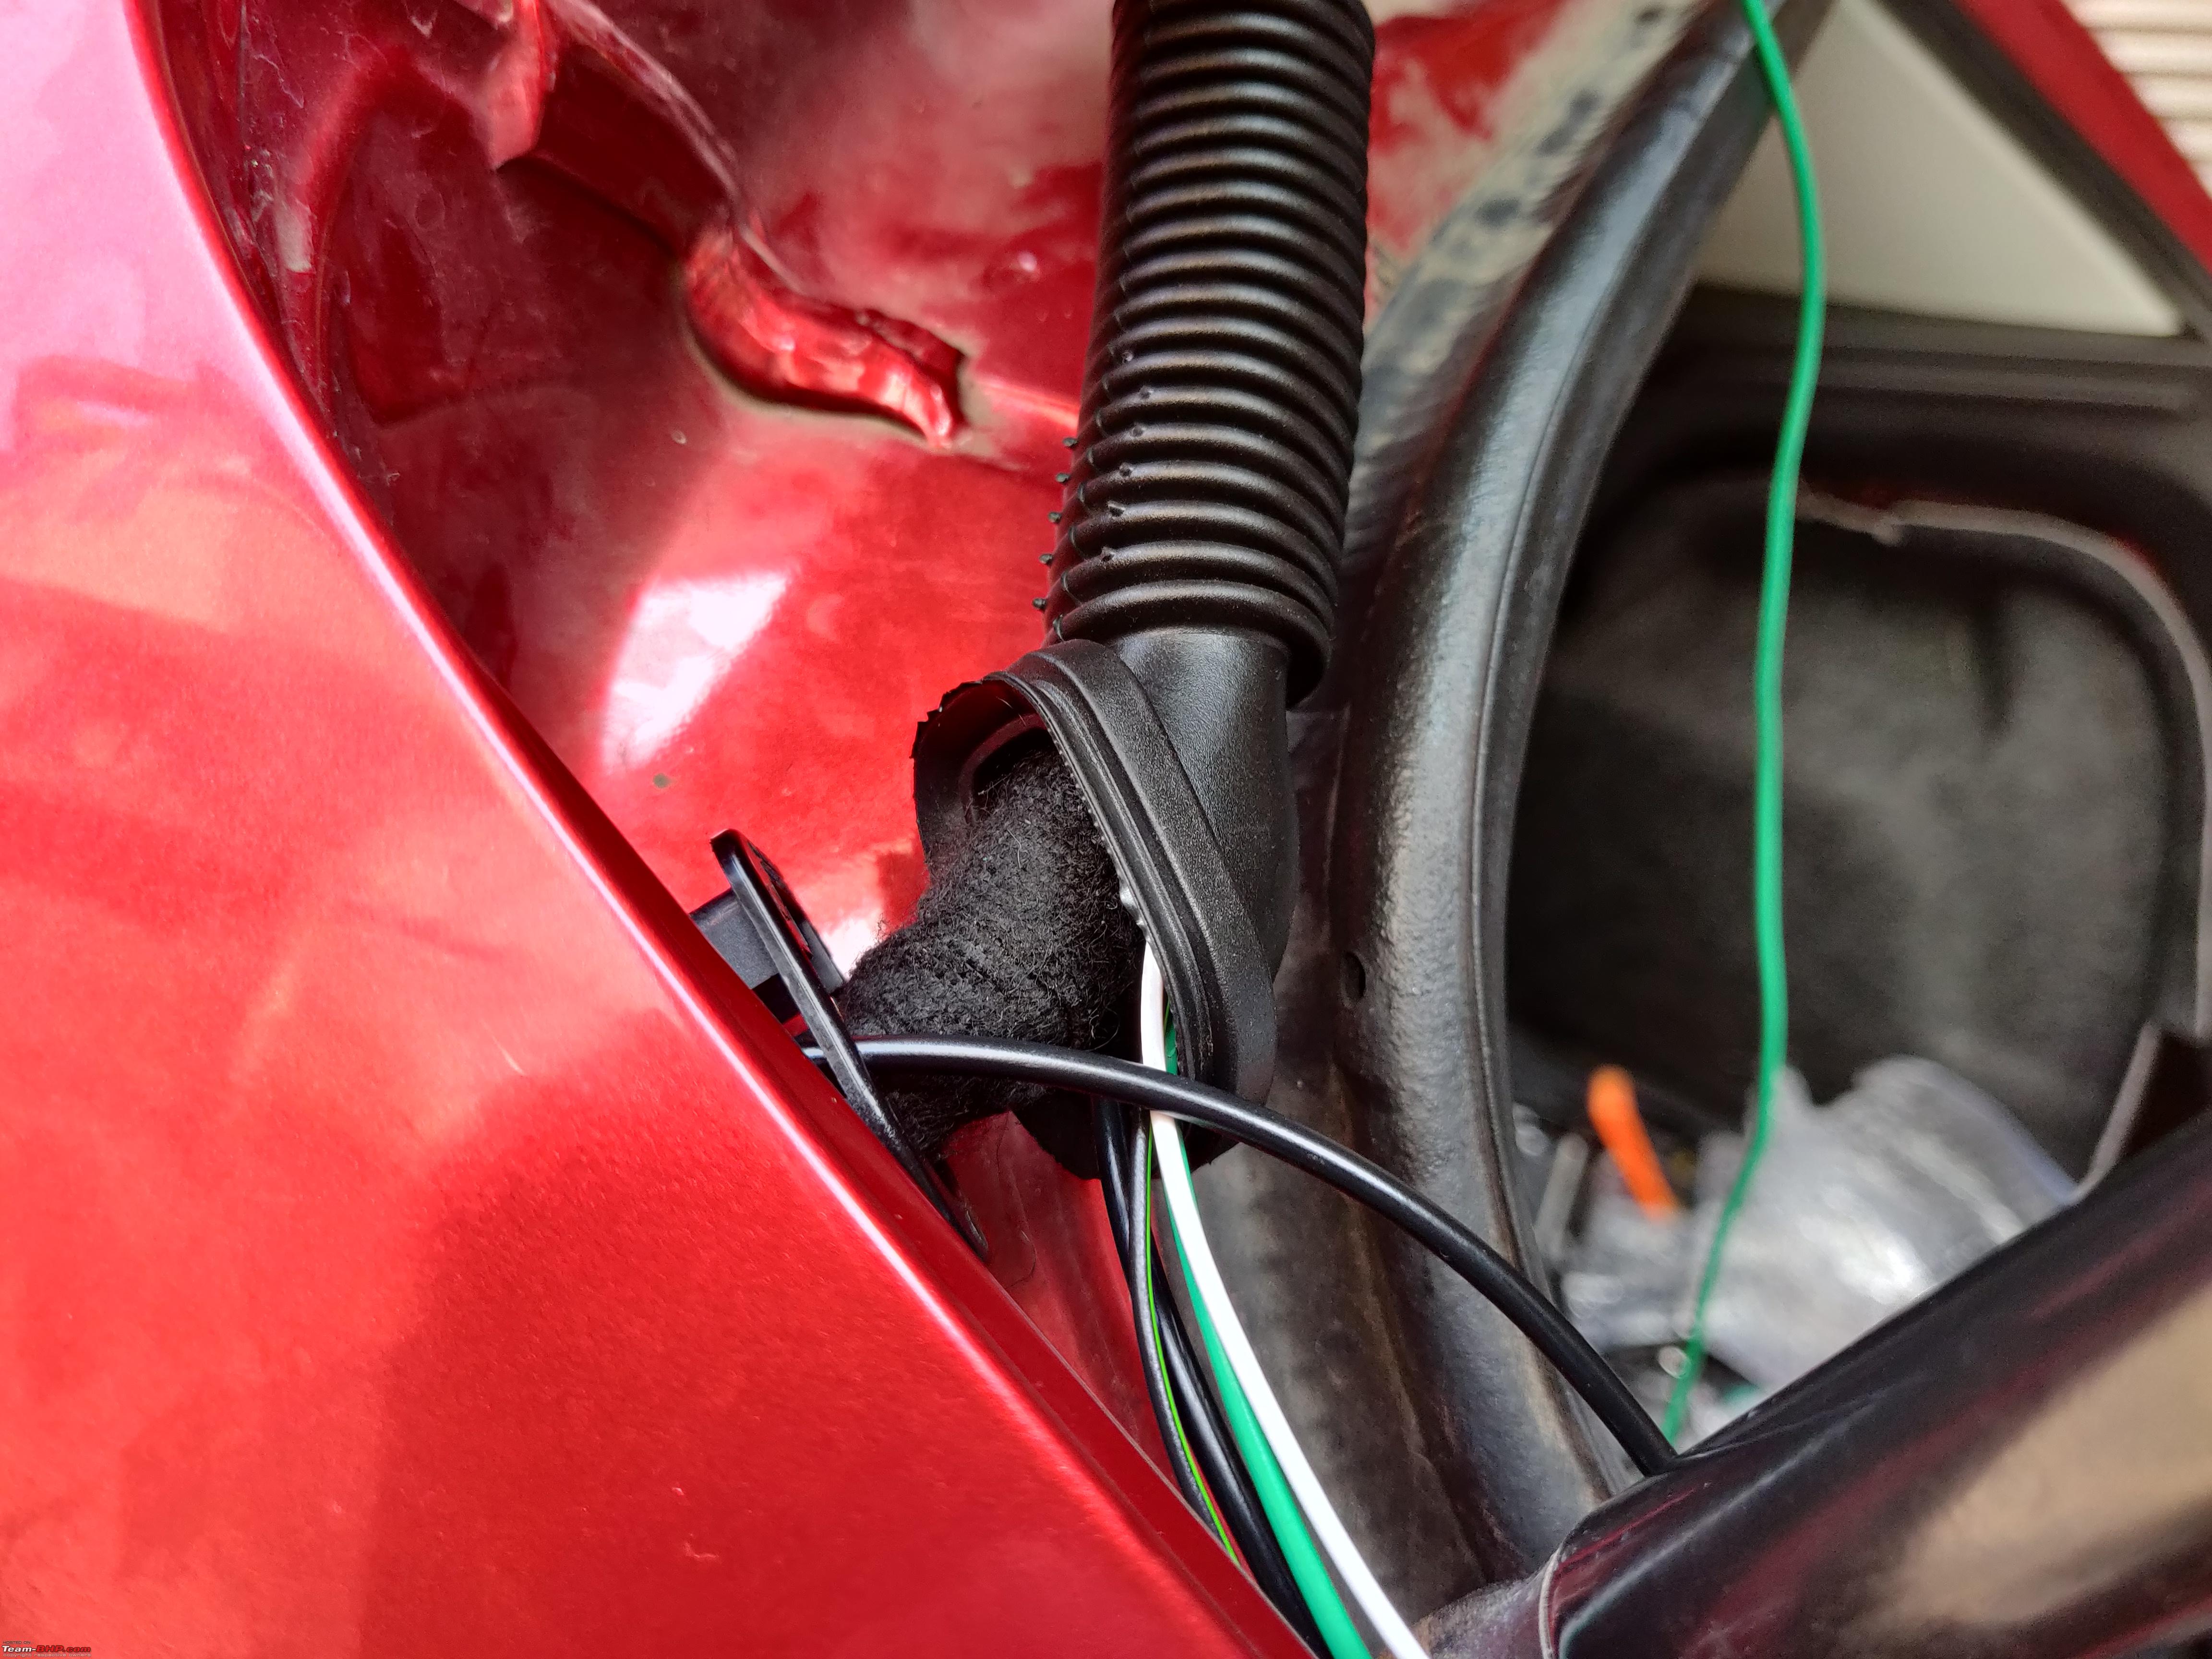
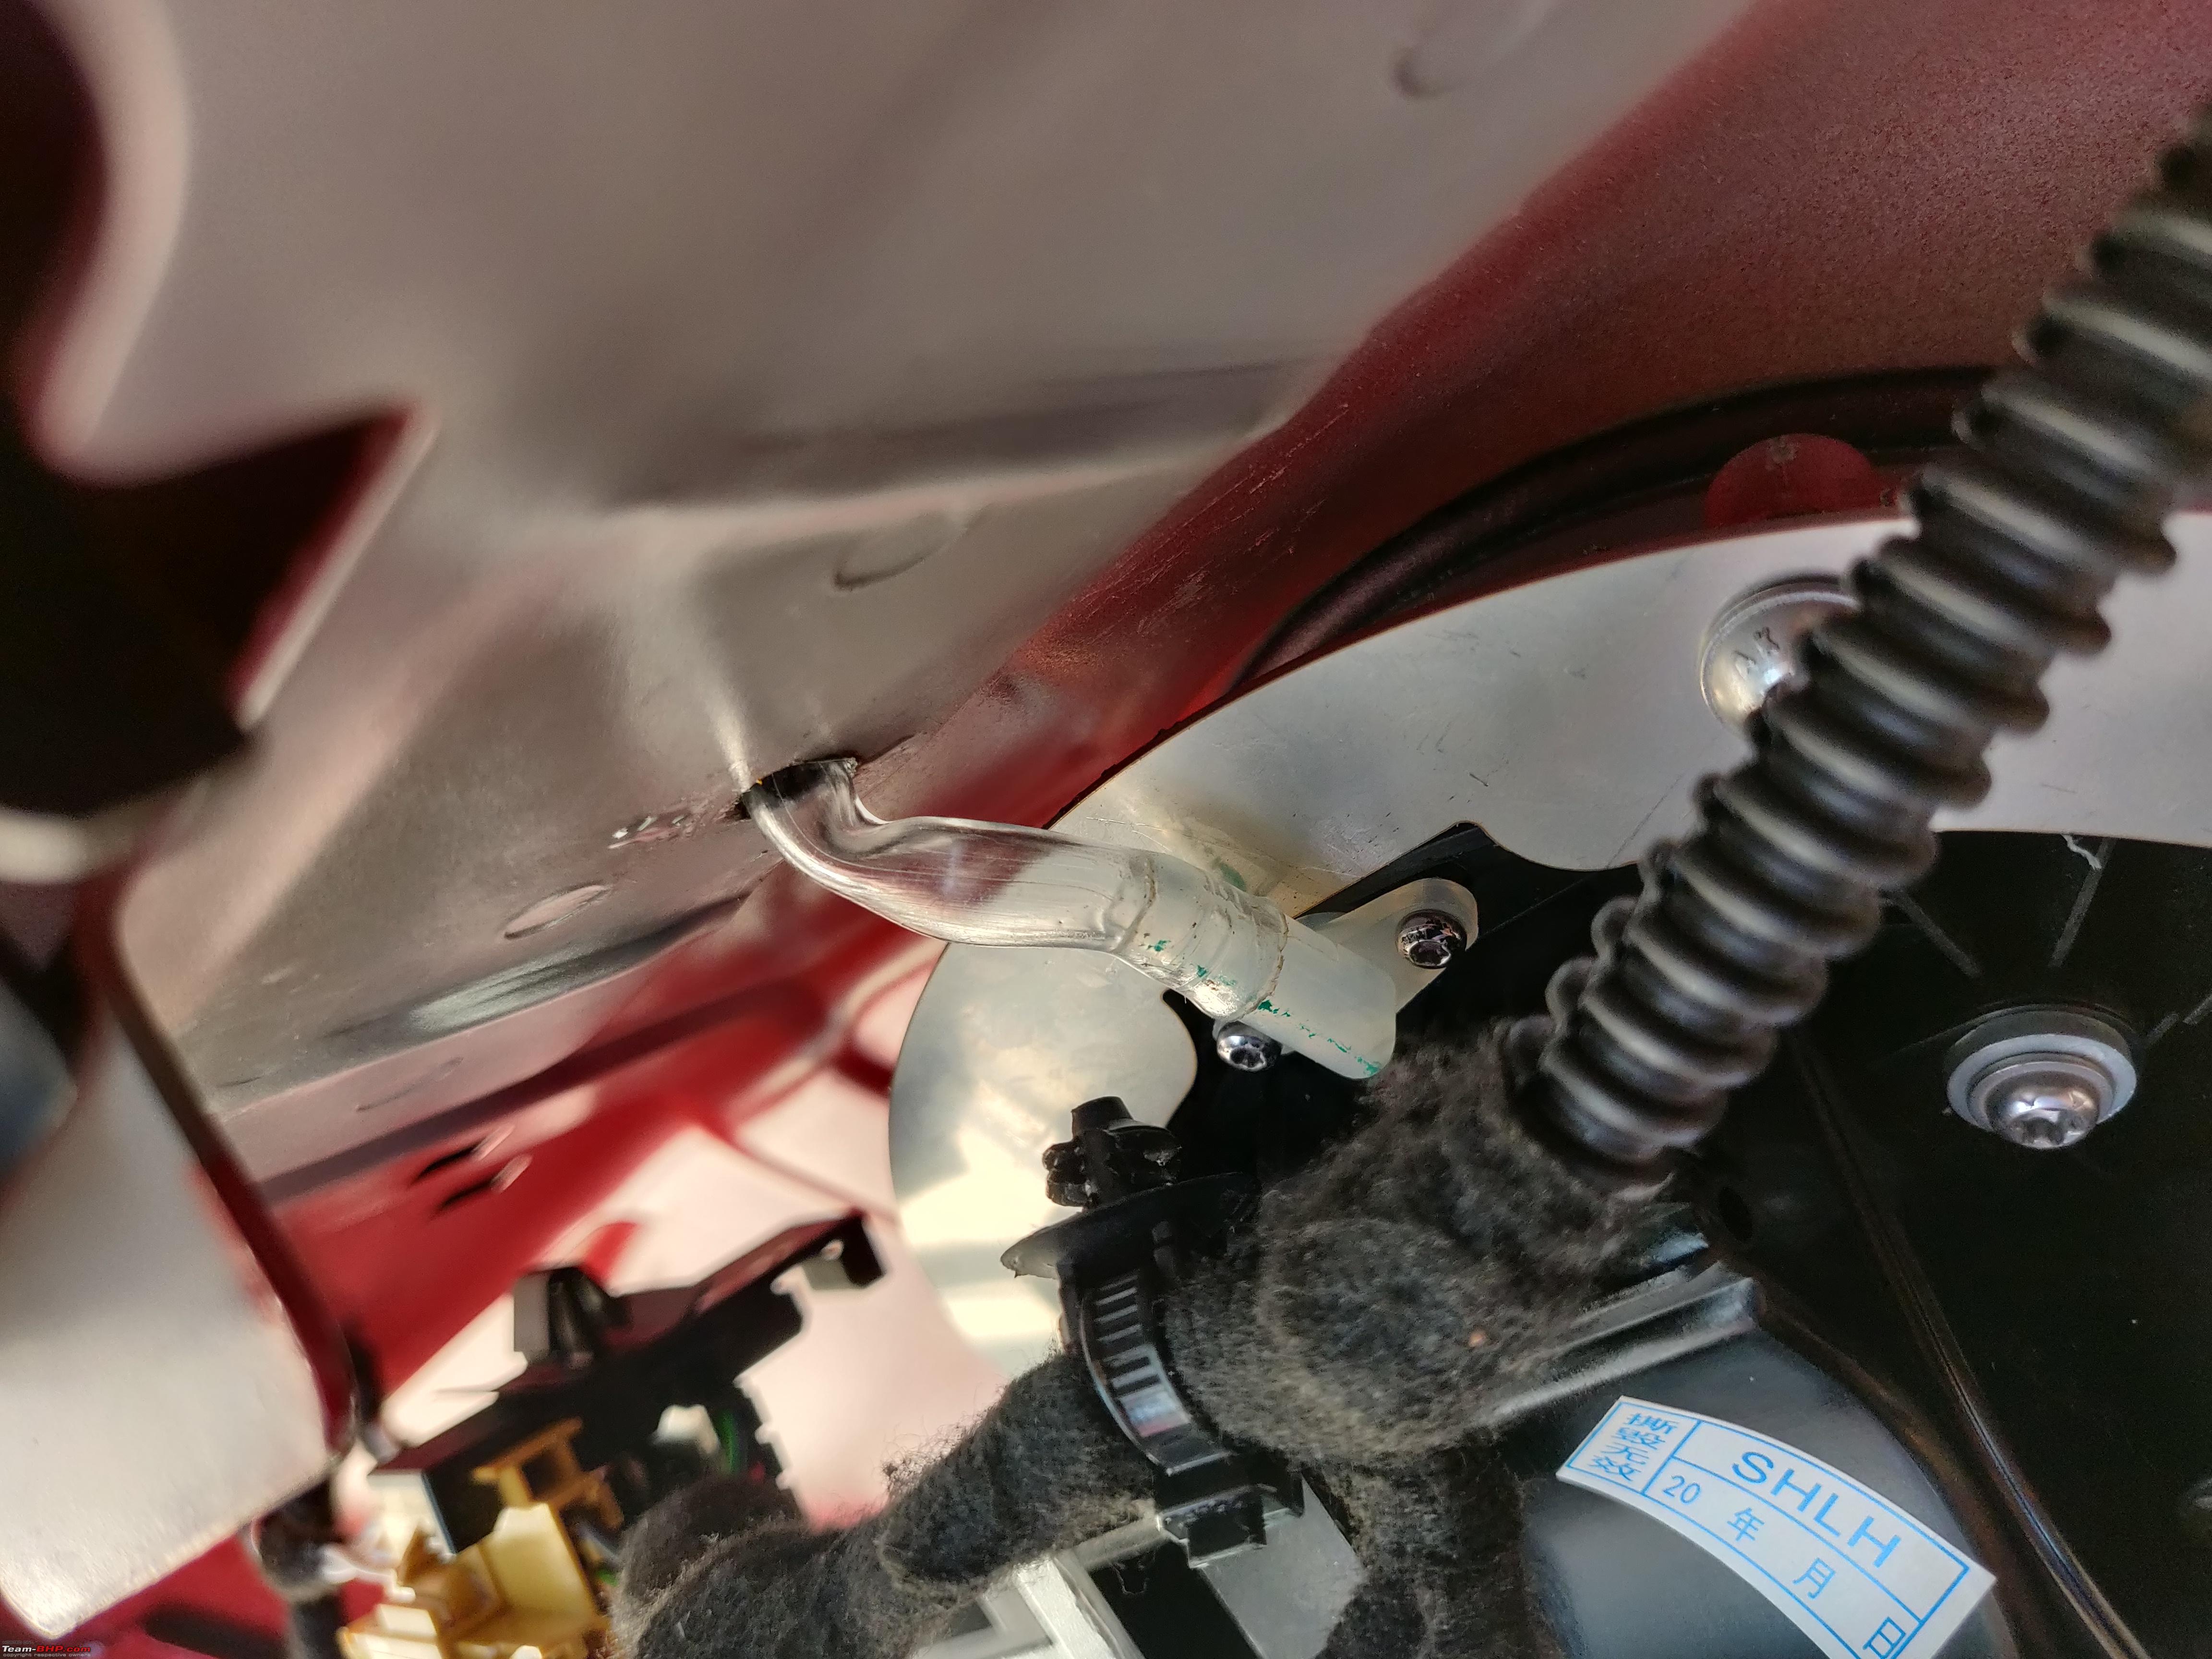
The wiring harness on my camera was a little messed up and I had to
de-pin quite a few pins till the camera started flipping open (a multimeter helps), but for the most part, this should be a plug and play install. Notice the FAKRA connector for the OEM Video Signal (I hope the connector in context is indeed called a FAKRA style connector of some sort) and a 4 pin connector on this one which carries a Reverse Signal, Power and Ground to the camera. Brown on the camera connector was not Ground contrary to conventional logic

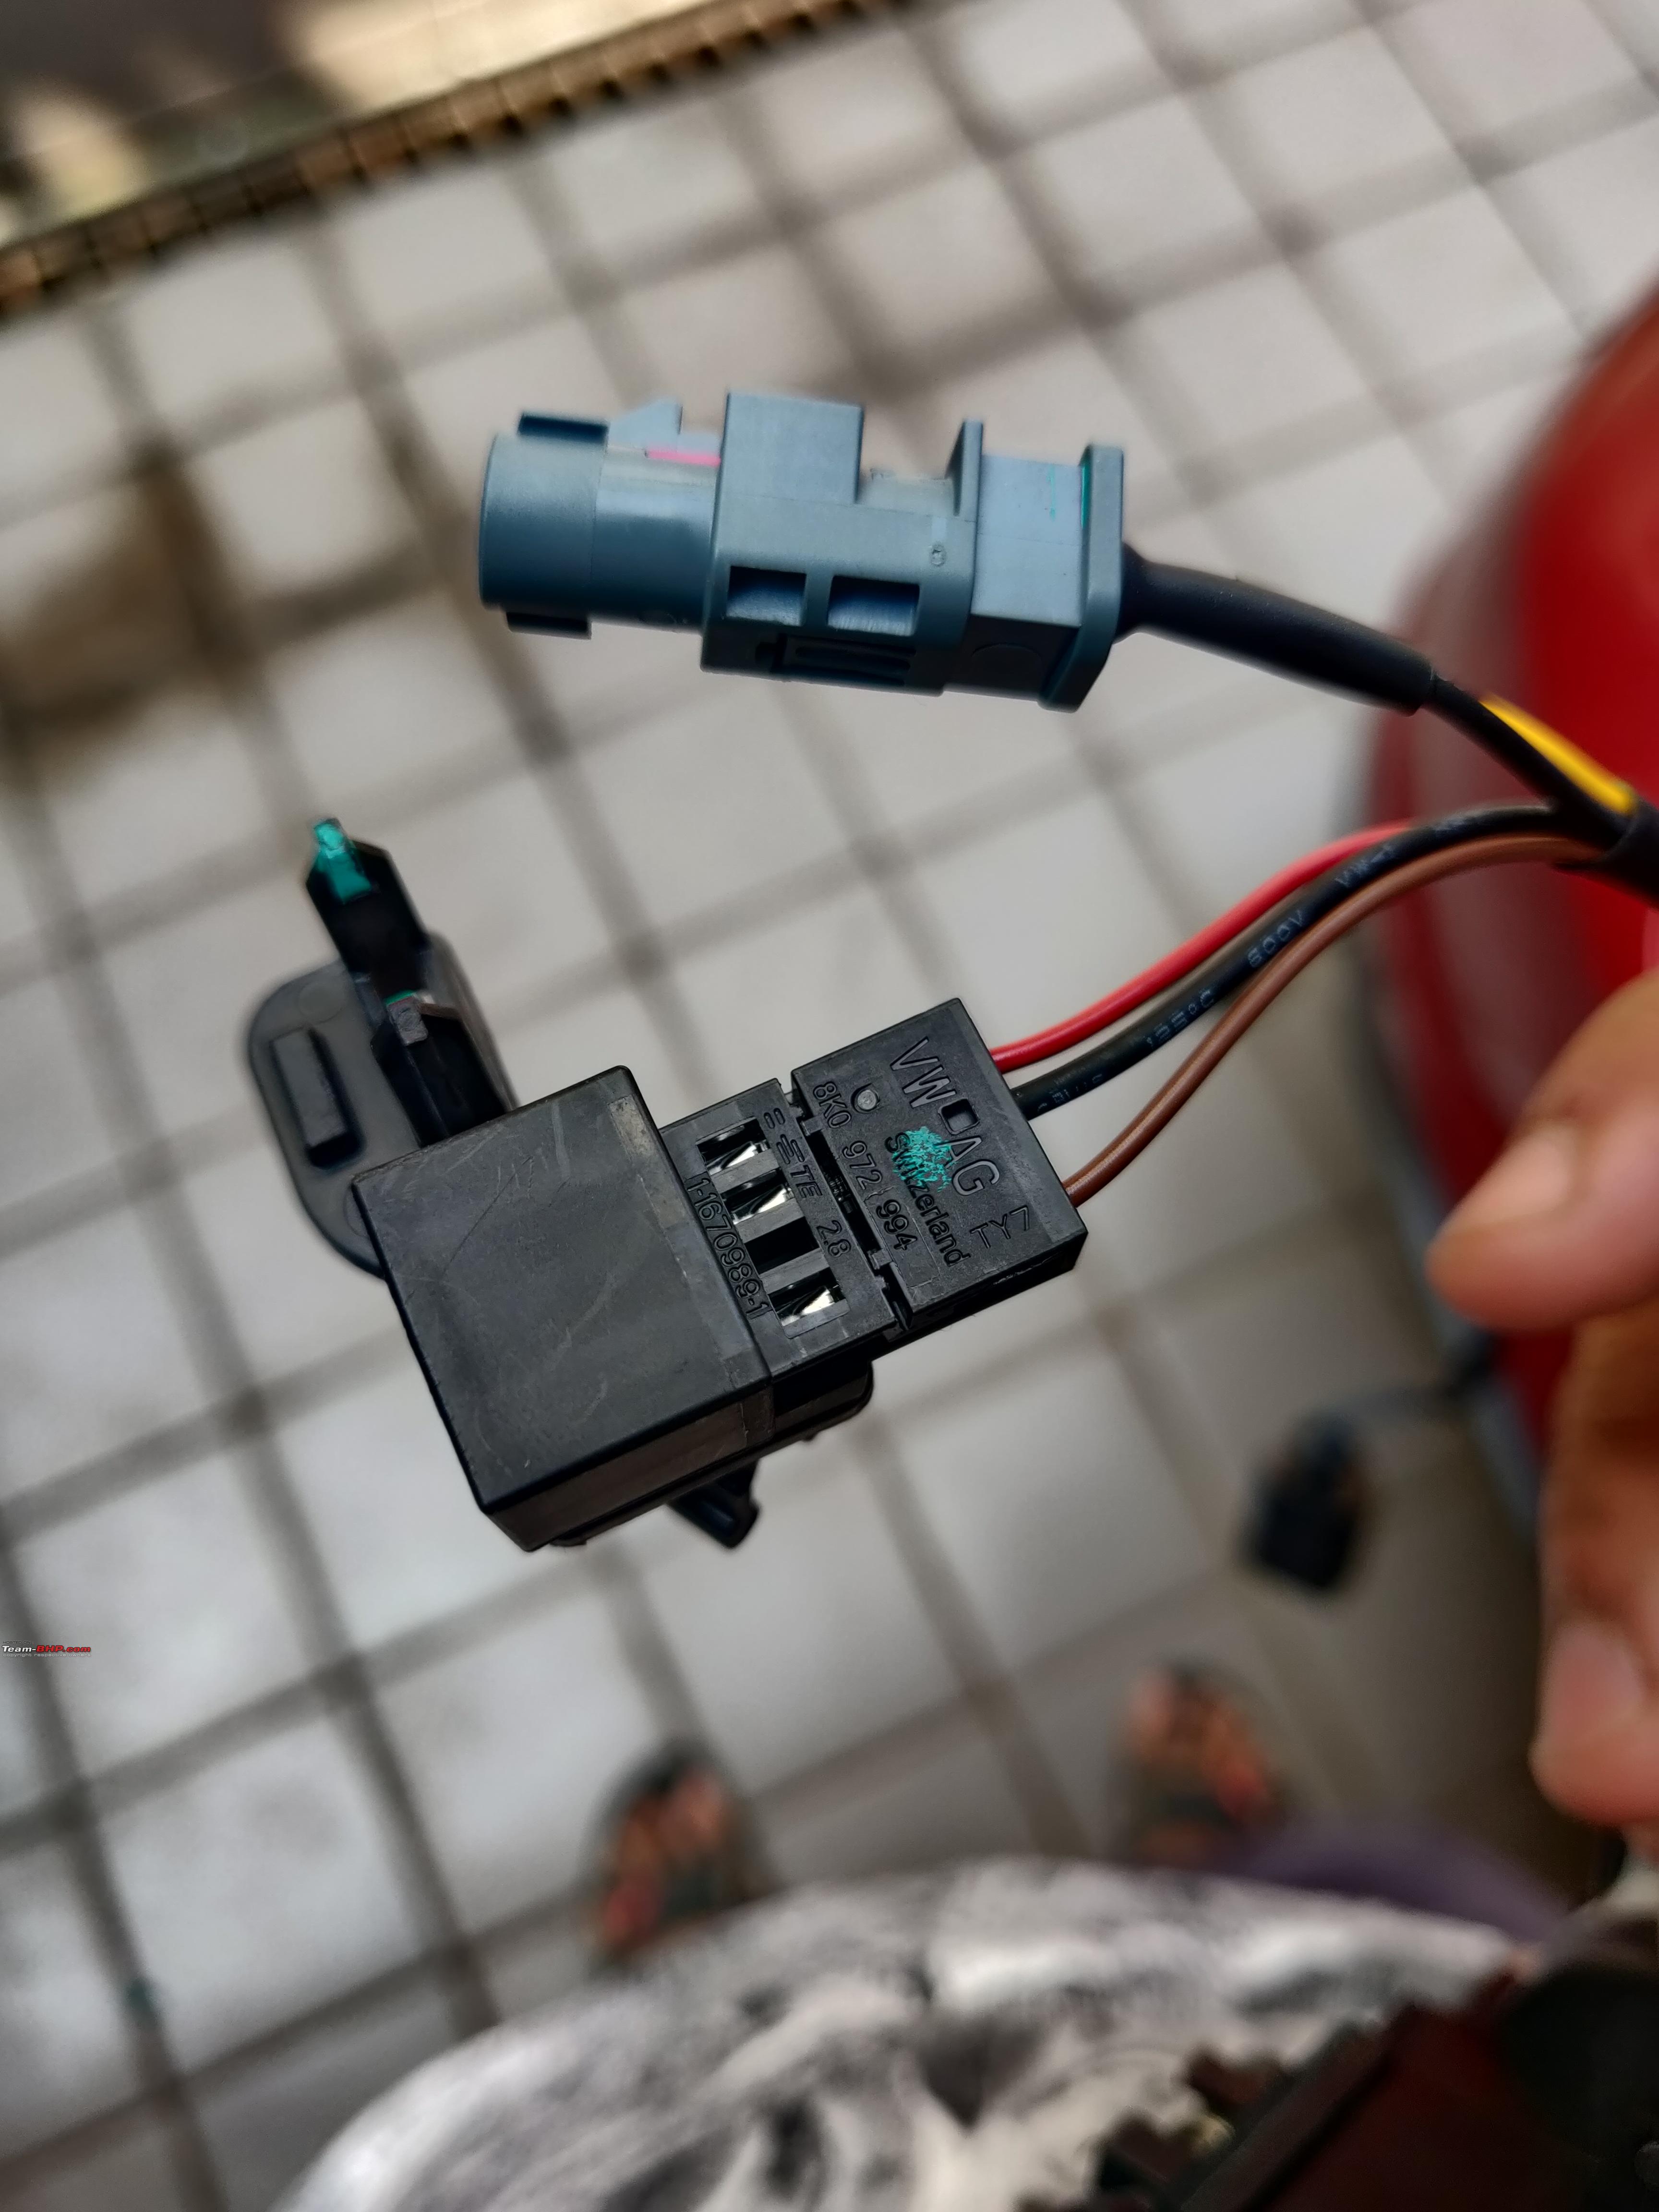
- Camera Connector Ends.jpg (3.37 MiB) Viewed 5368 times

- Final Assembly.jpg (4.81 MiB) Viewed 5368 times
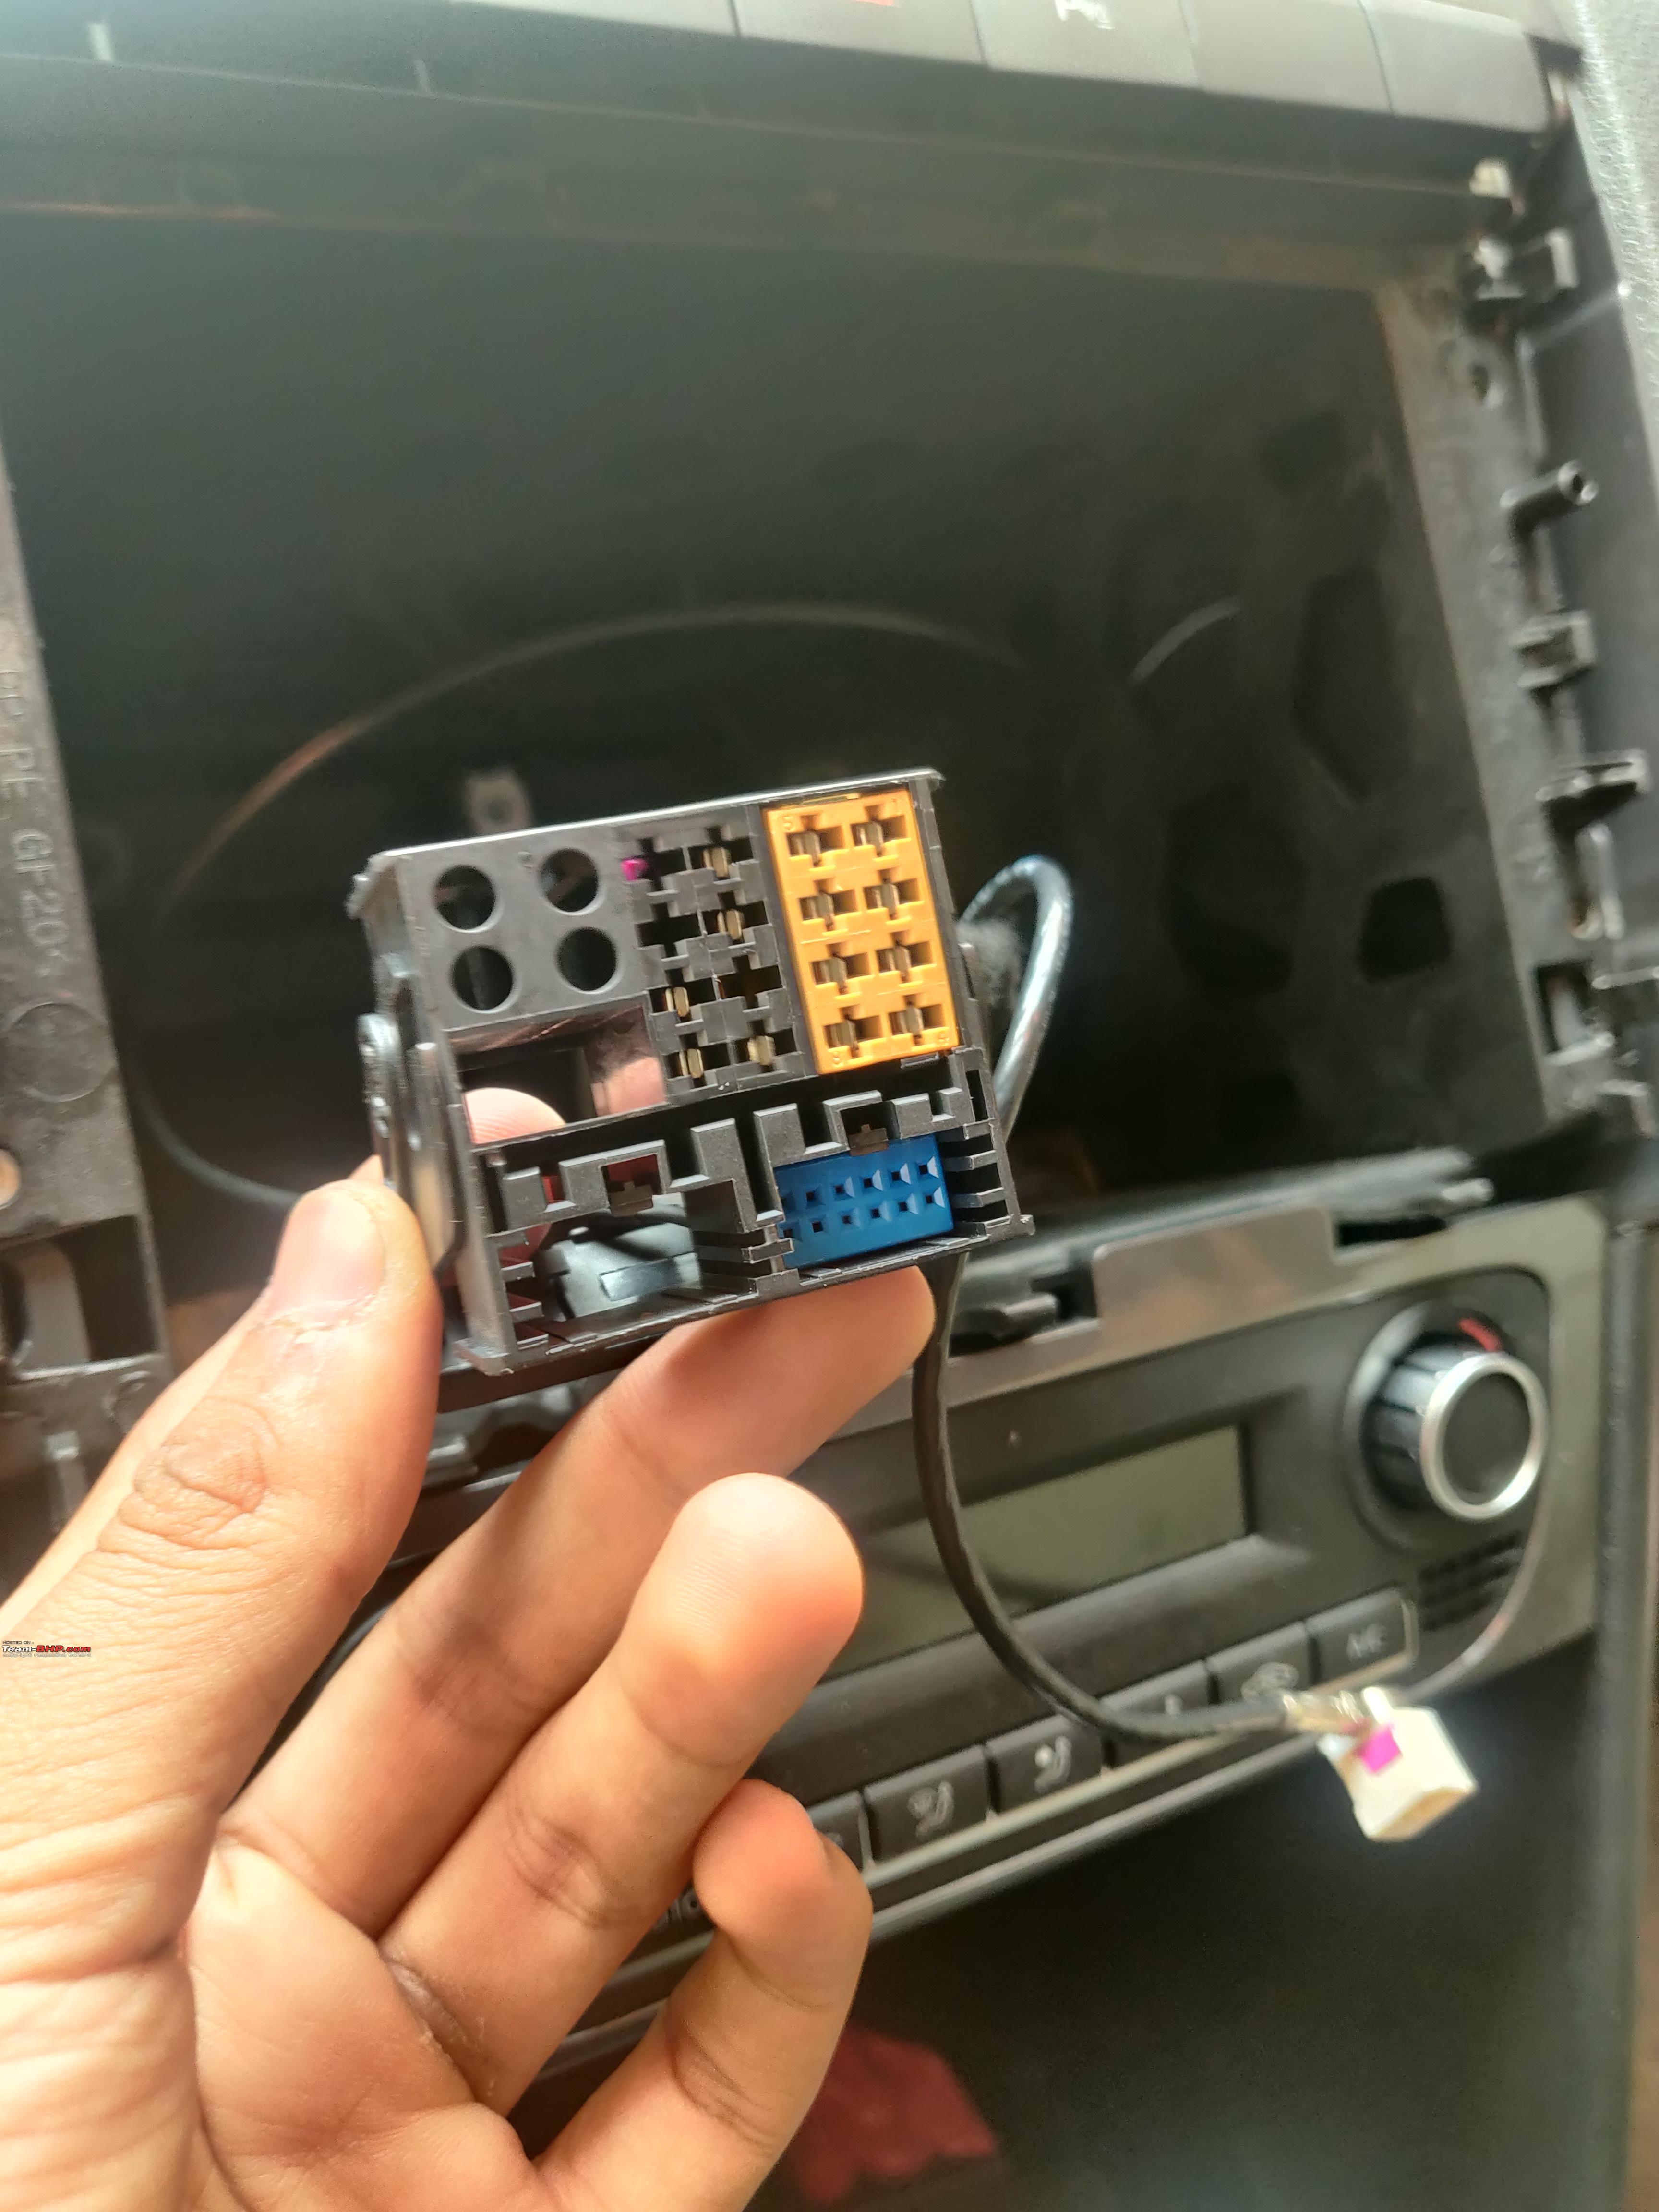
Radio Quadlock
On the RCD 330 and R340 Radios offered on the Polo 6R, the stock Quadlock harness does not include a Blue Block. T12/6 and
T12/12 are the videos signals on this Radio connector and
T12/6 is where the + Video Signal (White Gold Cable on my harness)goes while T12/12 is where the Ground connects.
- RCD340 harness.jpg (4.06 MiB) Viewed 5368 times
On the
Discover Media, the video signal has to share the block with the External Microphone signal cable. On the R340, just one byte has to be changed to enable the Reverse Camera view. Byte 3, bit 6 (Backup Camera installed) (40 became 44)
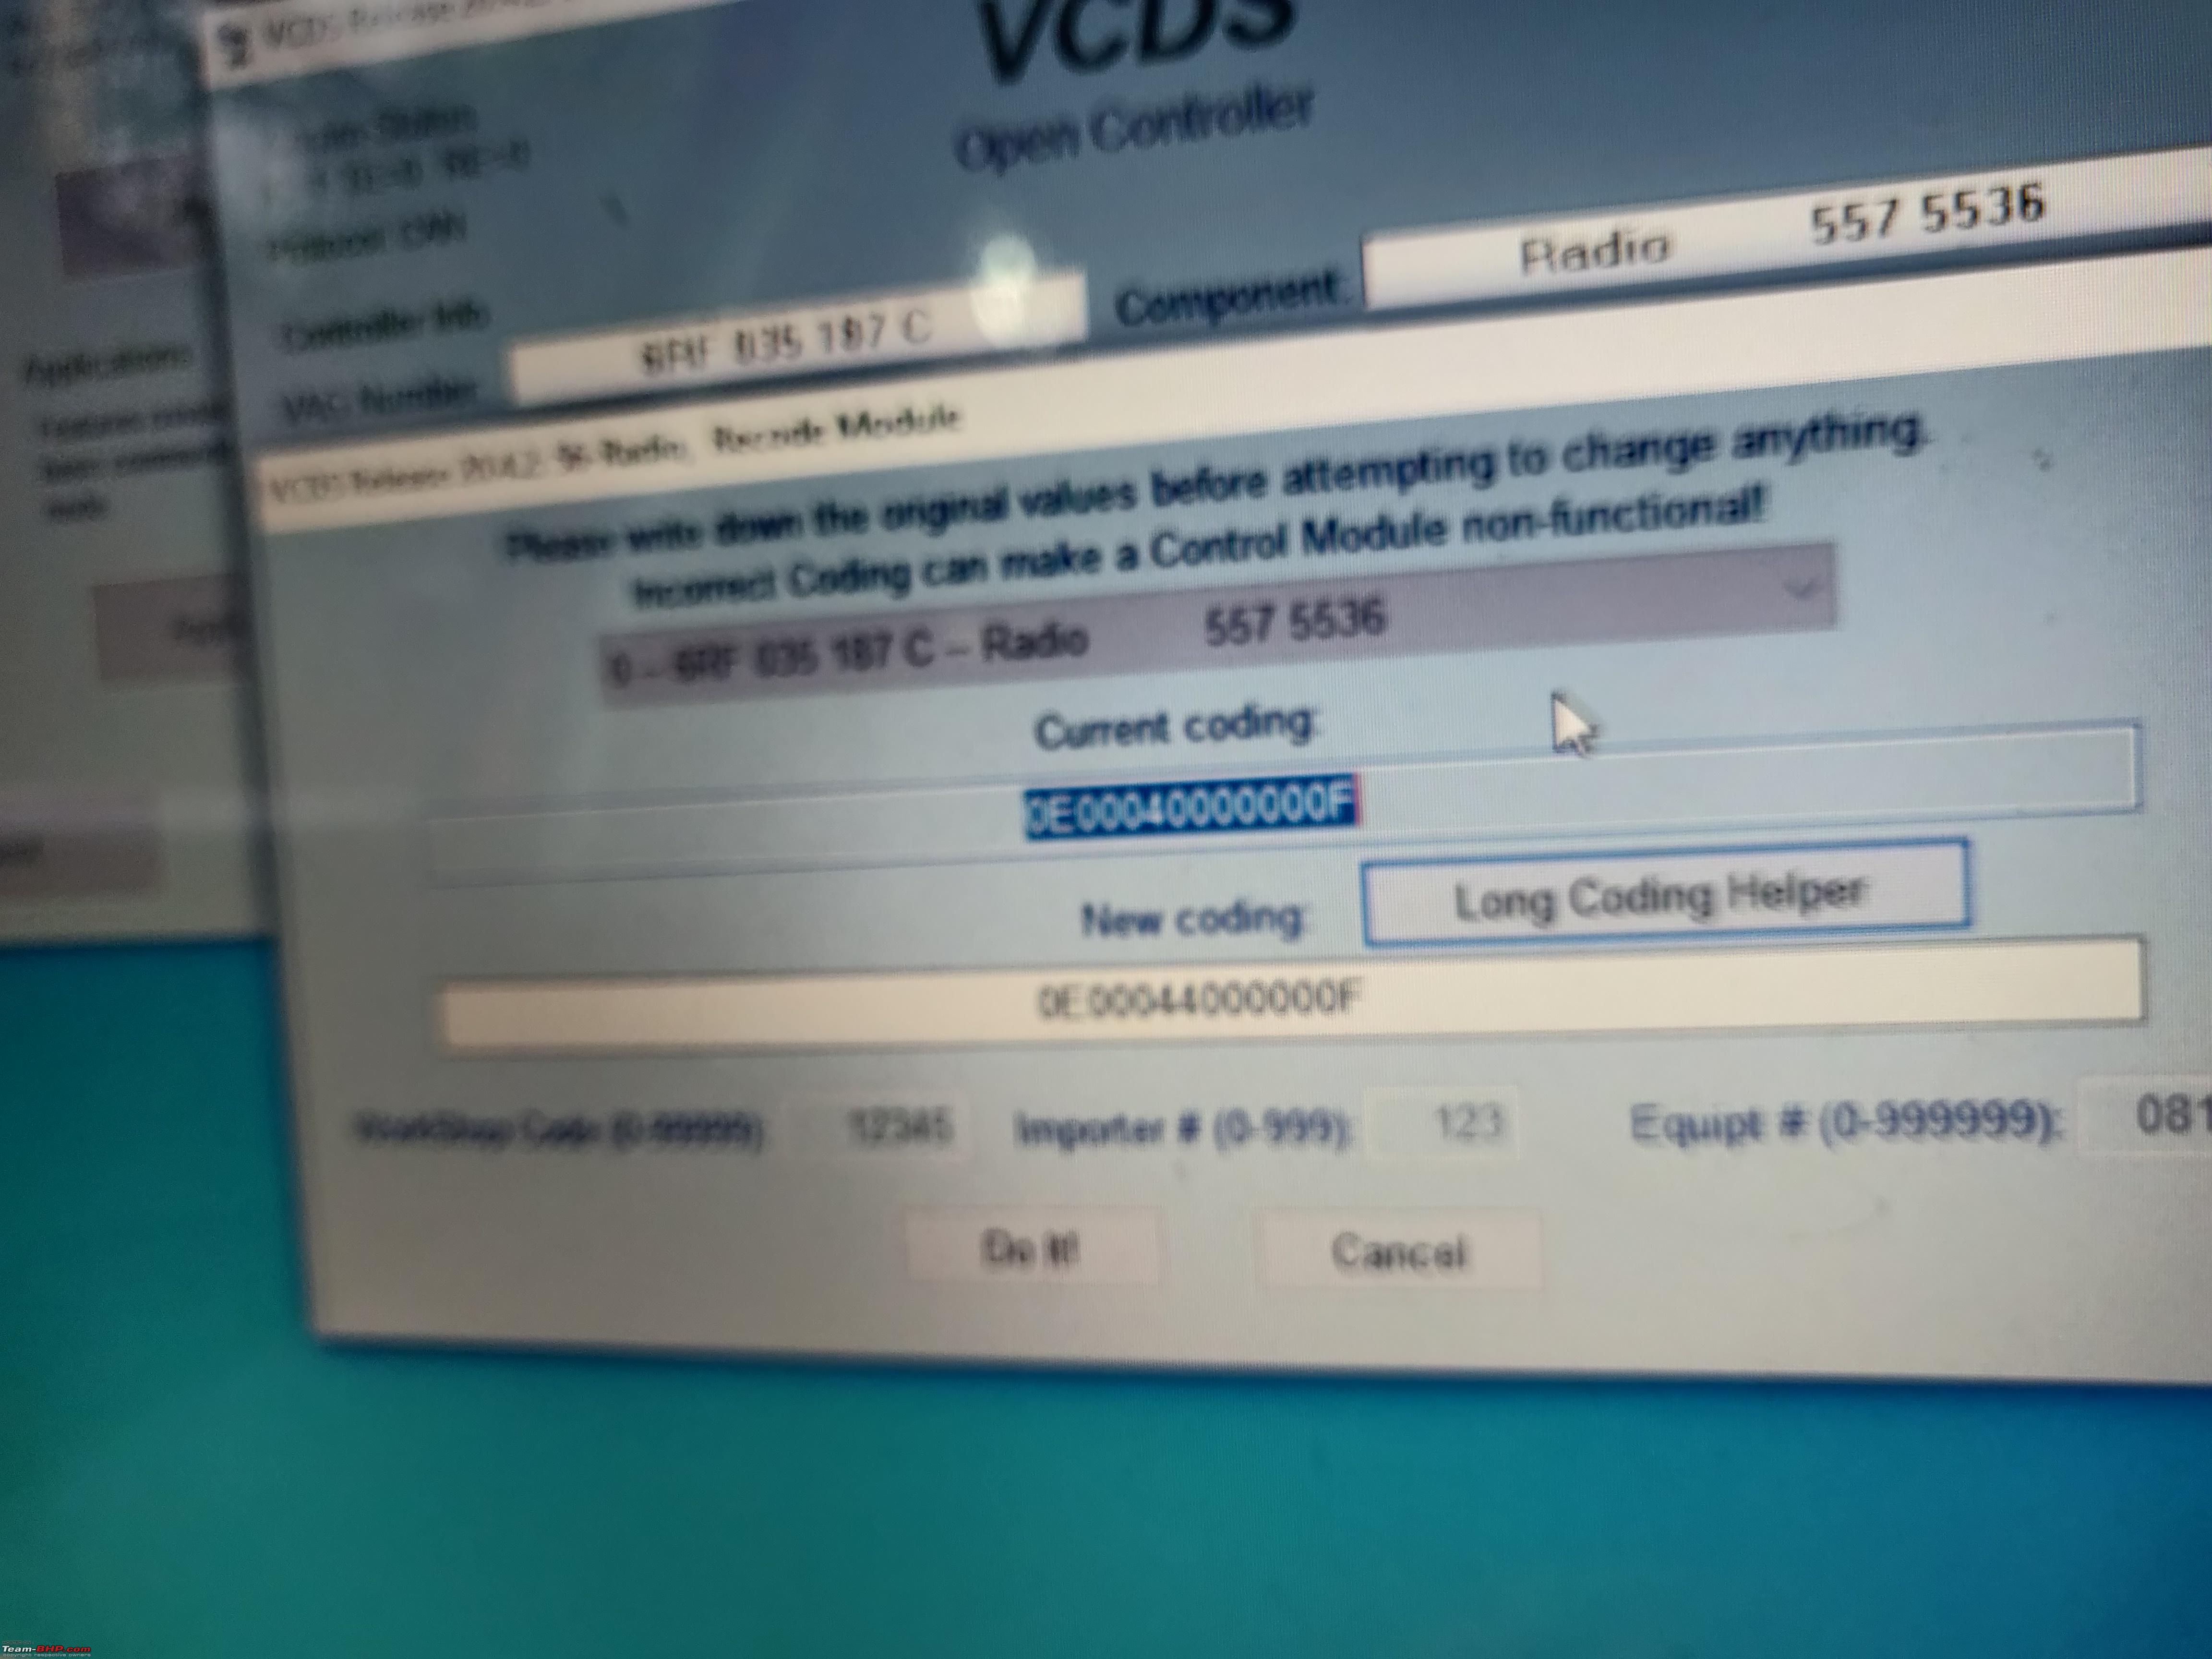
- Radio Coding.jpg (4.09 MiB) Viewed 5368 times
Wiring Connections
The camera needs a Fused
Power source from the Fusebox. Most accessory cameras use +15 supplies and so this was naturally what I tried in the beginning. However, I had problems with the boot switch not working and the camera would not flip back in after taking the key out. Connecting to a +30 source fixed this issue. A few retrofitters I spoke to had not tried this and had accepted that the Camera won't flip back in without the key, but this in my opinion is a ridiculous trade-off and I couldn't have lived with it. The camera wiring kit had a fuse crimp which is not appropriate for the 6R and so it can be cut and connected to a Junior Power Timer or a Fuse-Tap joint depending on your preference.
Video Quality
The video quality isn't the best and is definitely no match to aftermarket cameras with 1080p SONY CCD sensors, but the camera itself is quite usable and helpful even in the night. A powerful reverse LED will improve night-vision, but I have not been unhappy with this camera.
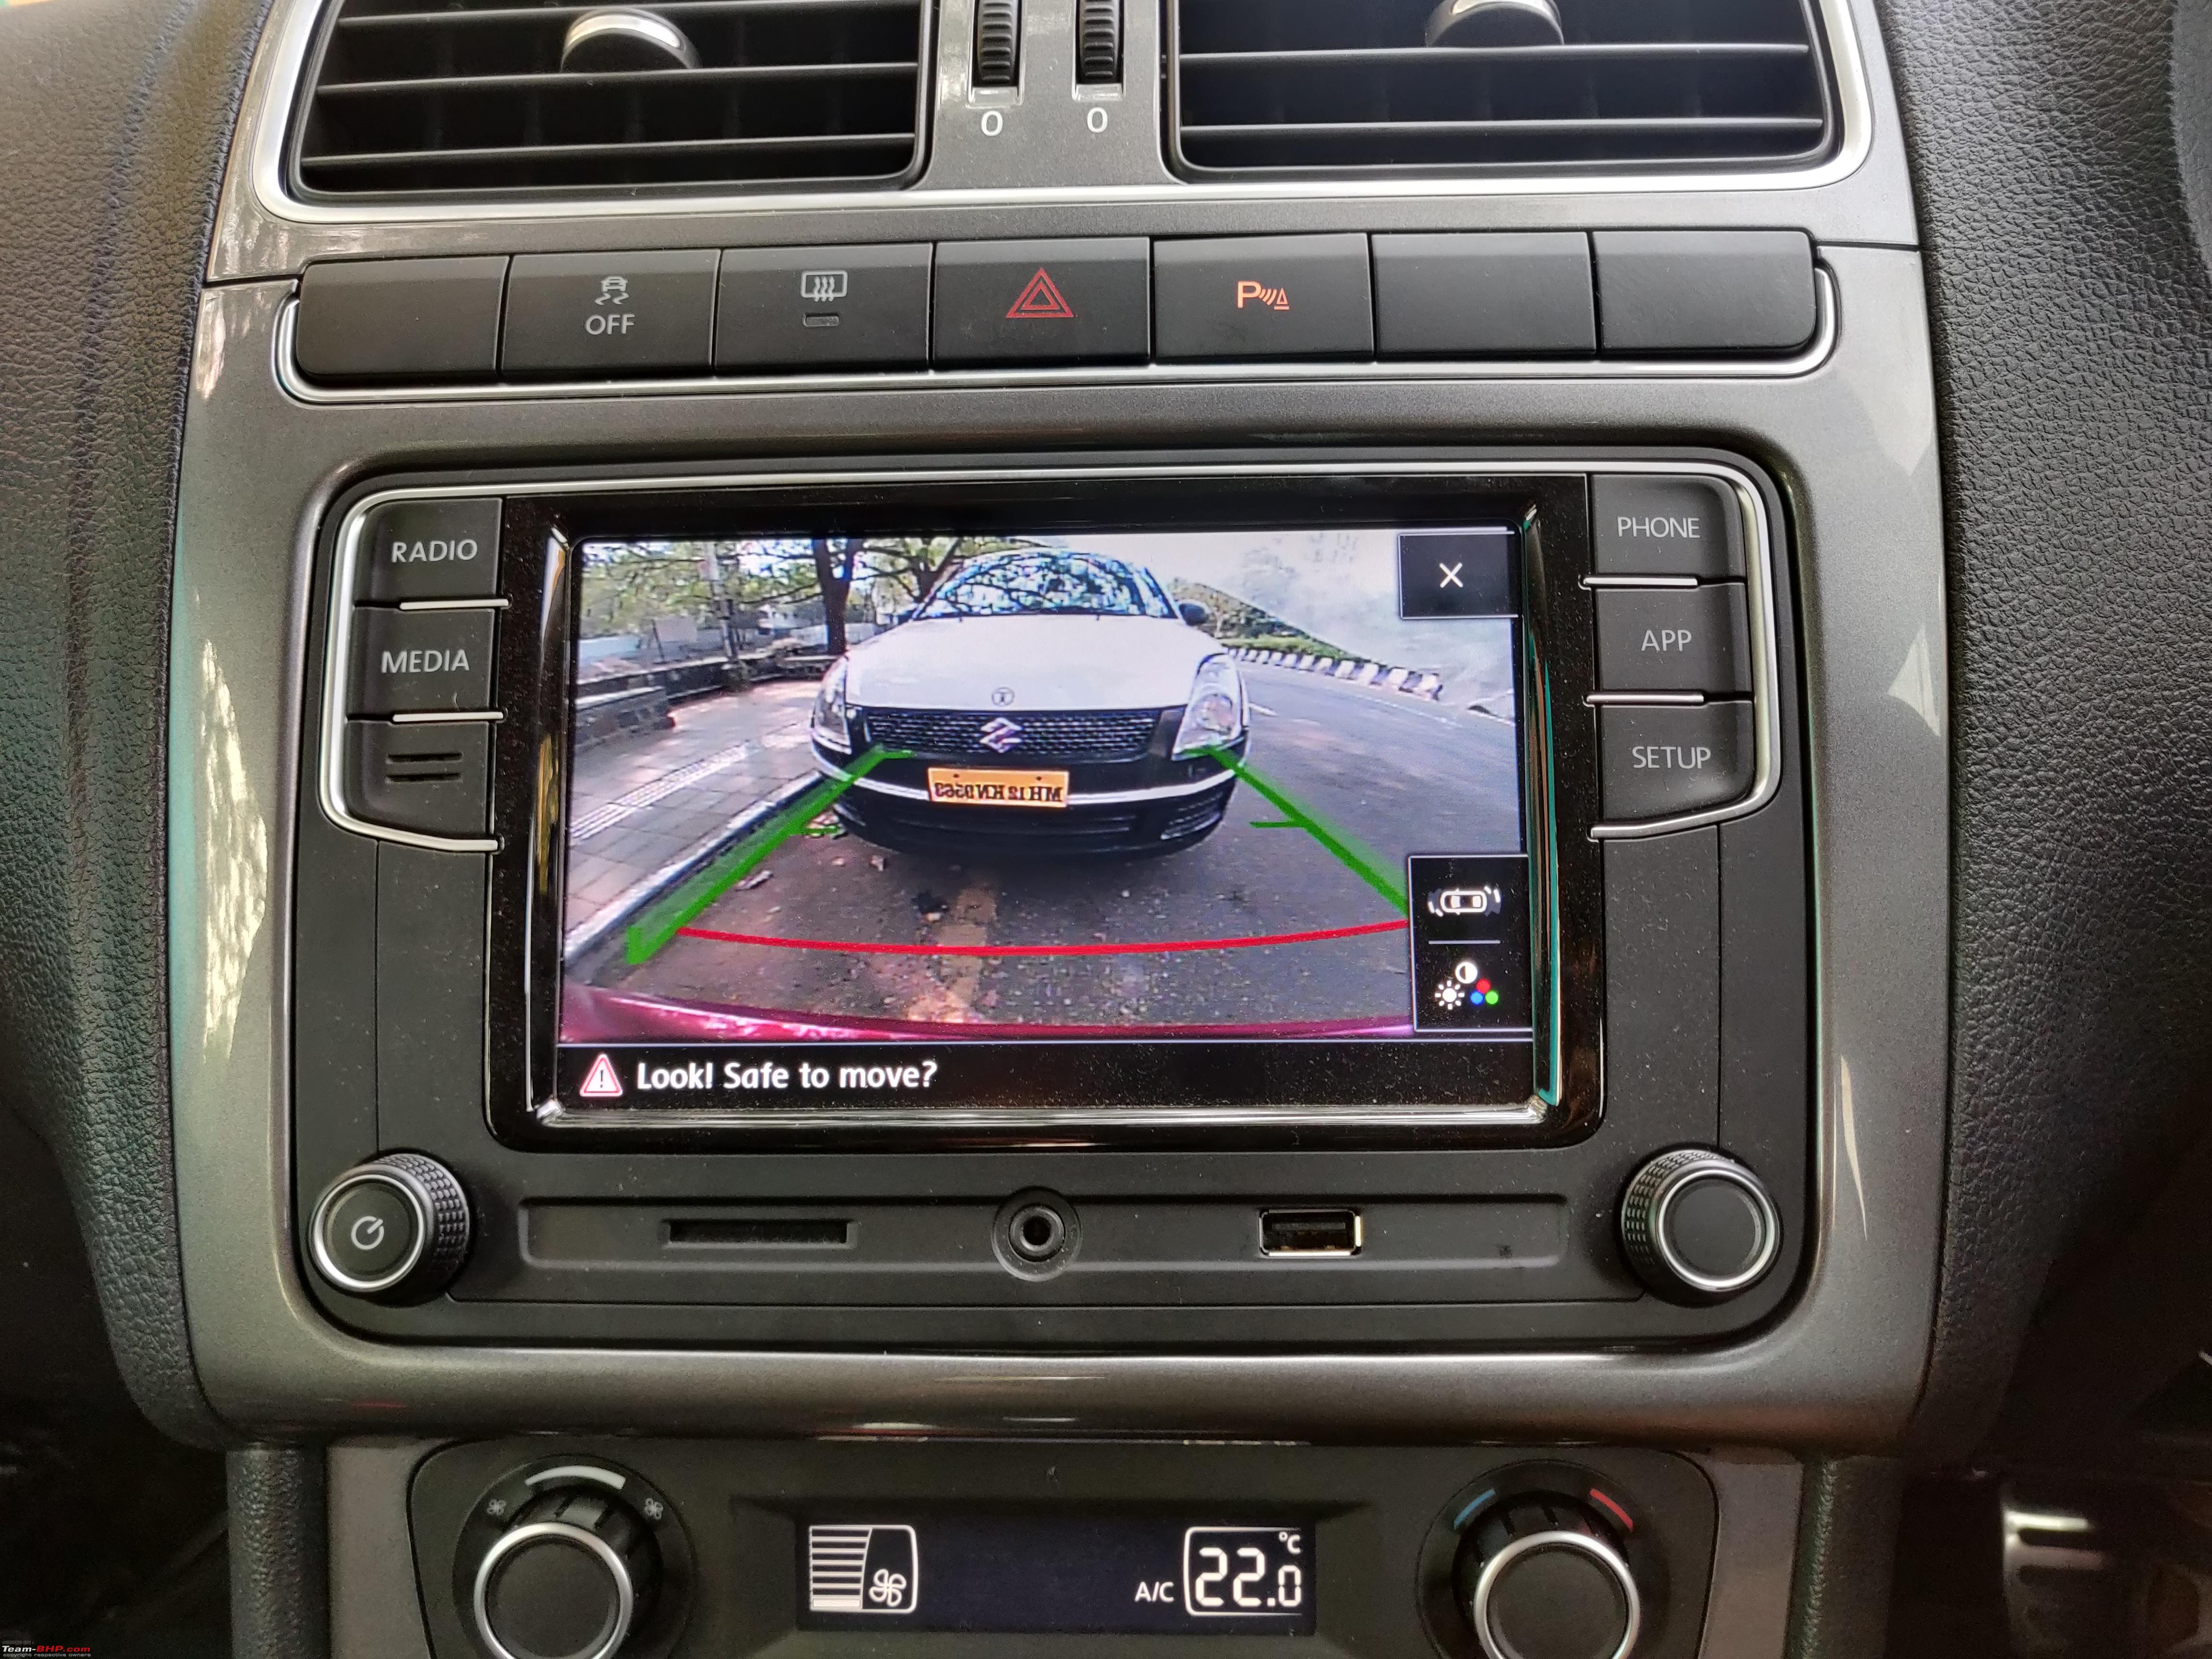
- Daylight Video Quality.jpg (6.88 MiB) Viewed 5368 times
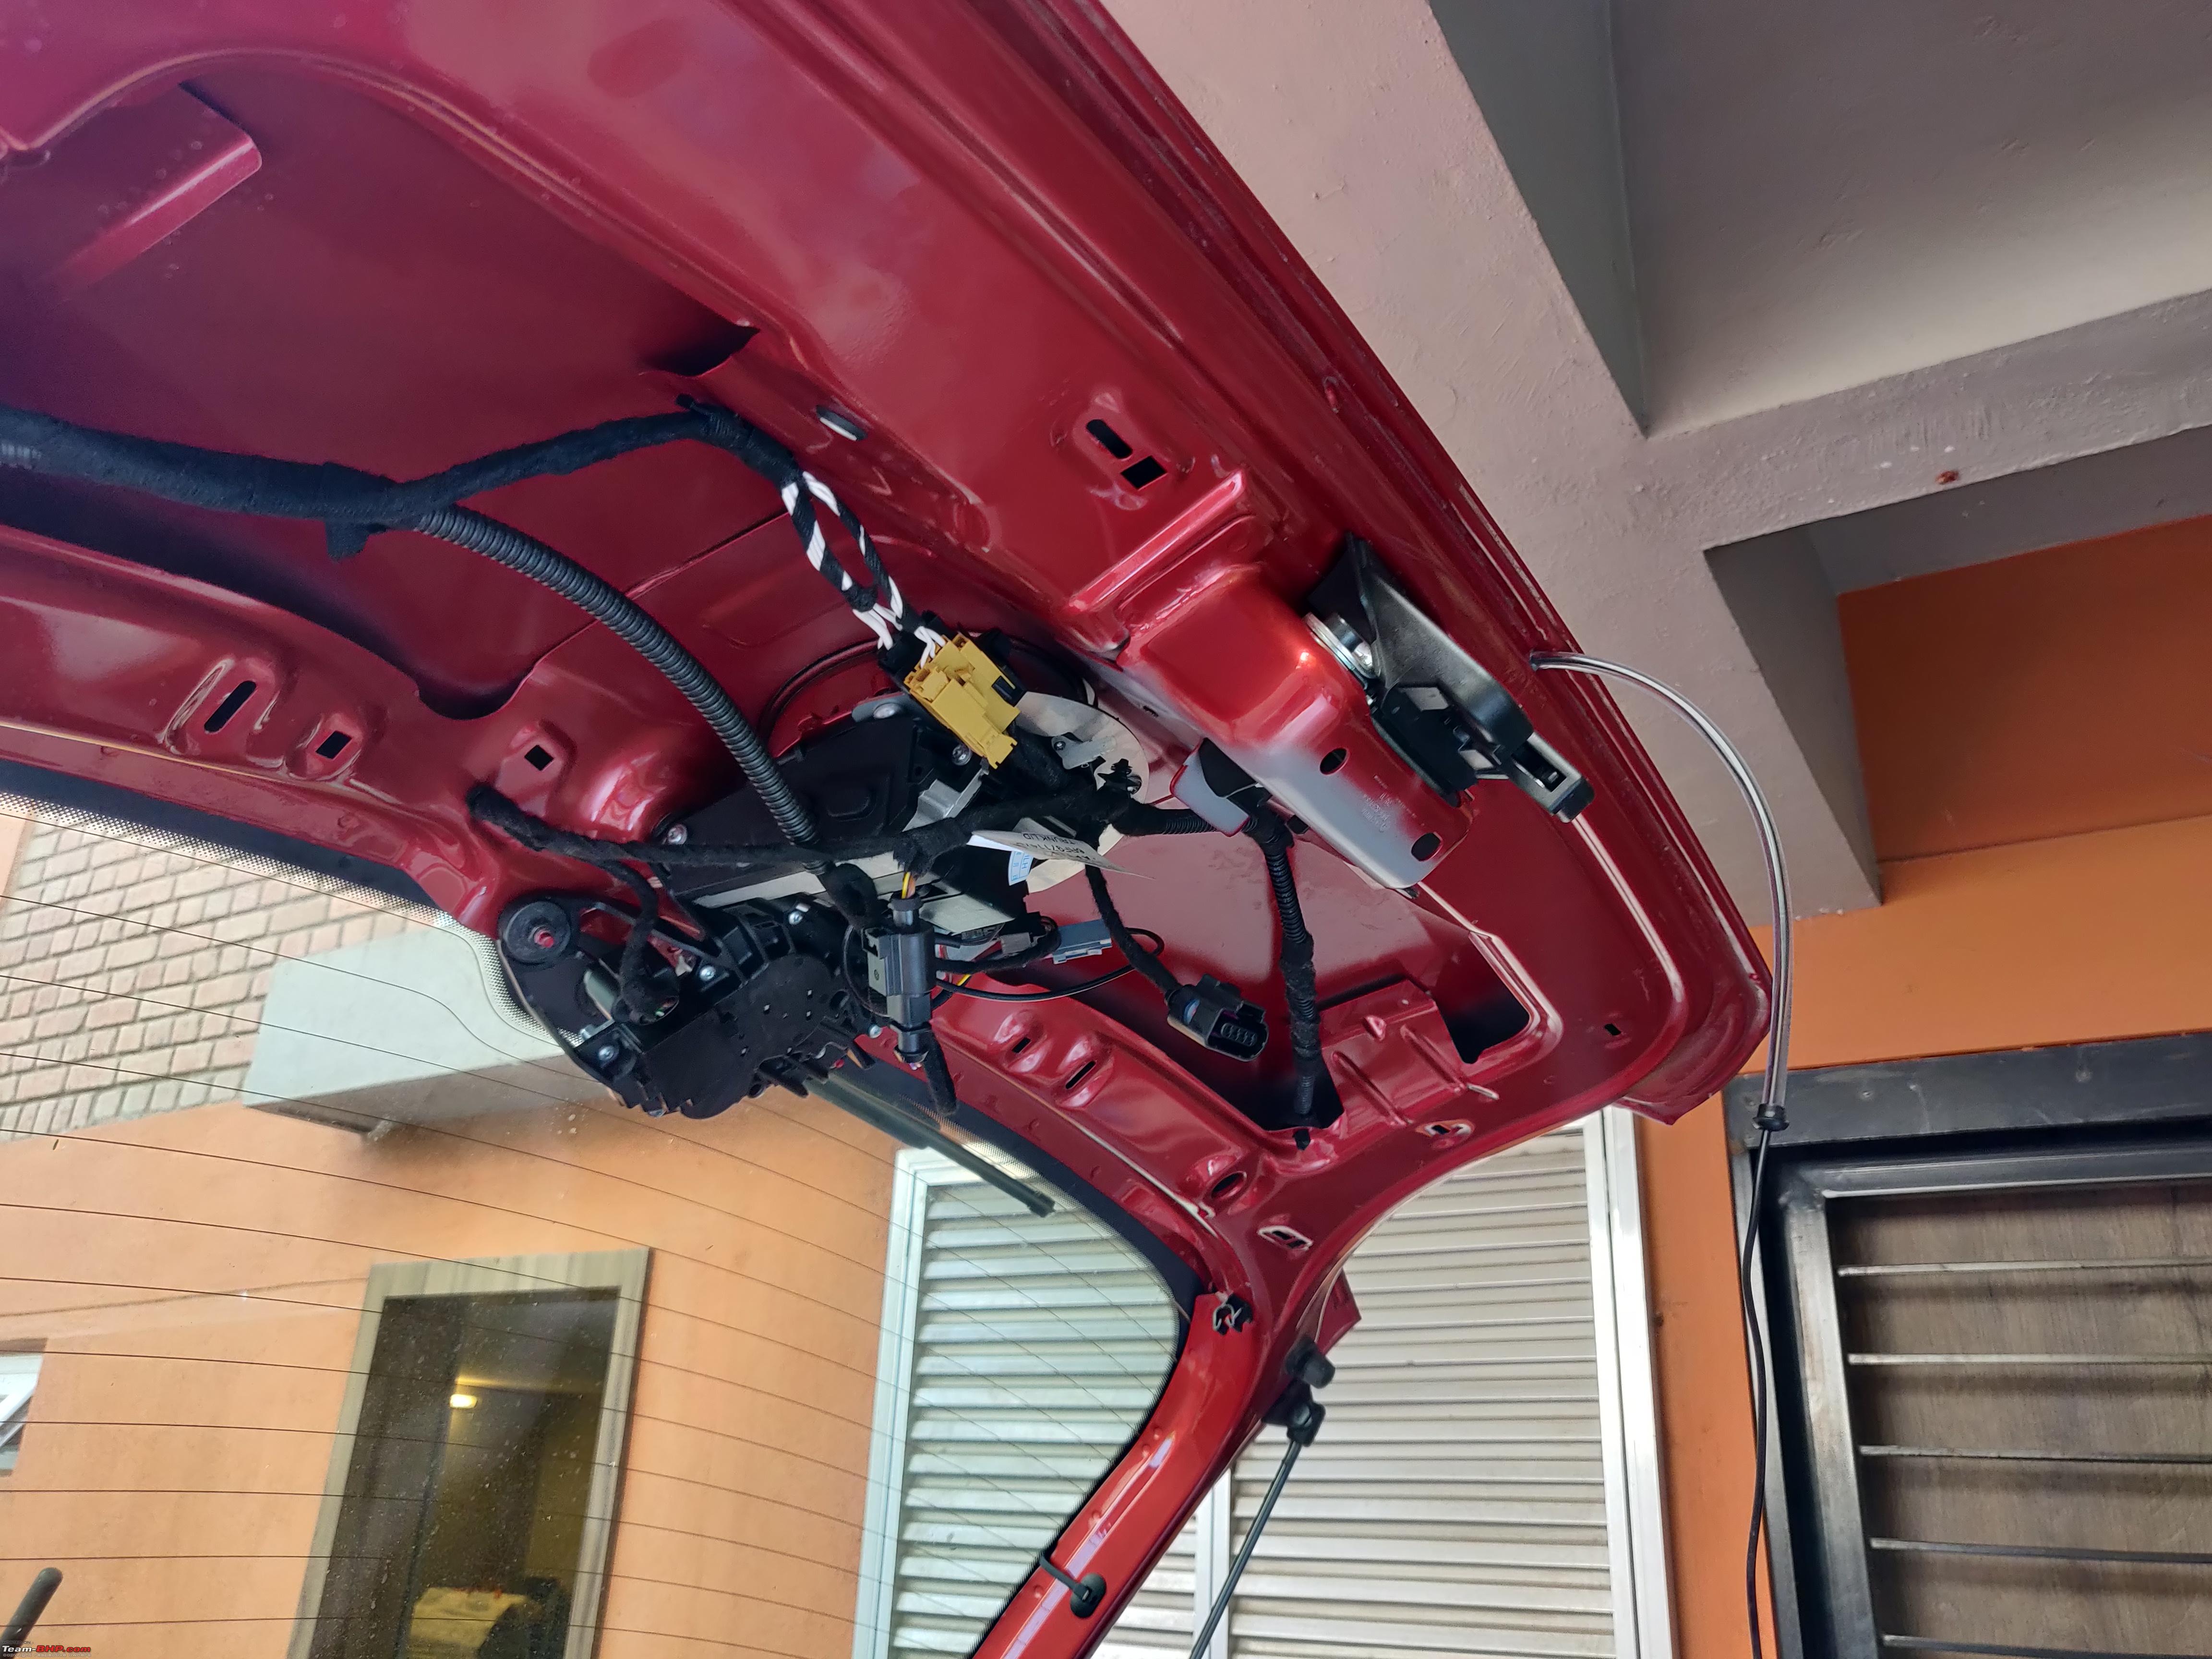
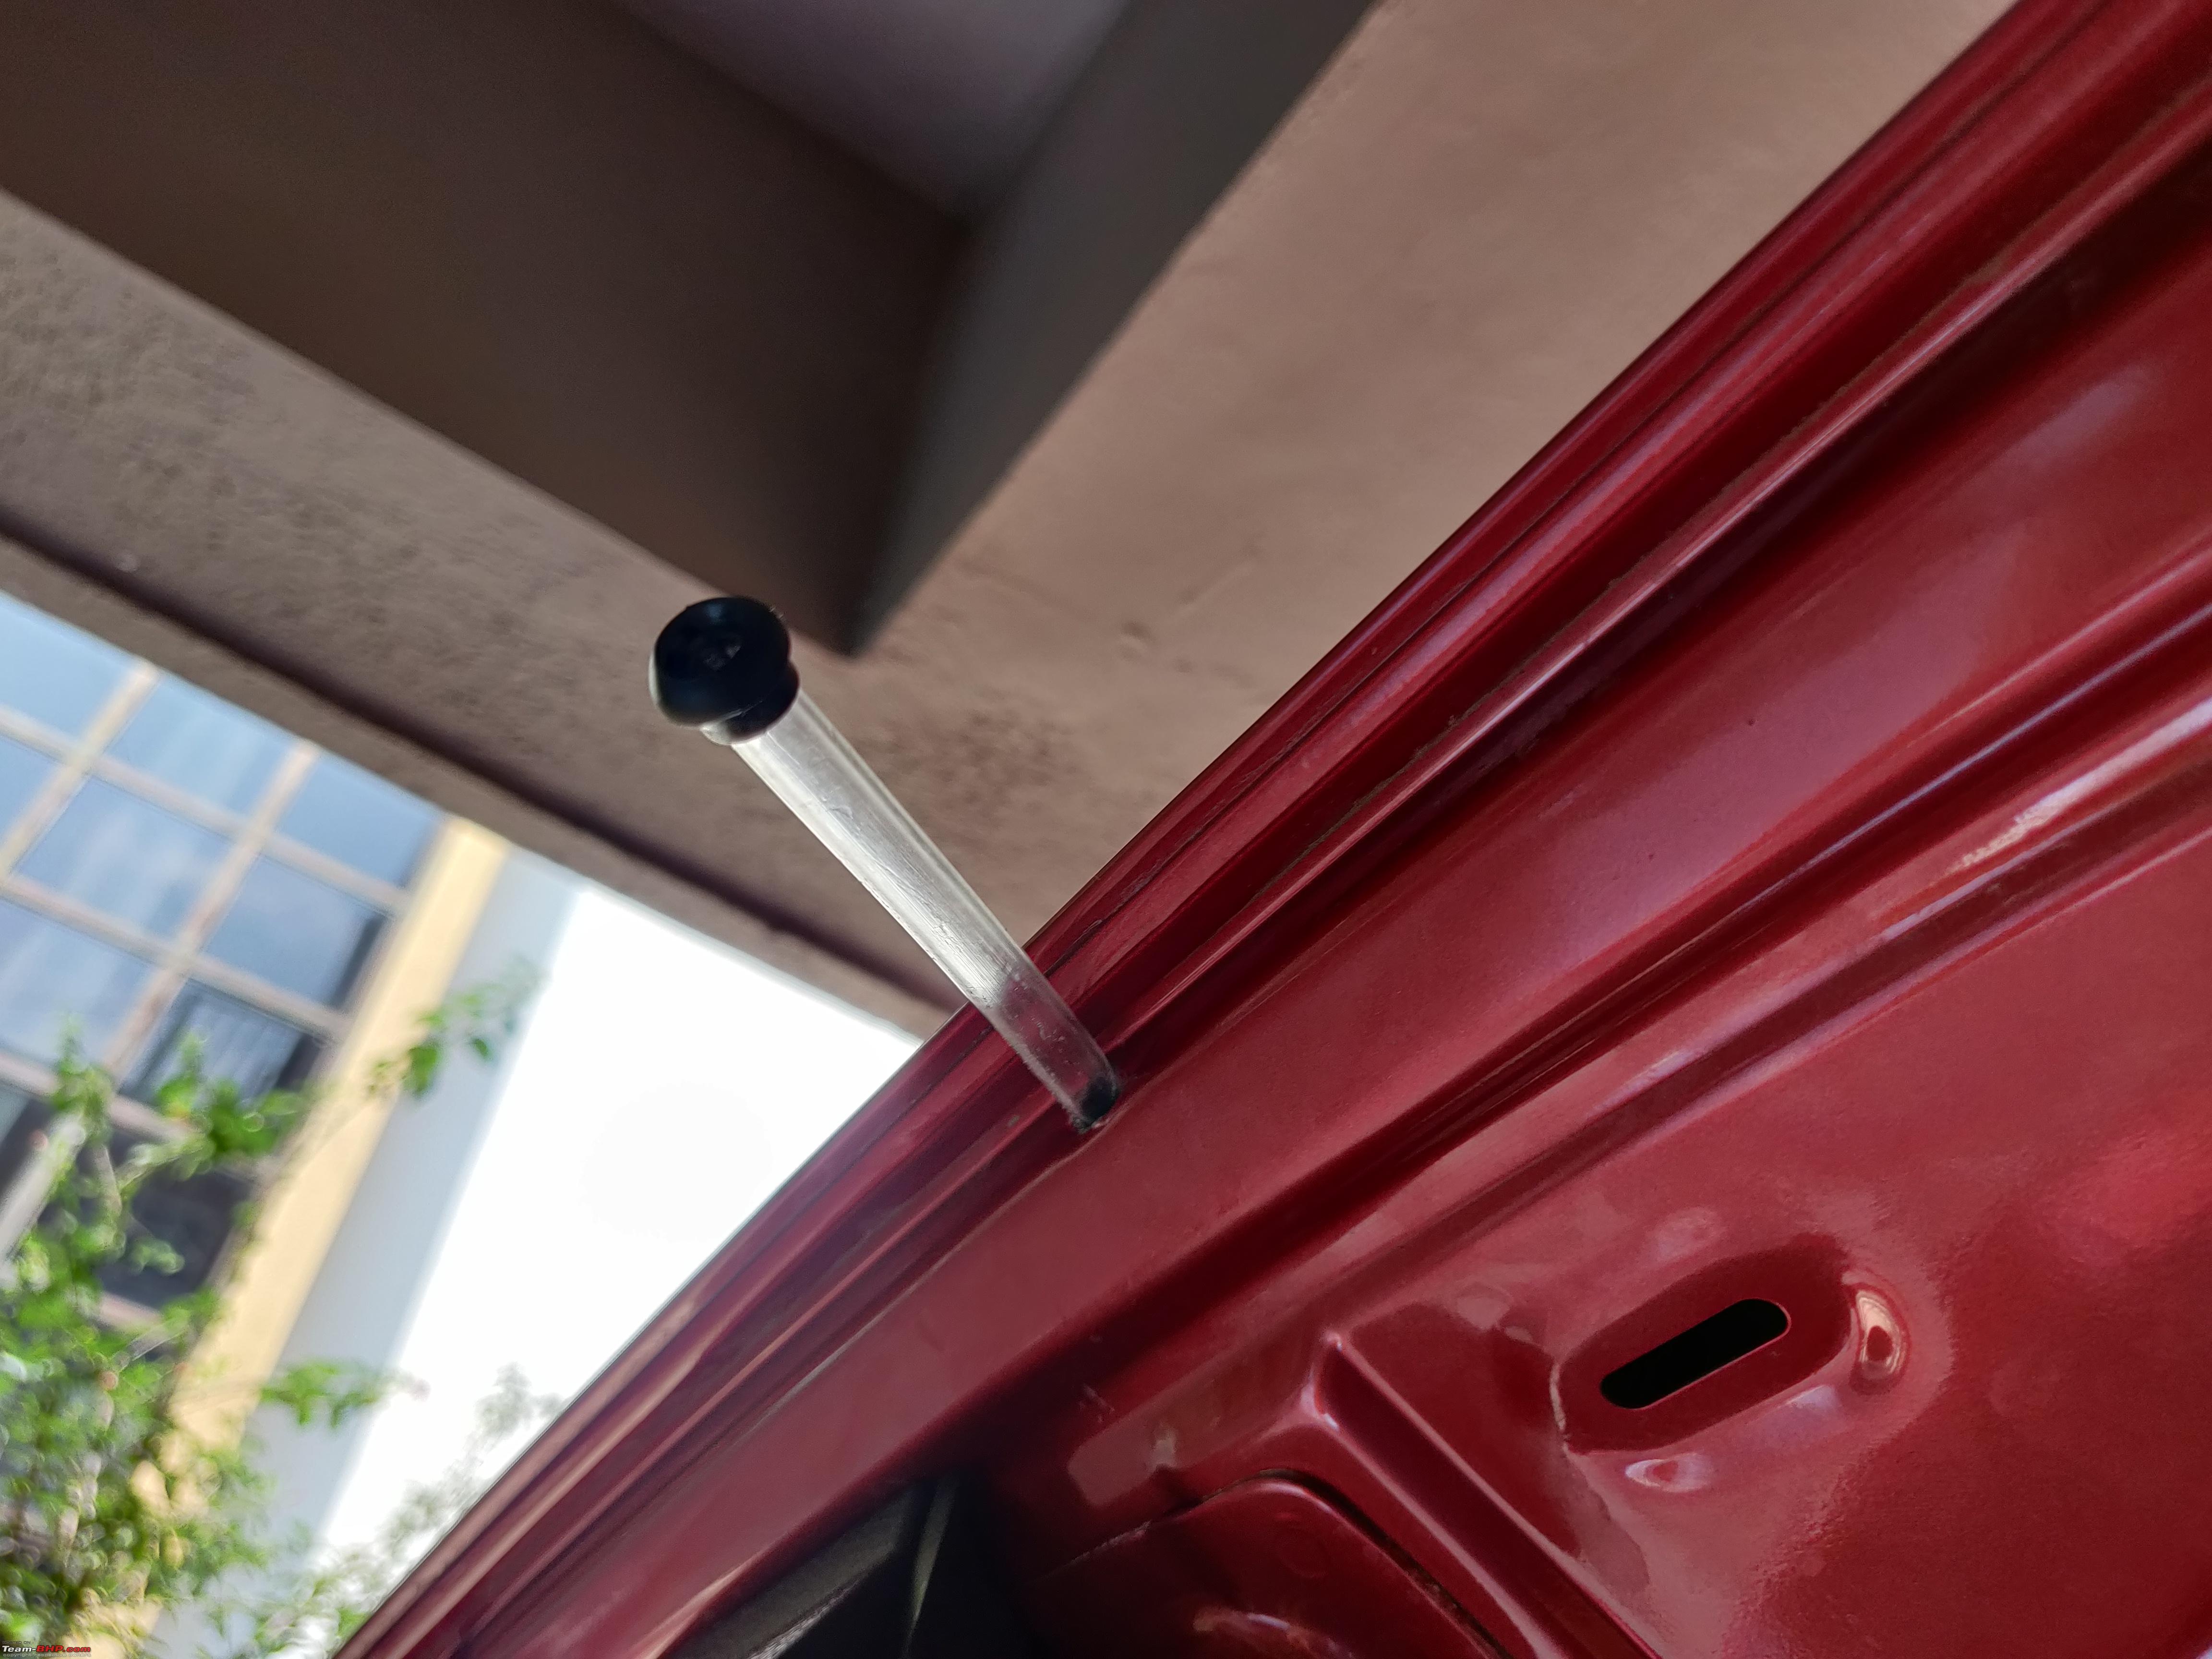
Drain Pipe
This is quite an important aspect of the Flip Camera install and failure to pay heed to
water drainage, would lead to flooding in the Polo boot.

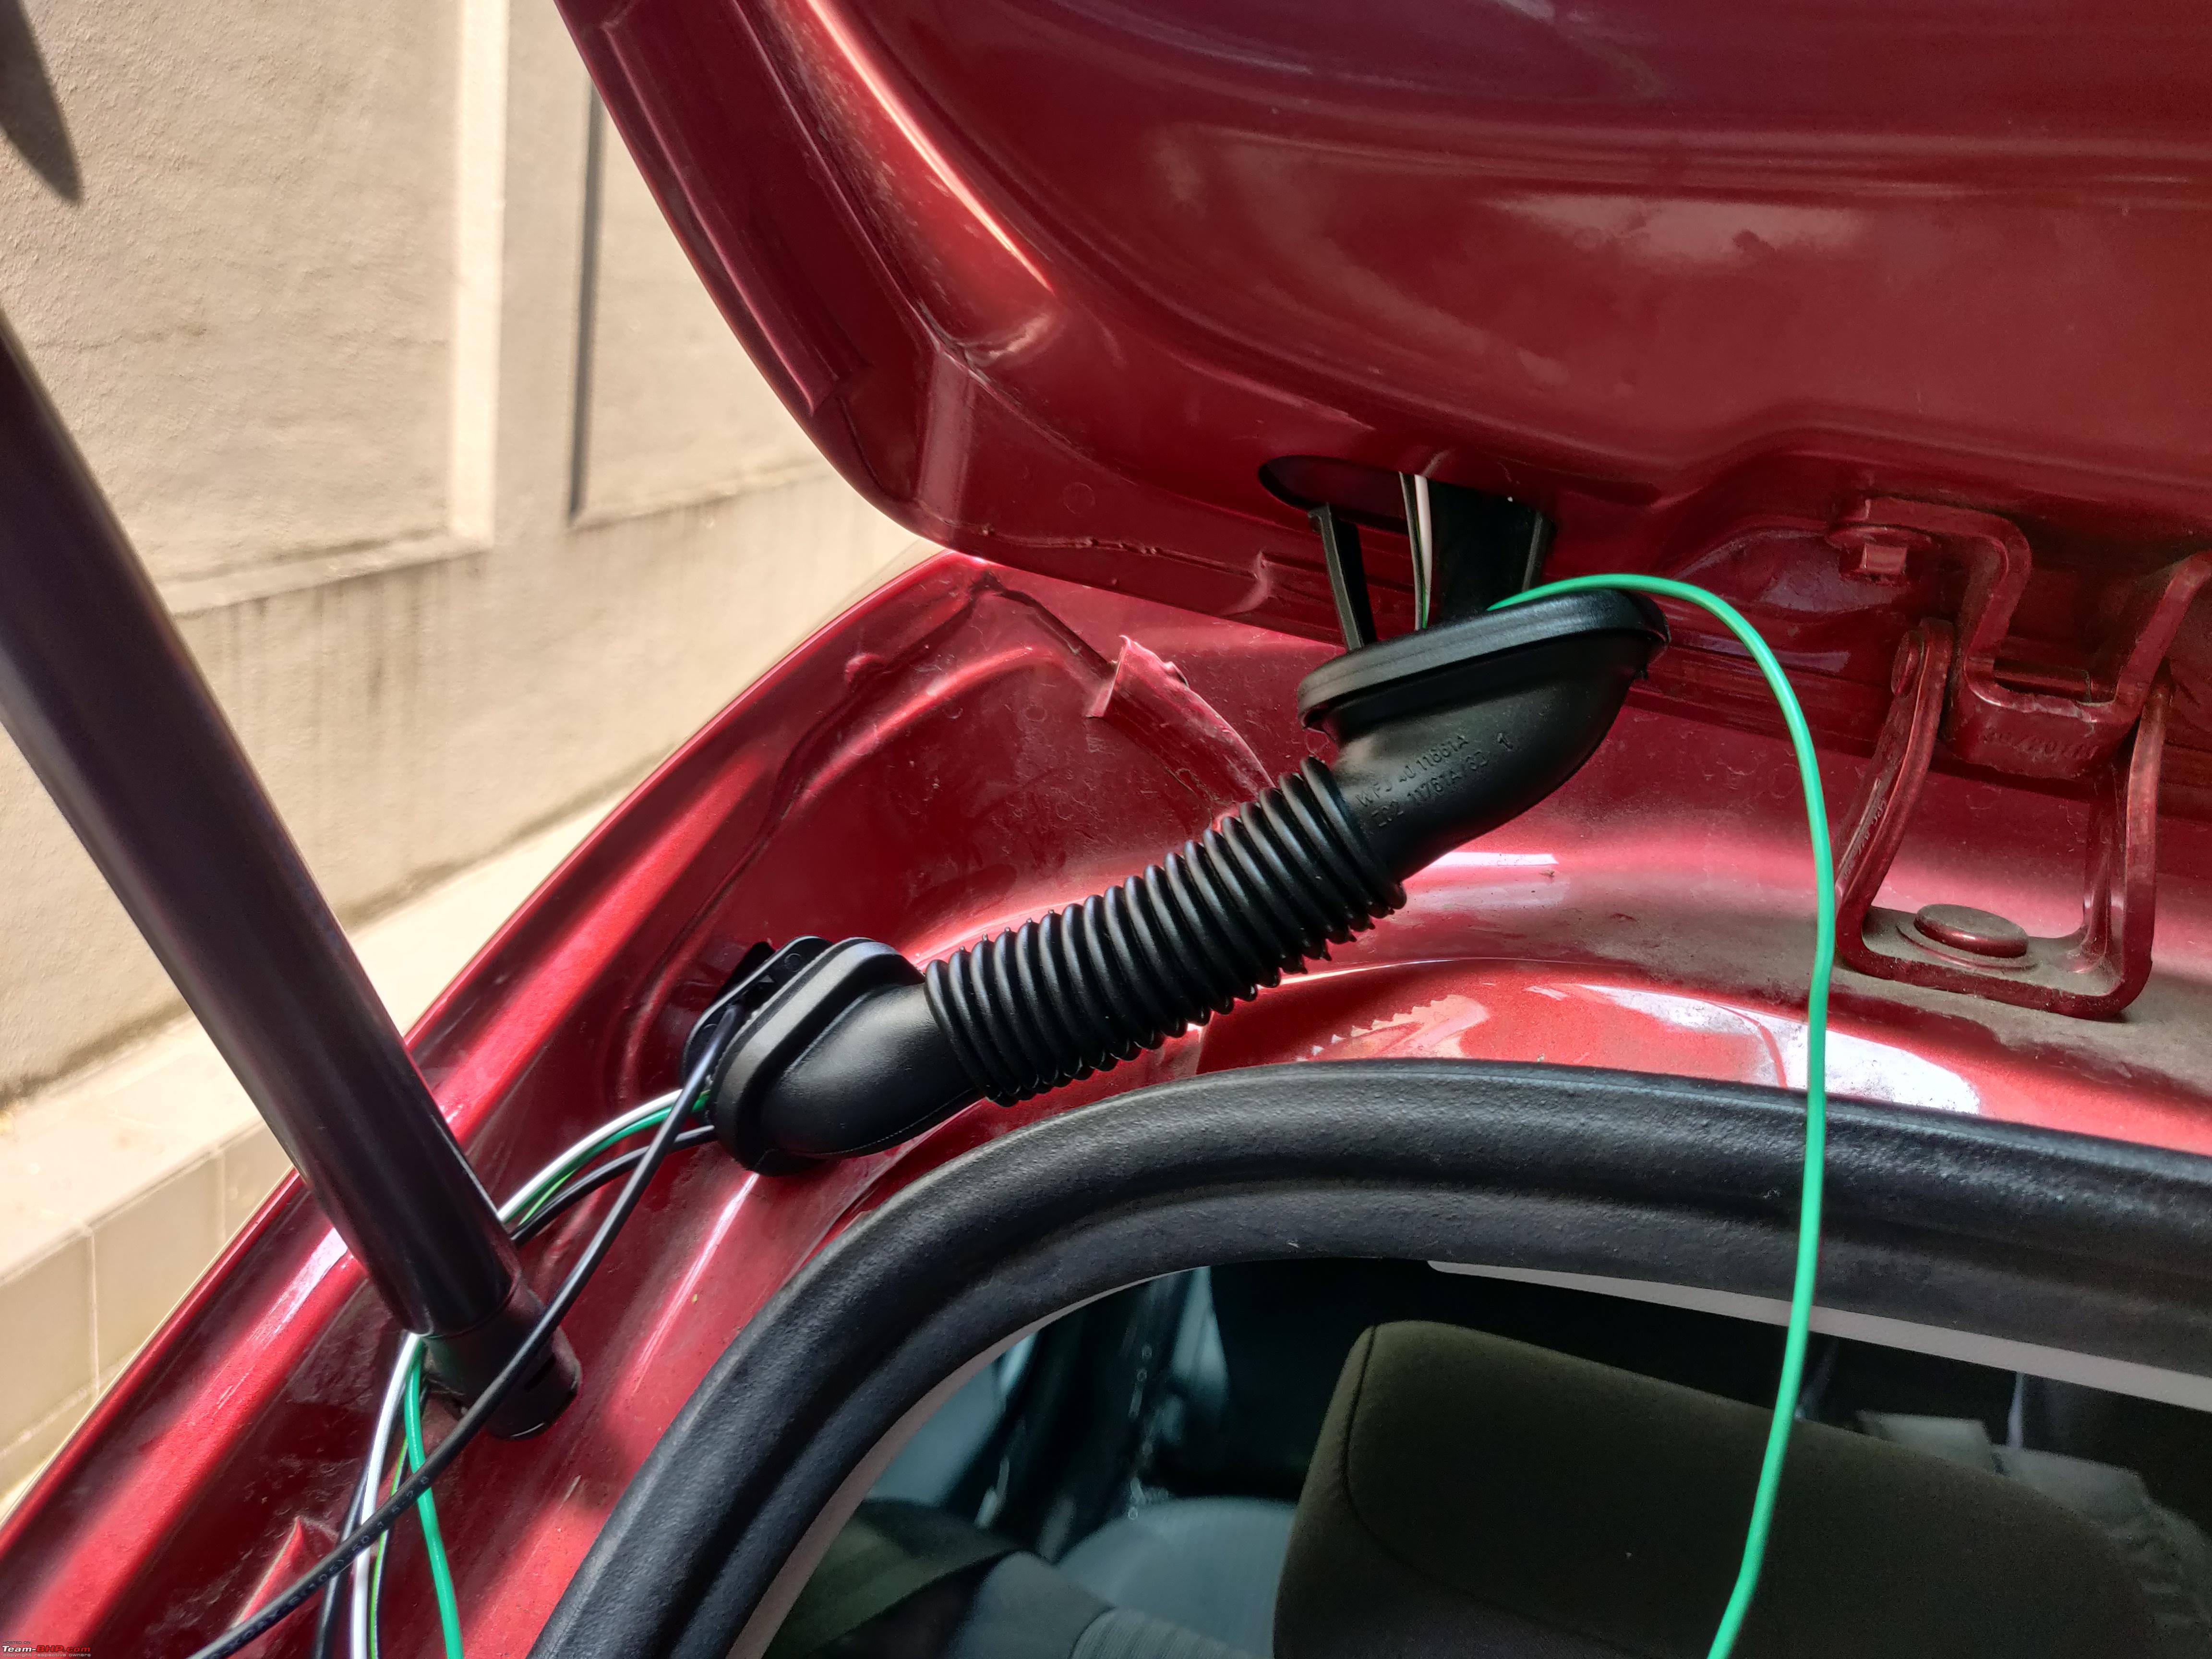
Master Ciclo and Graaja had both accounted for this problem and drilled a drain hole in the hatch region to route the drain pipe. I did not want to drill my new car, just 3 months old, and fortunately, I found two
body-coloured grommets along the boot sill, one of which was pried open to route the drain pipe
- Drain Pipe.jpg (4.87 MiB) Viewed 5368 times
- Drain Pipe End Grommet.jpg (4.45 MiB) Viewed 5368 times
- Water Drain Pipe.jpg (5.38 MiB) Viewed 5368 times
The plastic attachment for the drain on the camera is also a potential
leakage site, and once everything was tightened down, I applied silicone gasket to all potential ingress points. My car has been through two years of monsoons now, and there has been no trouble of water or humidity inside. I also did some extensive water testing, and made a quick video on this camera. Just a short while after this video, I came to know of over 100 Polo owners (both newer and older cars) who got this installed on their cars. It was this video and the allied threads about this retrofit which suddenly made the Flip Camera a very desirable proposition in India again. I am glad I could inspire the amazing Polo community in some way

[youtube]
https://youtu.be/zWbJ-nOlsbM[/youtube]
Moving ahead, it would really be nice if the
OEM Flip Camera with Dynamic Guidelines would be compatible with the Polo 6R with a BCM Max, and perhaps our in-house experts could shed more light to whether or not it is possible, and if not, why not


