Anyone had their LED headlights resealed or had new lenses fitted?
Moisture ingress into my passenger side is getting worse. Butyl seals on both sides are quite dry rotted and looking worse for wear. lenses are a bit battered after 105K so was maybe thinking of just fitting new lenses but don't want to fit a cheap set and have them go yellow.
Resealing or re-lensing LED headlights
-
ciclo
- Bling Bling Diamond Member
- Posts: 8974
- Joined: Sun Feb 24, 2013 10:20 am
- Drives: 6R'13/G7.5'19
- Location: Earth ♥, Spain.
- Contact:
Re: Resealing or re-lensing LED headlights
Fun fact for everyone here:
Have you ever noticed that we call that flat plastic a 'lens' (which literally means 'lentil' in Latin ) even though it refracts zero light?
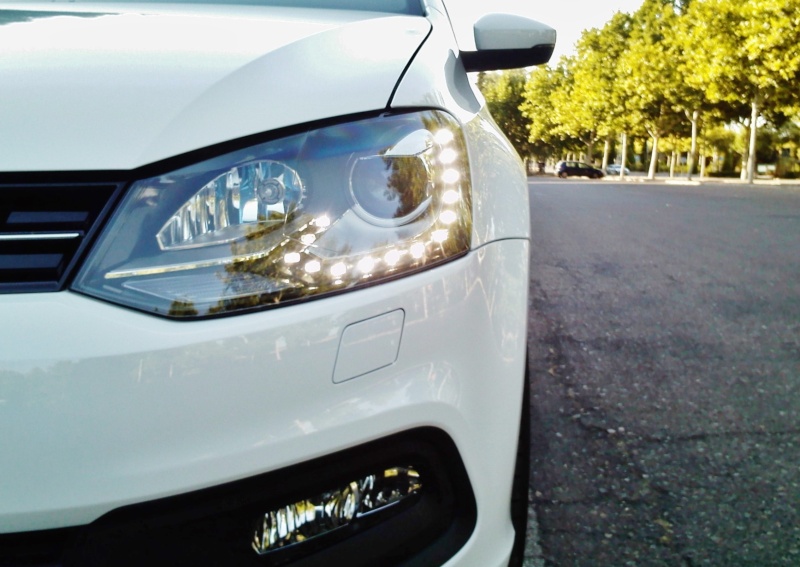
On a Polo 6C with reflector LEDs, that 'lens' is basically a high-tech Tupperware lid keeping the rain out. Modern German engineering named after medieval soup history.
Gotta love it!

I propose two options:
Option A: The "Do It Once, Do It Right" Method (Best Choice)
To be completely honest, these reflector LED headlights from VW are notorious for running extremely hot inside. When you mix that with the lovely British weather, condensation is almost inevitable once the factory seal fails. Since VW treats these as 100% sealed units, any DIY repair is honestly a ticking clock with an uncertain outcome.
Recommendation: Before buying parts, scour specialized Euro-parts sites (like Autodoc or distributors for Magneti Marelli/Automotive Lighting, who make the OEM ones). You can often find brand-new, complete units heavily discounted or on clearance. It saves you the headache and guarantees a perfect seal.
Keep in mind that you can transplant the existing external control modules and they do not need to be included in the purchase of the new LED headlights.
Option B: The Budget DIY Route (If you fancy a challenge)
If you do decide to open them up, without losing your sanity:
-The Seal: Don't just add new butyl over the old stuff. You need to heat the headlight, separate the pieces, and scrape out every single milligram of the old rotted seal. Use premium automotive butyl tape (like RetroRubber or Morimoto) and clamp it tightly while it cools down.
-The Yellowing: Aftermarket covers turn yellow fast because they lack proper UV protection. To prevent this, spray them with a 2K UV-resistant clear coat before fitting them. Alternatively, you’ll need to apply a high-quality ceramic coating every 6 to 12 months to act as a shield.
"A final reflection"
Of course, you could always just cross your fingers and hope someone gently bumps into your front bumper while parking. It would be a real shame if a cracked headlight forced a complete replacement out of nowhere... but hey, stranger things have happened!
Have you ever noticed that we call that flat plastic a 'lens' (which literally means 'lentil' in Latin
 ) even though it refracts zero light?
On a Polo 6C with reflector LEDs, that 'lens' is basically a high-tech Tupperware lid keeping the rain out. Modern German engineering named after medieval soup history.
Gotta love it!


I propose two options:
Option A: The "Do It Once, Do It Right" Method (Best Choice)
To be completely honest, these reflector LED headlights from VW are notorious for running extremely hot inside. When you mix that with the lovely British weather, condensation is almost inevitable once the factory seal fails. Since VW treats these as 100% sealed units, any DIY repair is honestly a ticking clock with an uncertain outcome.
Recommendation: Before buying parts, scour specialized Euro-parts sites (like Autodoc or distributors for Magneti Marelli/Automotive Lighting, who make the OEM ones). You can often find brand-new, complete units heavily discounted or on clearance. It saves you the headache and guarantees a perfect seal.
Keep in mind that you can transplant the existing external control modules and they do not need to be included in the purchase of the new LED headlights.
Option B: The Budget DIY Route (If you fancy a challenge)
If you do decide to open them up, without losing your sanity:
-The Seal: Don't just add new butyl over the old stuff. You need to heat the headlight, separate the pieces, and scrape out every single milligram of the old rotted seal. Use premium automotive butyl tape (like RetroRubber or Morimoto) and clamp it tightly while it cools down.
-The Yellowing: Aftermarket covers turn yellow fast because they lack proper UV protection. To prevent this, spray them with a 2K UV-resistant clear coat before fitting them. Alternatively, you’ll need to apply a high-quality ceramic coating every 6 to 12 months to act as a shield.
"A final reflection"
Of course, you could always just cross your fingers and hope someone gently bumps into your front bumper while parking. It would be a real shame if a cracked headlight forced a complete replacement out of nowhere... but hey, stranger things have happened!

-
amer6R
- Platinum Member
- Posts: 1305
- Joined: Thu Feb 06, 2020 7:57 am
- Drives: Polo 6R 2010 1.6 TDI
- Location: budget build
Re: Resealing or re-lensing LED headlights

local headlight rebuilder pimper, swears by this product