Any idea about how to save/set Radio in RCD320?
While playing around, Reset it to factory.
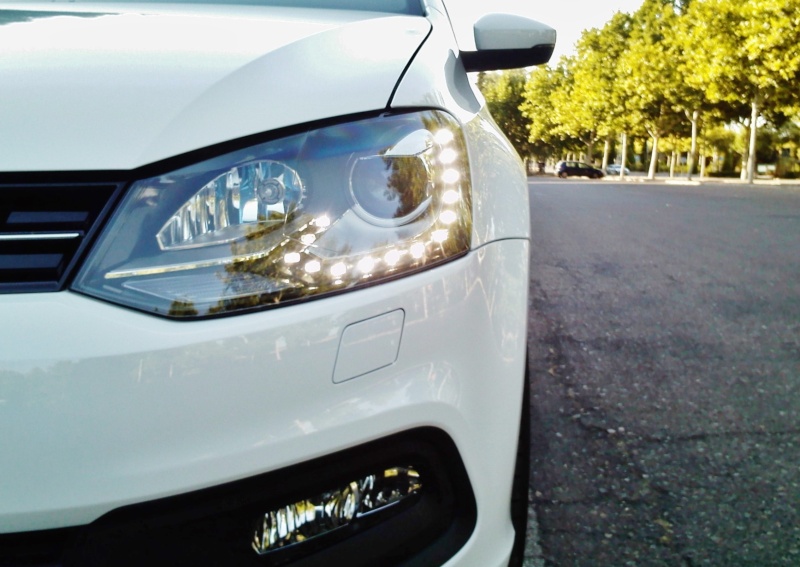
Introducing my Lightning McQueen LM95
-
antardaksh04
- New
- Posts: 43
- Joined: Sat Nov 21, 2015 6:20 pm
- Drives: TSI
- Location: IND
Re: Introducing my Lightning McQueen LM95
Hi,ag69 wrote: Fri Sep 22, 2017 4:25 pm Apologies ciclo (and all) for not able to visit and update thread.
have got stuck in some work and hardly getting any time.
tried removing A pillar twice and something came up and DIY remained incomplete.
hopefully, soon i would get few hours to get this done.
You will need to pull the A pillar trim with lot of strength. It wont budge if you pull gently.
Please make sure there is nothing on the dashboard and you have enough room so that you don't end up scratching dashboard.
You can save radio station by searching the channel frequency first and then long press the preset number.
Regards.
-
ag69

- Silver Member
- Posts: 432
- Joined: Fri May 26, 2017 10:39 am
- Drives: 1.2TSi 77Kw 7DSG
- Location: Earth
Re: Introducing my Lightning McQueen LM95
Thank you antardaksh04.
Got my radio frequency saved.
Got my radio frequency saved.
-
ag69
- Silver Member
- Posts: 432
- Joined: Fri May 26, 2017 10:39 am
- Drives: 1.2TSi 77Kw 7DSG
- Location: Earth
Re: Introducing my Lightning McQueen LM95
Recently got a chance to drive a LHD vehicle (Polo too).
Somehow what surprised me VW Polo - LHD and RHD both have a pass (flash high beam) stalk on left of steering. Indicator stalks on right of steering.
Now what kept me thinking is --
Did manufacturers pull LHD vehicles parts and just put in RHD cars? without thinking of orientation?
Eg -- you are driving a manual gearbox LHD on single lane and have to overtake a vehicle.
You use left hand on stalks and use pass (ie flash high beam) to oncoming vehicle/s.
You use right hand to change gear. All good.
Now exact same thing in RHD, you cant use stalks to flash light to pass and change gear!!!!
Don't know if any certifying authority in RHD country think about this?
or I am absolutely stupid to come up with problem?
-
iichel

- Bling Bling Diamond Member
- Posts: 6687
- Joined: Fri Nov 14, 2014 2:14 pm
- Drives: Polo 6R 2.0 TDI, Passat B8 2.0 TSI
- Location: http://mypassat.nl/
Re: Introducing my Lightning McQueen LM95
here in the LHD world, the indicator stalks/high beam stalks are on the left. always.
-
ciclo
- Bling Bling Diamond Member
- Posts: 8868
- Joined: Sun Feb 24, 2013 10:20 am
- Drives: 6R'13/G7.5'19
- Location: Earth ♥, Spain.
- Contact:
Re: Introducing my Lightning McQueen LM95
Fortunately the horn button is in the center (RHD/LHD)... 
-
sharan1988
- New
- Posts: 13
- Joined: Thu Dec 21, 2017 1:01 pm
- Drives: Polo sedan
- Location: Chennai , India
Re: Introducing my Lightning McQueen LM95
hi , could you tell me where you got your steering with paddles . i have a volkswagen vento tsi and looking to buy the same steering. could you help me?
-
ag69
- Silver Member
- Posts: 432
- Joined: Fri May 26, 2017 10:39 am
- Drives: 1.2TSi 77Kw 7DSG
- Location: Earth
Re: Introducing my Lightning McQueen LM95
Sharan1988,
I got it from Poland. Honestly I searched for it for quite some time.
Same/similar is listed on vagtune.in
I got it from Poland. Honestly I searched for it for quite some time.
Same/similar is listed on vagtune.in
-
sharan1988
- New
- Posts: 13
- Joined: Thu Dec 21, 2017 1:01 pm
- Drives: Polo sedan
- Location: Chennai , India
Re: Introducing my Lightning McQueen LM95
vagtune is charging 45k without airbags... guess these should be around 20k
-
ag69
- Silver Member
- Posts: 432
- Joined: Fri May 26, 2017 10:39 am
- Drives: 1.2TSi 77Kw 7DSG
- Location: Earth
Re: Introducing my Lightning McQueen LM95
yes that is quite a lot.
You can find "SAME" looking steering wheels on ebay germany as well.
However please be extremely careful about buying any as they look same but have a different inside holes.
You can find "SAME" looking steering wheels on ebay germany as well.
However please be extremely careful about buying any as they look same but have a different inside holes.
-
sharan1988
- New
- Posts: 13
- Joined: Thu Dec 21, 2017 1:01 pm
- Drives: Polo sedan
- Location: Chennai , India
Re: Introducing my Lightning McQueen LM95
Does your mfsw with paddles have red backlighting? Could you help me with the model number
-
ciclo
- Bling Bling Diamond Member
- Posts: 8868
- Joined: Sun Feb 24, 2013 10:20 am
- Drives: 6R'13/G7.5'19
- Location: Earth ♥, Spain.
- Contact:
Re: Introducing my Lightning McQueen LM95
viewtopic.php?f=56&t=69996#p523324sharan1988 wrote: Fri Dec 22, 2017 5:51 pm Does your mfsw with paddles have red backlighting? Could you help me with the model number
6C0419091H
-
ag69
- Silver Member
- Posts: 432
- Joined: Fri May 26, 2017 10:39 am
- Drives: 1.2TSi 77Kw 7DSG
- Location: Earth
Re: Introducing my Lightning McQueen LM95
Being an IT engineer with wife, kid and mother, I am sure you would understand and forgive for this post after nearly 2 years 
So much of parts and DIY stuff is packed in Boot that I almost forgot about it all. With driven around resulted in I nearly forgetting owning a car and driving
Enough of excuses and ....
My car had 7 switches in dashboard. 4 Dummy buttons and 3 factory fitted switches namely ESP, Defogger and Hazard
It was sore to look at these dummy switches. So wanted to change them to actual switches namely - Left Heated Seat, Parktronic, Auto On Off and Right Heated Seat and make them illuminate like rest.
Got 3 switches from NL from used car dealer and 1 brand new from Russia. Procured housing but they were not for individual with suffix A,B. So only inside connector could go in switches.
Here is how the pins are arranged.
1 - 4
2 - 5
3 - 6
Above connector has flat and groove pattern on top and bottom.
viewtopic.php?f=56&t=64354&start=15#p540747 though mentioned which button needs to be fed power, I somehow stored pin 3 and pin 6 in my memory and kept on checking. I removed all wire connectors from the 4D0971636 except wire at 3 and 6.
To get desired output ie illumination, took one switch at a time and inserted connector and :
1. Checked if it illuminated. (Pin 3 +ve and Pin 6 -ve)
2. Reversed polarity and checked (Pin 3 -ve and Pin 6 -ve)
3. Reversed connector and checked (Pin 1 +ve and Pin 4 -ve)
4. Reversed polarity and checked. (Pin 1-ve and Pin 4 +ve)
To check all are working, I just checked if they illuminate but did not note down pins and polarity.
So ended up doing this exercise few times
This connector slides in plastic housing with notch displayed. Factory fittings has grooves on top.
However in reality it goes upside down.
So if you get pin configuration right and then insert in cover to latch in switches, then all connections have become wrong
Anyway with enough playing like kid figured the pins.
Now the wiring --
Splices 05 sqmm wires at one end and then at desired length so I can join the wires from the switches. Made two of these one for +ve and one for -ve.
Then soldered wires, applied sleeves and then taped it with insulating tape and finally with Loom Adhesive Cloth Tape.
Finally with Loom Adhesive Cloth Tape.
Then started colour coding the housings.
Dry Run
Dashboard Panel Removed
Music System, Climatronic and Cage Removed
Original Fuse Box
Route the wire from and into fuse box through holes that are used to lock fuse box cover.
The wholes are quite large. Single positive wire with all protection can easily routed inside.
Fuse box after tapping in Fuse # 7
Here are tapped fuse details
Negative wire is further router to right side of dashboard. Grounded created with a nut onto a metal body part.
Fuse box cover fixed
Finally this is how it looks during daytime.
This is how it looks at night or illuminated.
Very honestly illuminates images (shared here) does not do justice. The color looks orange here where are in reality they are Red. To match rest of interior.
Parts used :
B) 6R0963564 -- Right Heated Seat
C) 6RU927122 -- Parkrtronic
D) 6R0905218 -- Auto On Off
So much of parts and DIY stuff is packed in Boot that I almost forgot about it all. With driven around resulted in I nearly forgetting owning a car and driving
Enough of excuses and ....
My car had 7 switches in dashboard. 4 Dummy buttons and 3 factory fitted switches namely ESP, Defogger and Hazard
Got 3 switches from NL from used car dealer and 1 brand new from Russia. Procured housing but they were not for individual with suffix A,B. So only inside connector could go in switches.
1 - 4
2 - 5
3 - 6
- 4D0971636-PIN.png (126.44 KiB) Viewed 6783 times
- SwitchWithTopBottom.png (82.74 KiB) Viewed 6783 times
To get desired output ie illumination, took one switch at a time and inserted connector and :
1. Checked if it illuminated. (Pin 3 +ve and Pin 6 -ve)
2. Reversed polarity and checked (Pin 3 -ve and Pin 6 -ve)
3. Reversed connector and checked (Pin 1 +ve and Pin 4 -ve)
4. Reversed polarity and checked. (Pin 1-ve and Pin 4 +ve)
To check all are working, I just checked if they illuminate but did not note down pins and polarity.
So ended up doing this exercise few times
This connector slides in plastic housing with notch displayed. Factory fittings has grooves on top.
- SwitchInHousing.png (17.06 KiB) Viewed 6783 times
So if you get pin configuration right and then insert in cover to latch in switches, then all connections have become wrong
Anyway with enough playing like kid figured the pins.
Now the wiring --
Splices 05 sqmm wires at one end and then at desired length so I can join the wires from the switches. Made two of these one for +ve and one for -ve.
- ColorCoding.png (210.59 KiB) Viewed 6783 times
The wholes are quite large. Single positive wire with all protection can easily routed inside.
Fuse box after tapping in Fuse # 7
Very honestly illuminates images (shared here) does not do justice. The color looks orange here where are in reality they are Red. To match rest of interior.
Parts used :
- Wire used -- 0.5 sq mm
- Soldering Gun for soldering Joints
- Sleeve to cover the soldered joints
- Insulating Tape wrapped for all joints
- Applied loom tape for whole wires. From dashboard to fuse box both wrapped together. Once split then covered individually.
- Switches used -
B) 6R0963564 -- Right Heated Seat
C) 6RU927122 -- Parkrtronic
D) 6R0905218 -- Auto On Off
- Connectors used -- 4D0971636
- Fuse tap
- Wurth Fuse 10A
- Butt Connector
- 10 mm bolt and nut
- 0.5 sqmm wire should be good enough? (though too late to ask)
- Fuse # 7 is right?
- Tapped Original Fuse is 15A and I have used 10A for these switches.
- Attachments
-
-
ag69
- Silver Member
- Posts: 432
- Joined: Fri May 26, 2017 10:39 am
- Drives: 1.2TSi 77Kw 7DSG
- Location: Earth
Re: Introducing my Lightning McQueen LM95
Compartment at the passenger side.
This is quite straight forward, however it needs force to pull/push the plastic parts.
Here is how it looks after original panel is removed.
Here is after it is replaced with one which has compartment
Part Number is : 6R1863482 -- which is for LHD
This is quite straight forward, however it needs force to pull/push the plastic parts.
Here is how it looks after original panel is removed.
-
iichel
- Bling Bling Diamond Member
- Posts: 6687
- Joined: Fri Nov 14, 2014 2:14 pm
- Drives: Polo 6R 2.0 TDI, Passat B8 2.0 TSI
- Location: http://mypassat.nl/
Re: Introducing my Lightning McQueen LM95
I'll forgive your 2 years of silence, no problem at all... 
So all experts please advise:
0.5 sqmm wire should be good enough? (though too late to ask)
yes 0.5mm2 is perfectly fine. factory wiring even has 0.35mm2
Fuse # 7 is right?
Tapped Original Fuse is 15A and I have used 10A for these switches.
You could have simply spliced it from the grey/blue and brown wires from the other buttons, i.e. ESP.
A fuse is not necessary. But this way it's fine as well.
The fuse 7, I think, is a terminal 58 and not a 58d. The d stands for dimmed. So they will always be at 100% brightness.
Originally the fuse SB7 should have been 5 amps, and not 15 according to my schemes.
I'd advise to splice the wirings from i.e. ESP button for the illumination. But if you're happy this way, it's not wrong, not at all.